UAPIM Workshop - Lab 0: Prerequisites
Overview
Duration: 15:00 mins
Welcome to the MuleSoft Universal API Management (UAPIM) Workshop. Below are the instructions to follow in order to gain access to the environment used in the hands-on workshop.
The following will detail how to gain access to the workshop environment. You may run the workshop from a company device or a personal device.
Step 1: Register for an Anypoint Platform Account
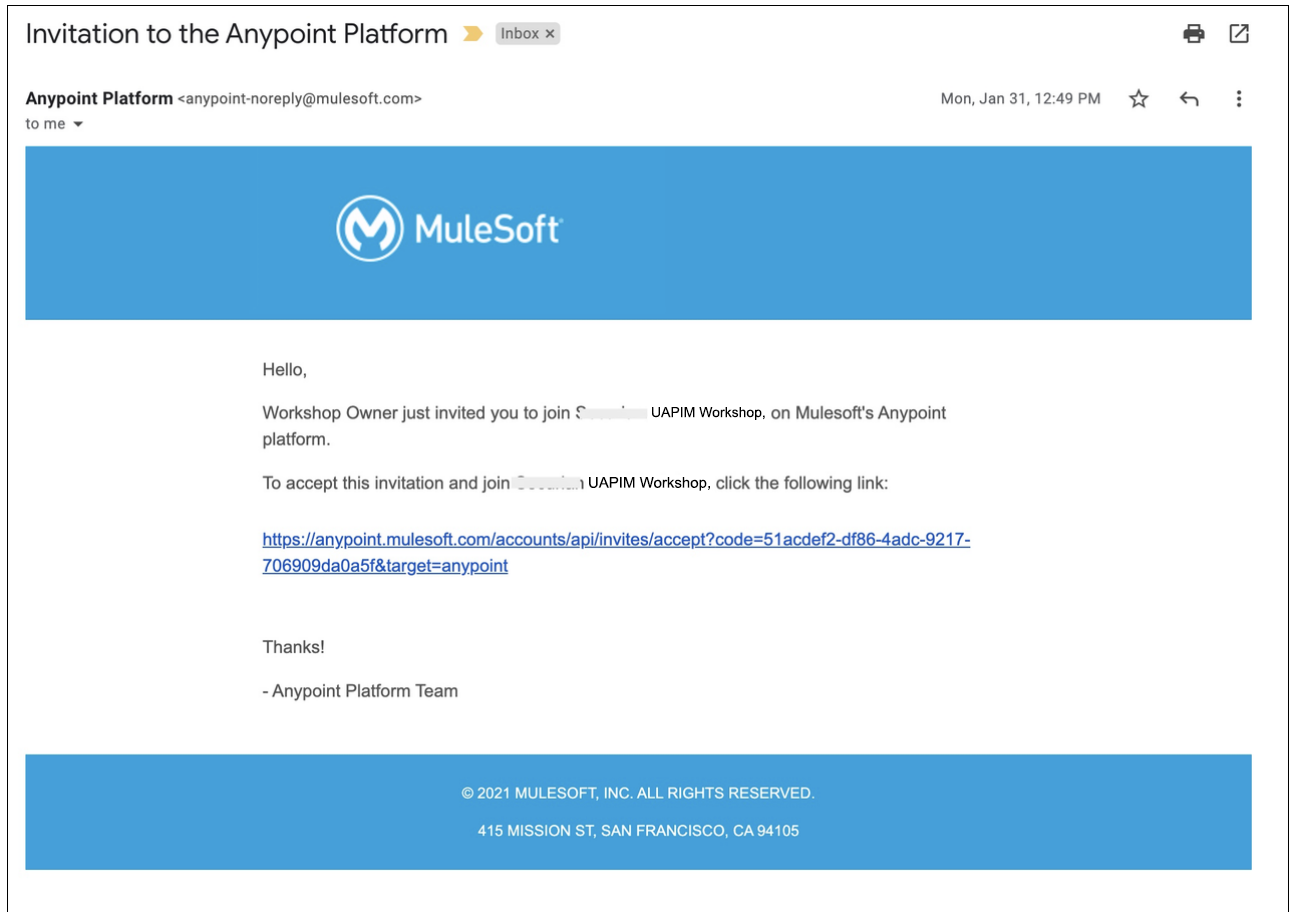
1. Locate the email titled, "Invitation to the Anypoint Platform", which was sent to all workshop registrants. The email is from <anypoint-noreply@mulesoft.com> After clicking the link in the email, DO NOT use an existing Anypoint account. Follow the instructions below to setup a new account to be used during the workshop.
Example image of the email sent from the Anypoint Platform:
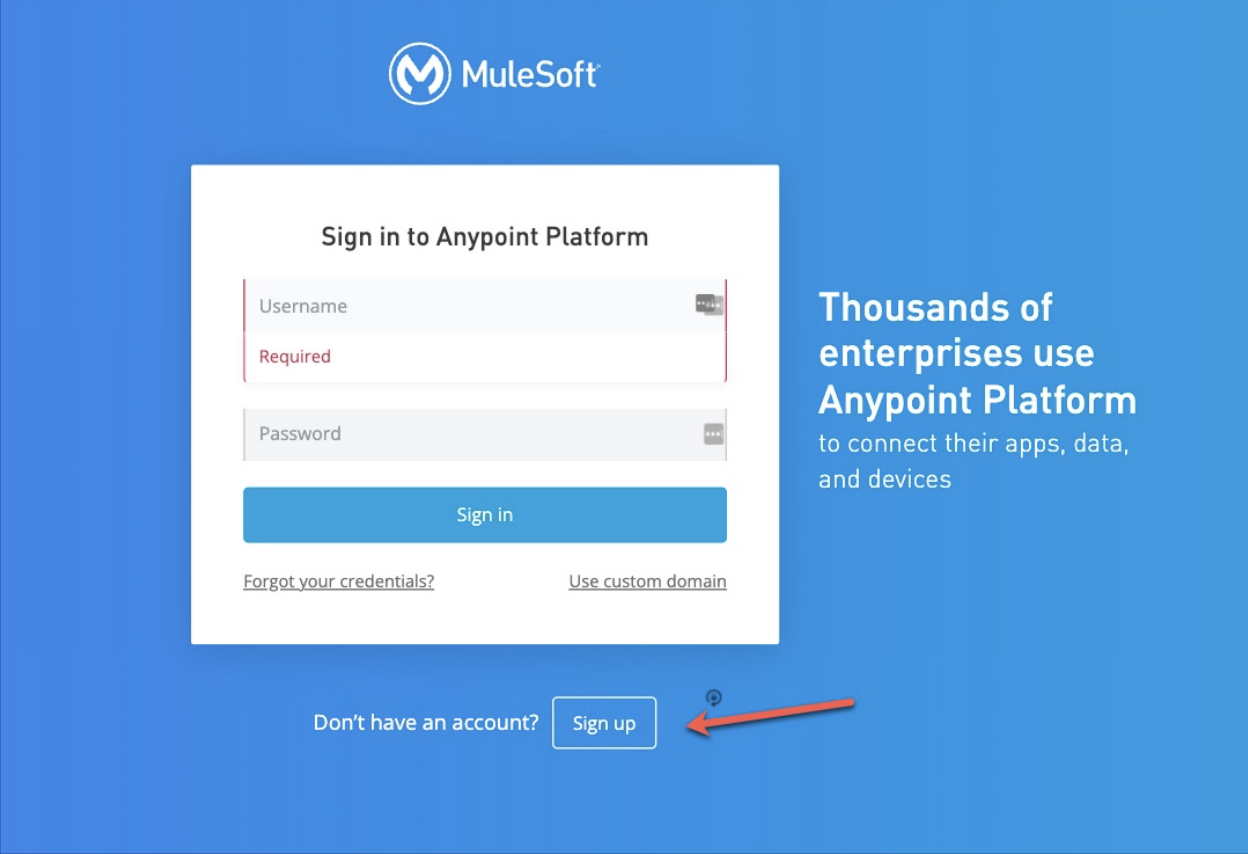
2 . Begin the steps to register for an Anypoint Platform account by clicking on the link provided in the email. This link directs registrants to the Anypoint Platform sign in page.
-
Click on the link, Sign up, which is located at the bottom of the screen next to “Don’t have an account?”. NOTE: If you have an existing Anypoint Platform account DO NOT use an existing Anypoint account. Instead, create a new account for the purpose of this workshop
Image of the sign in page and the Sign up button located at the bottom of the page:
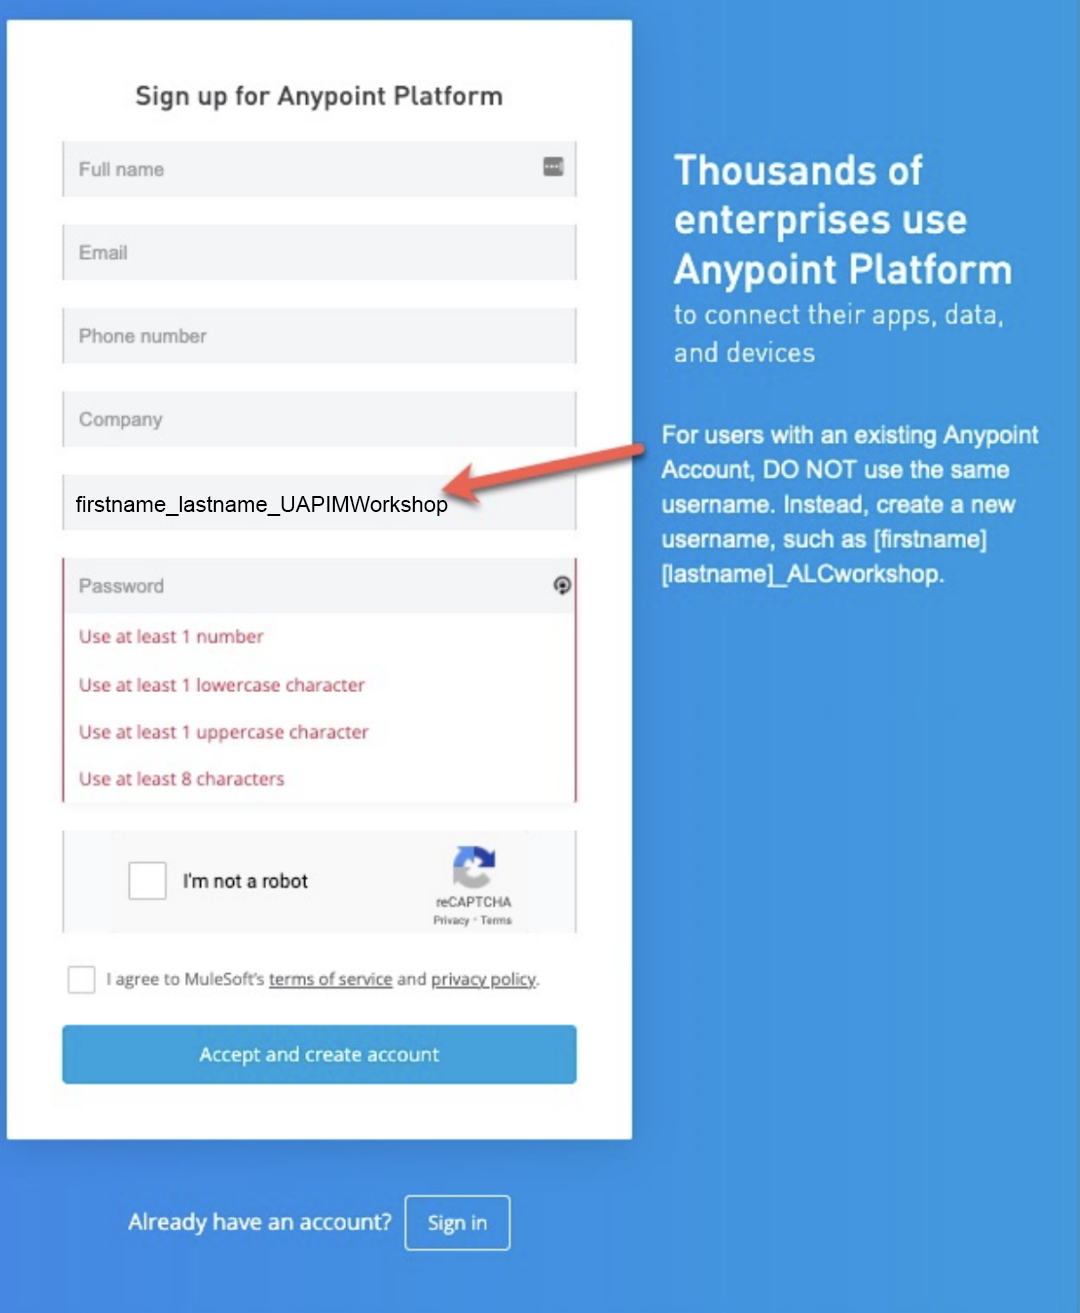
4. Complete the registration form with the required information.
◦ For users with an existing Anypoint Account, DO NOT use the same username. Instead, create a new username, such as [firstname][lastname]_UAPIMworkshop.
◦ The same email address may be used for multiple Anypoint Platform accounts. Only the usernames must be different.
5. Click “Accept and create account” to finish registration in the Anypoint Platform. 6. If prompted, DO NOT enable multi-factor authentication (MFA)
-
If prompted, DO NOT enable multi-factor authentication (MFA).
Image of the registration form:
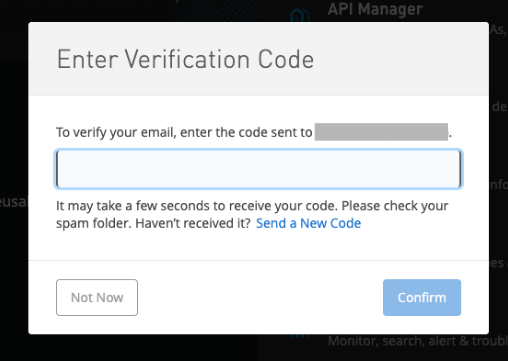
After you login for the first time, for security purposes, it may ask you to confirm your email address with a verification code sent to your email
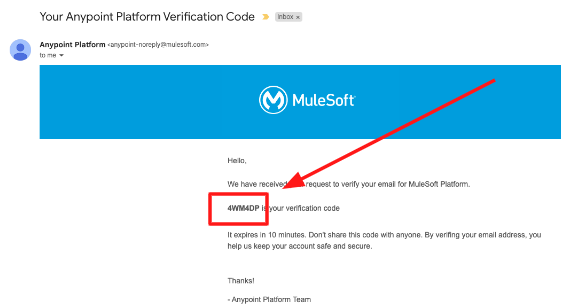
Enter your security verification code to proceed:
Finally, once you login, make sure to move to the Business Group allocated for this workshop.
-
Click on the top right corner of the Anypoint Console and click on the top Root Business Group name, followed by the last business group mention at the bottom of the dropped list.
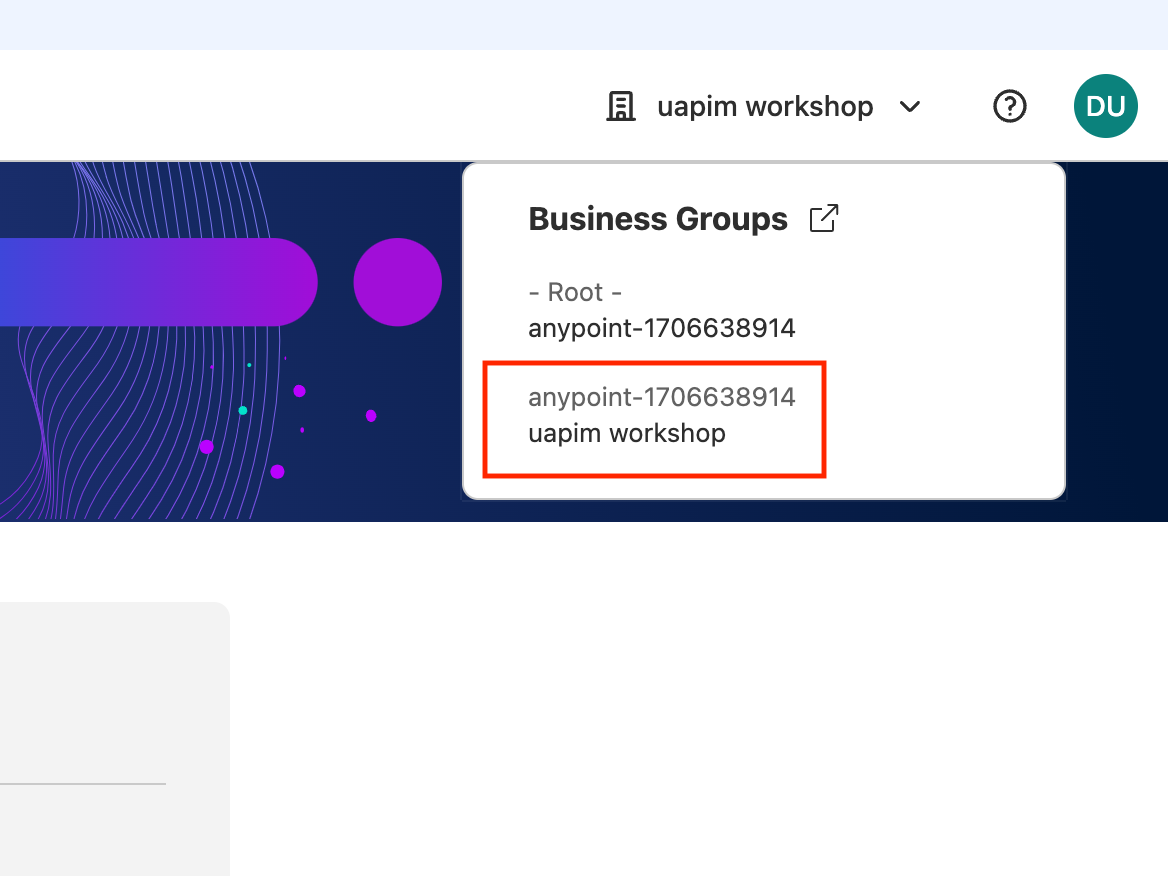
Note: The name will vary depending on the provisioning name selected by your instructor, but it will always be the bottom down business group.
Step 2: Setup the Terminal Environment
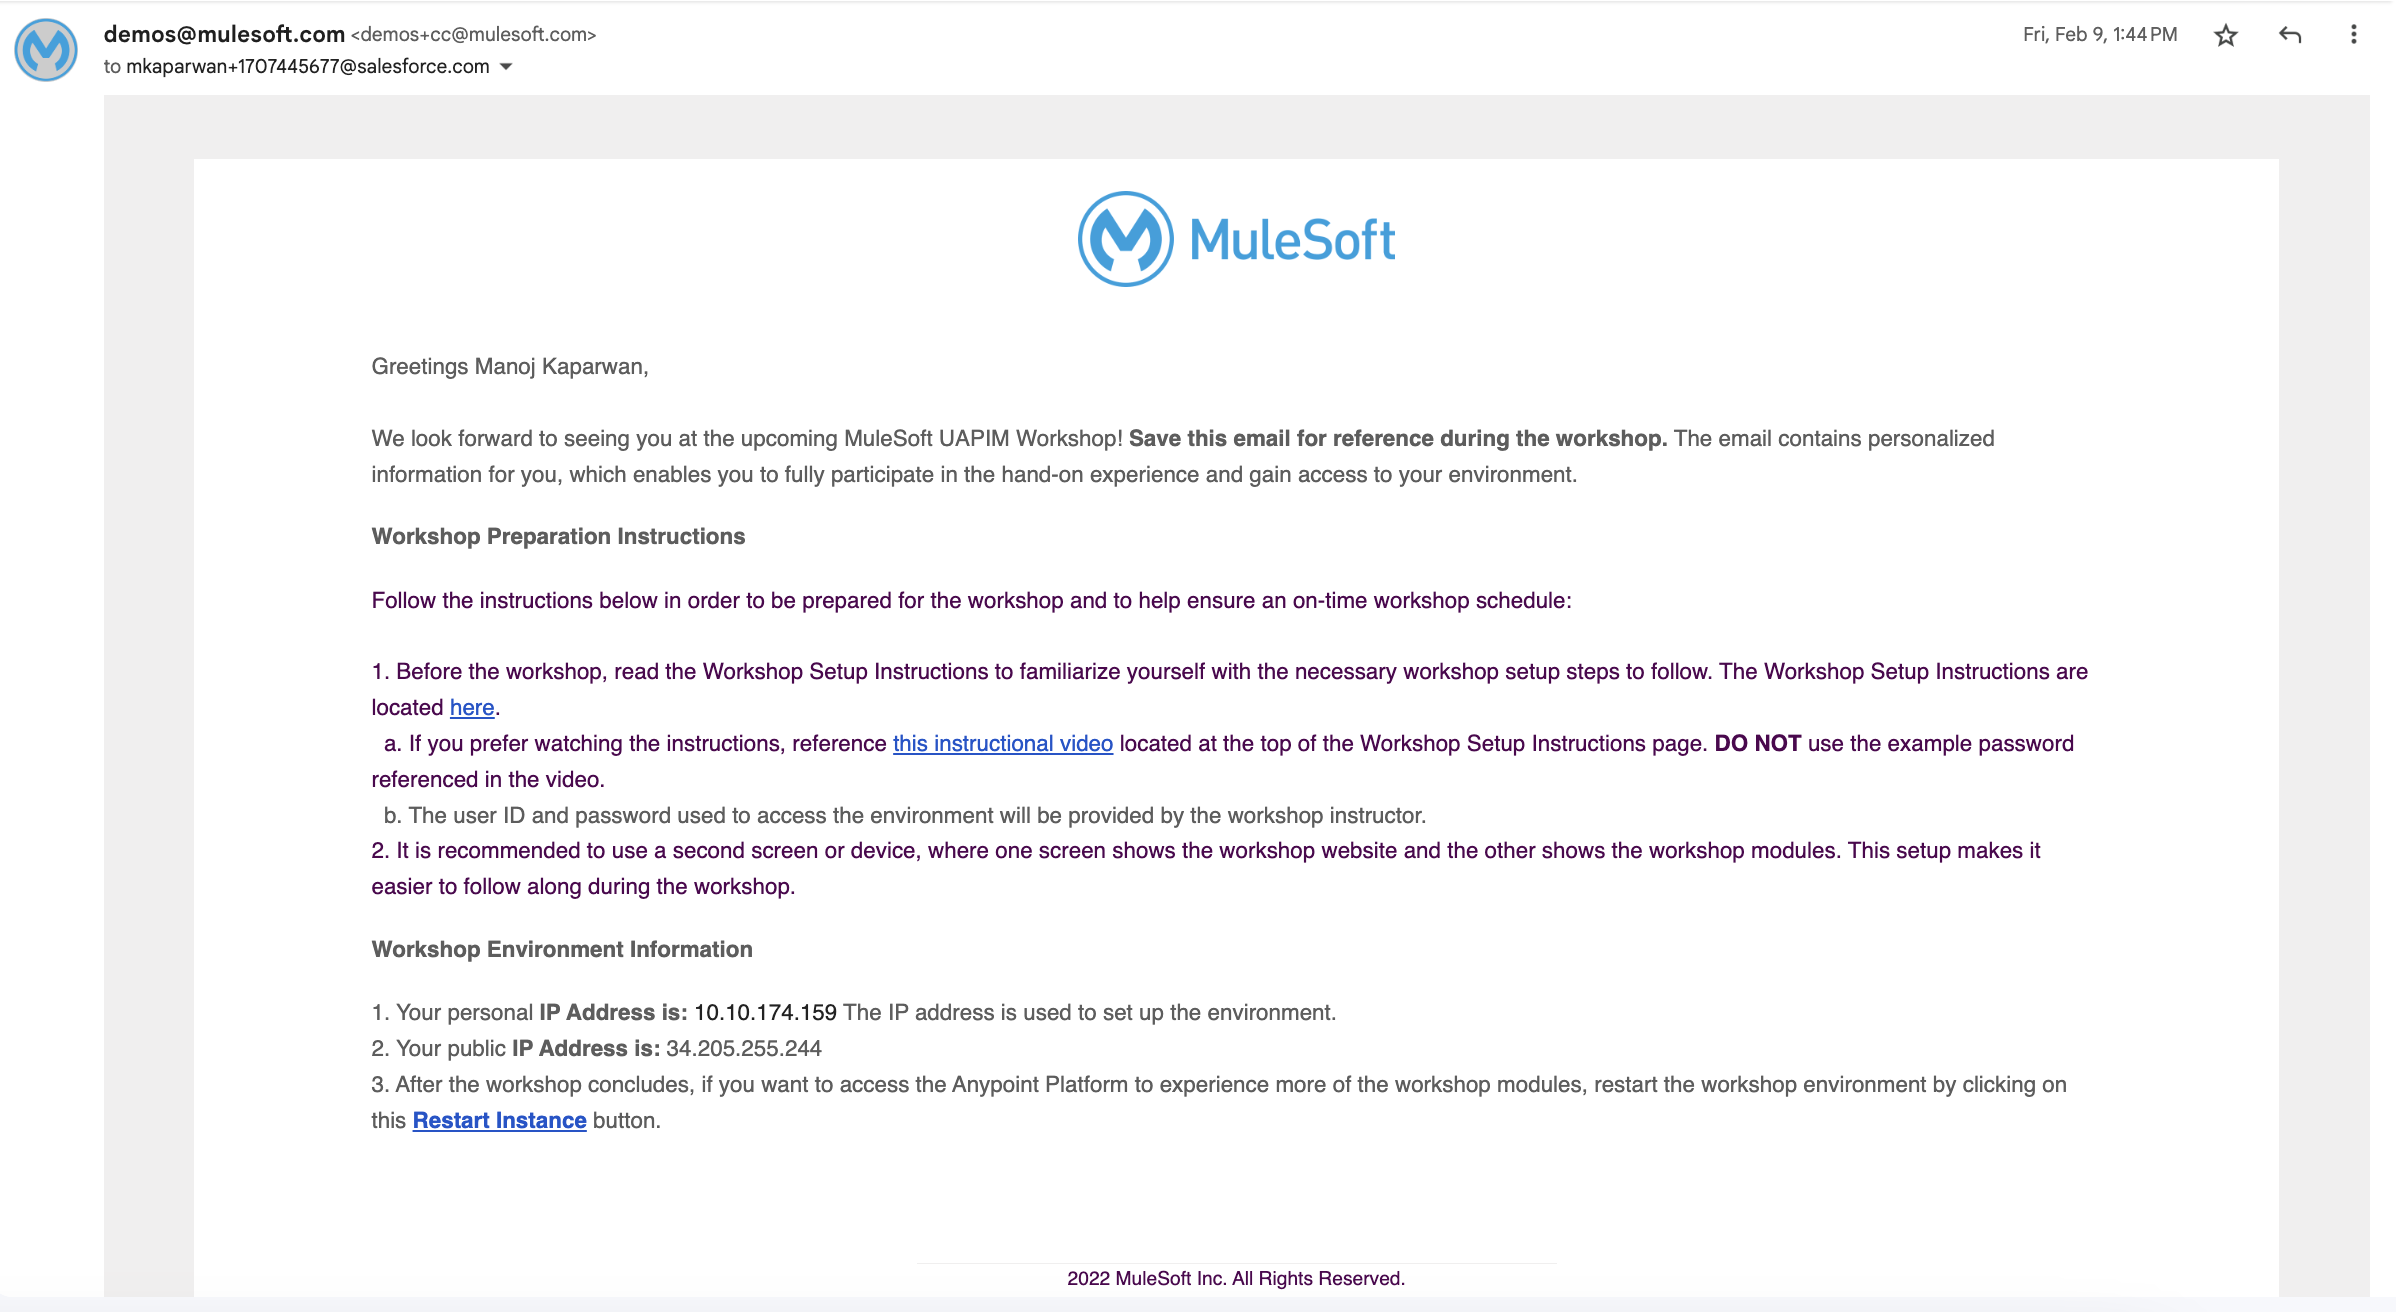
1. Locate the email titled, “ MuleSoft Workshop Environment Details ” which was sent to all workshop registrants. This email is sent from <demos@mulesoft.com> . This email contains your unique IP address that will be used for the workshop. Example image of the email containing the workshop environment details:
Example image of the email containing the workshop environment details:
-
Connecting to the Workshop VM Web Terminal
Note: The CLI portion of this workshop will take place on a browser based terminal.
Below we will review the steps to connect.
Depending on the region where your workshop was provisioned, you need to go to one of these links. If in doubt, ask your instructor
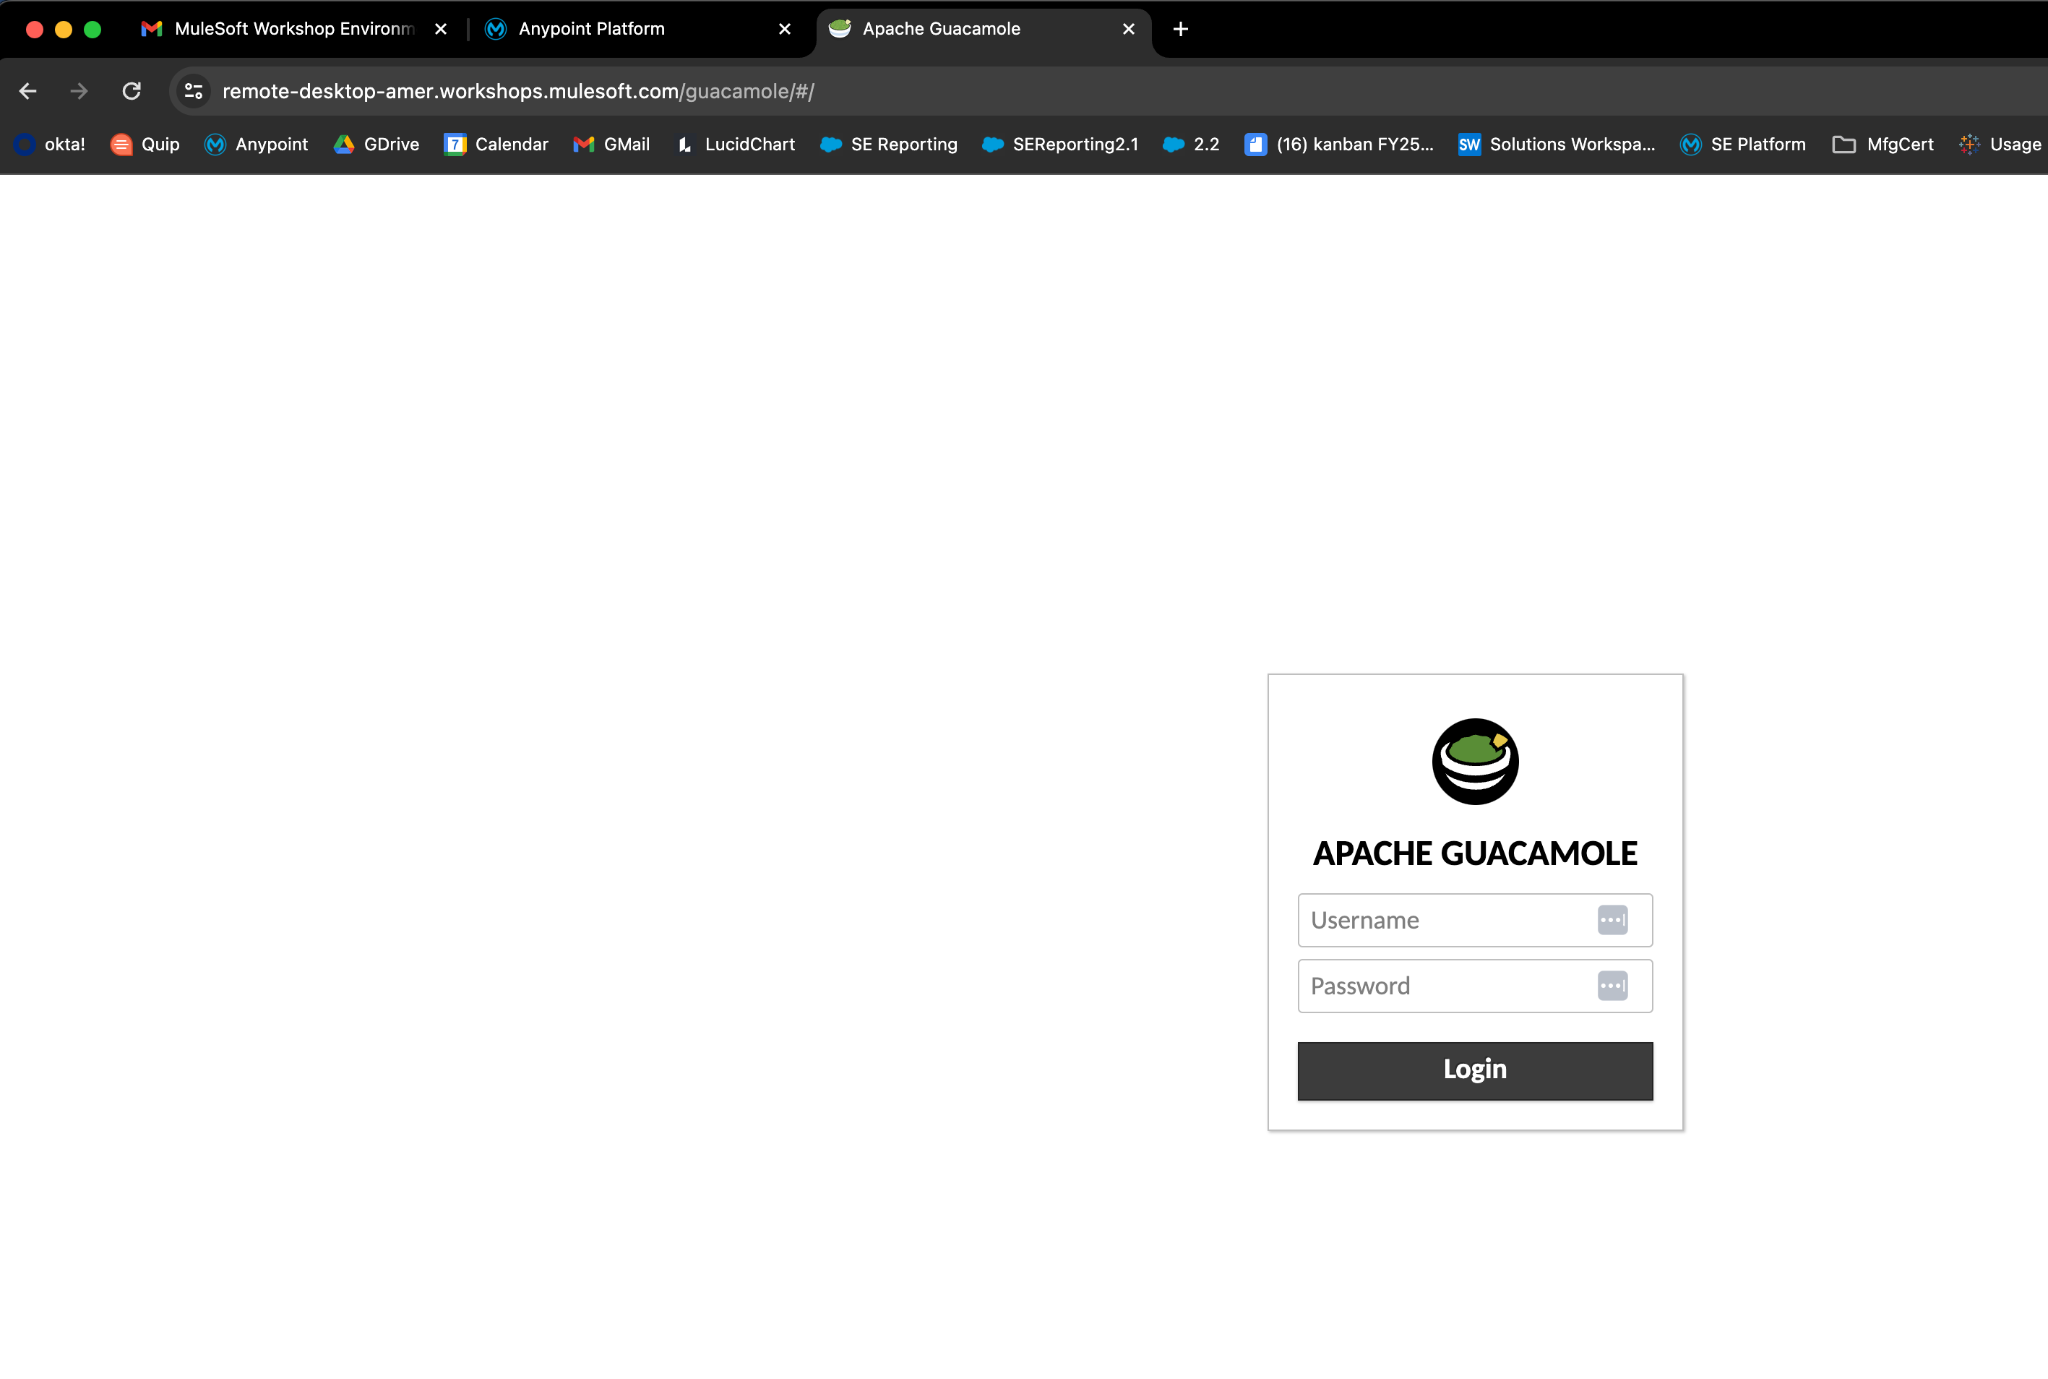
User: [PROVIDED BY INSTRUCTOR]
Password: [PROVIDED BY INSTRUCTOR]
From here you are now able to execute commands within the web terminal or Linux GUI in concert with the workshop module instructions and the Anypoint Platform.
Next you will insert the personal IP address that you received from the email that came from “demos@mulesoft.com in the previous step. In the “Workshop environment information” portion of the email you will find your personal private IP address for the Linux server
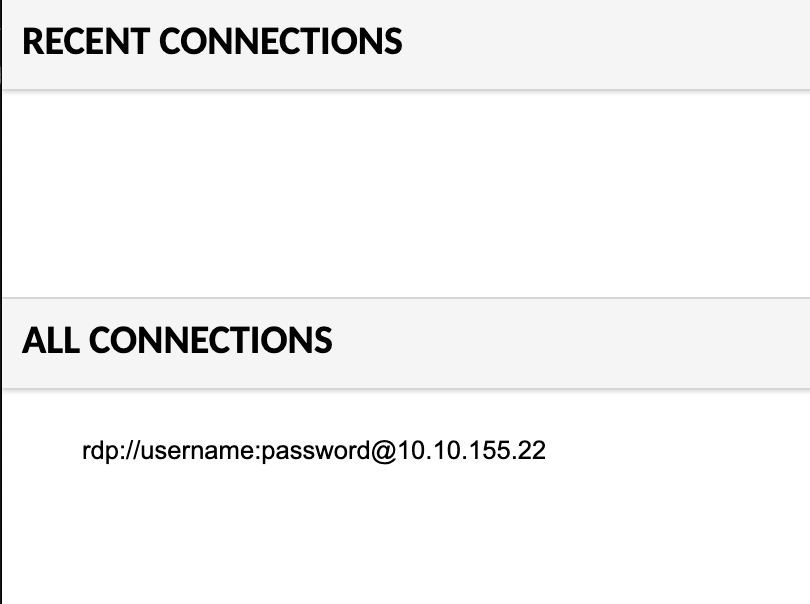
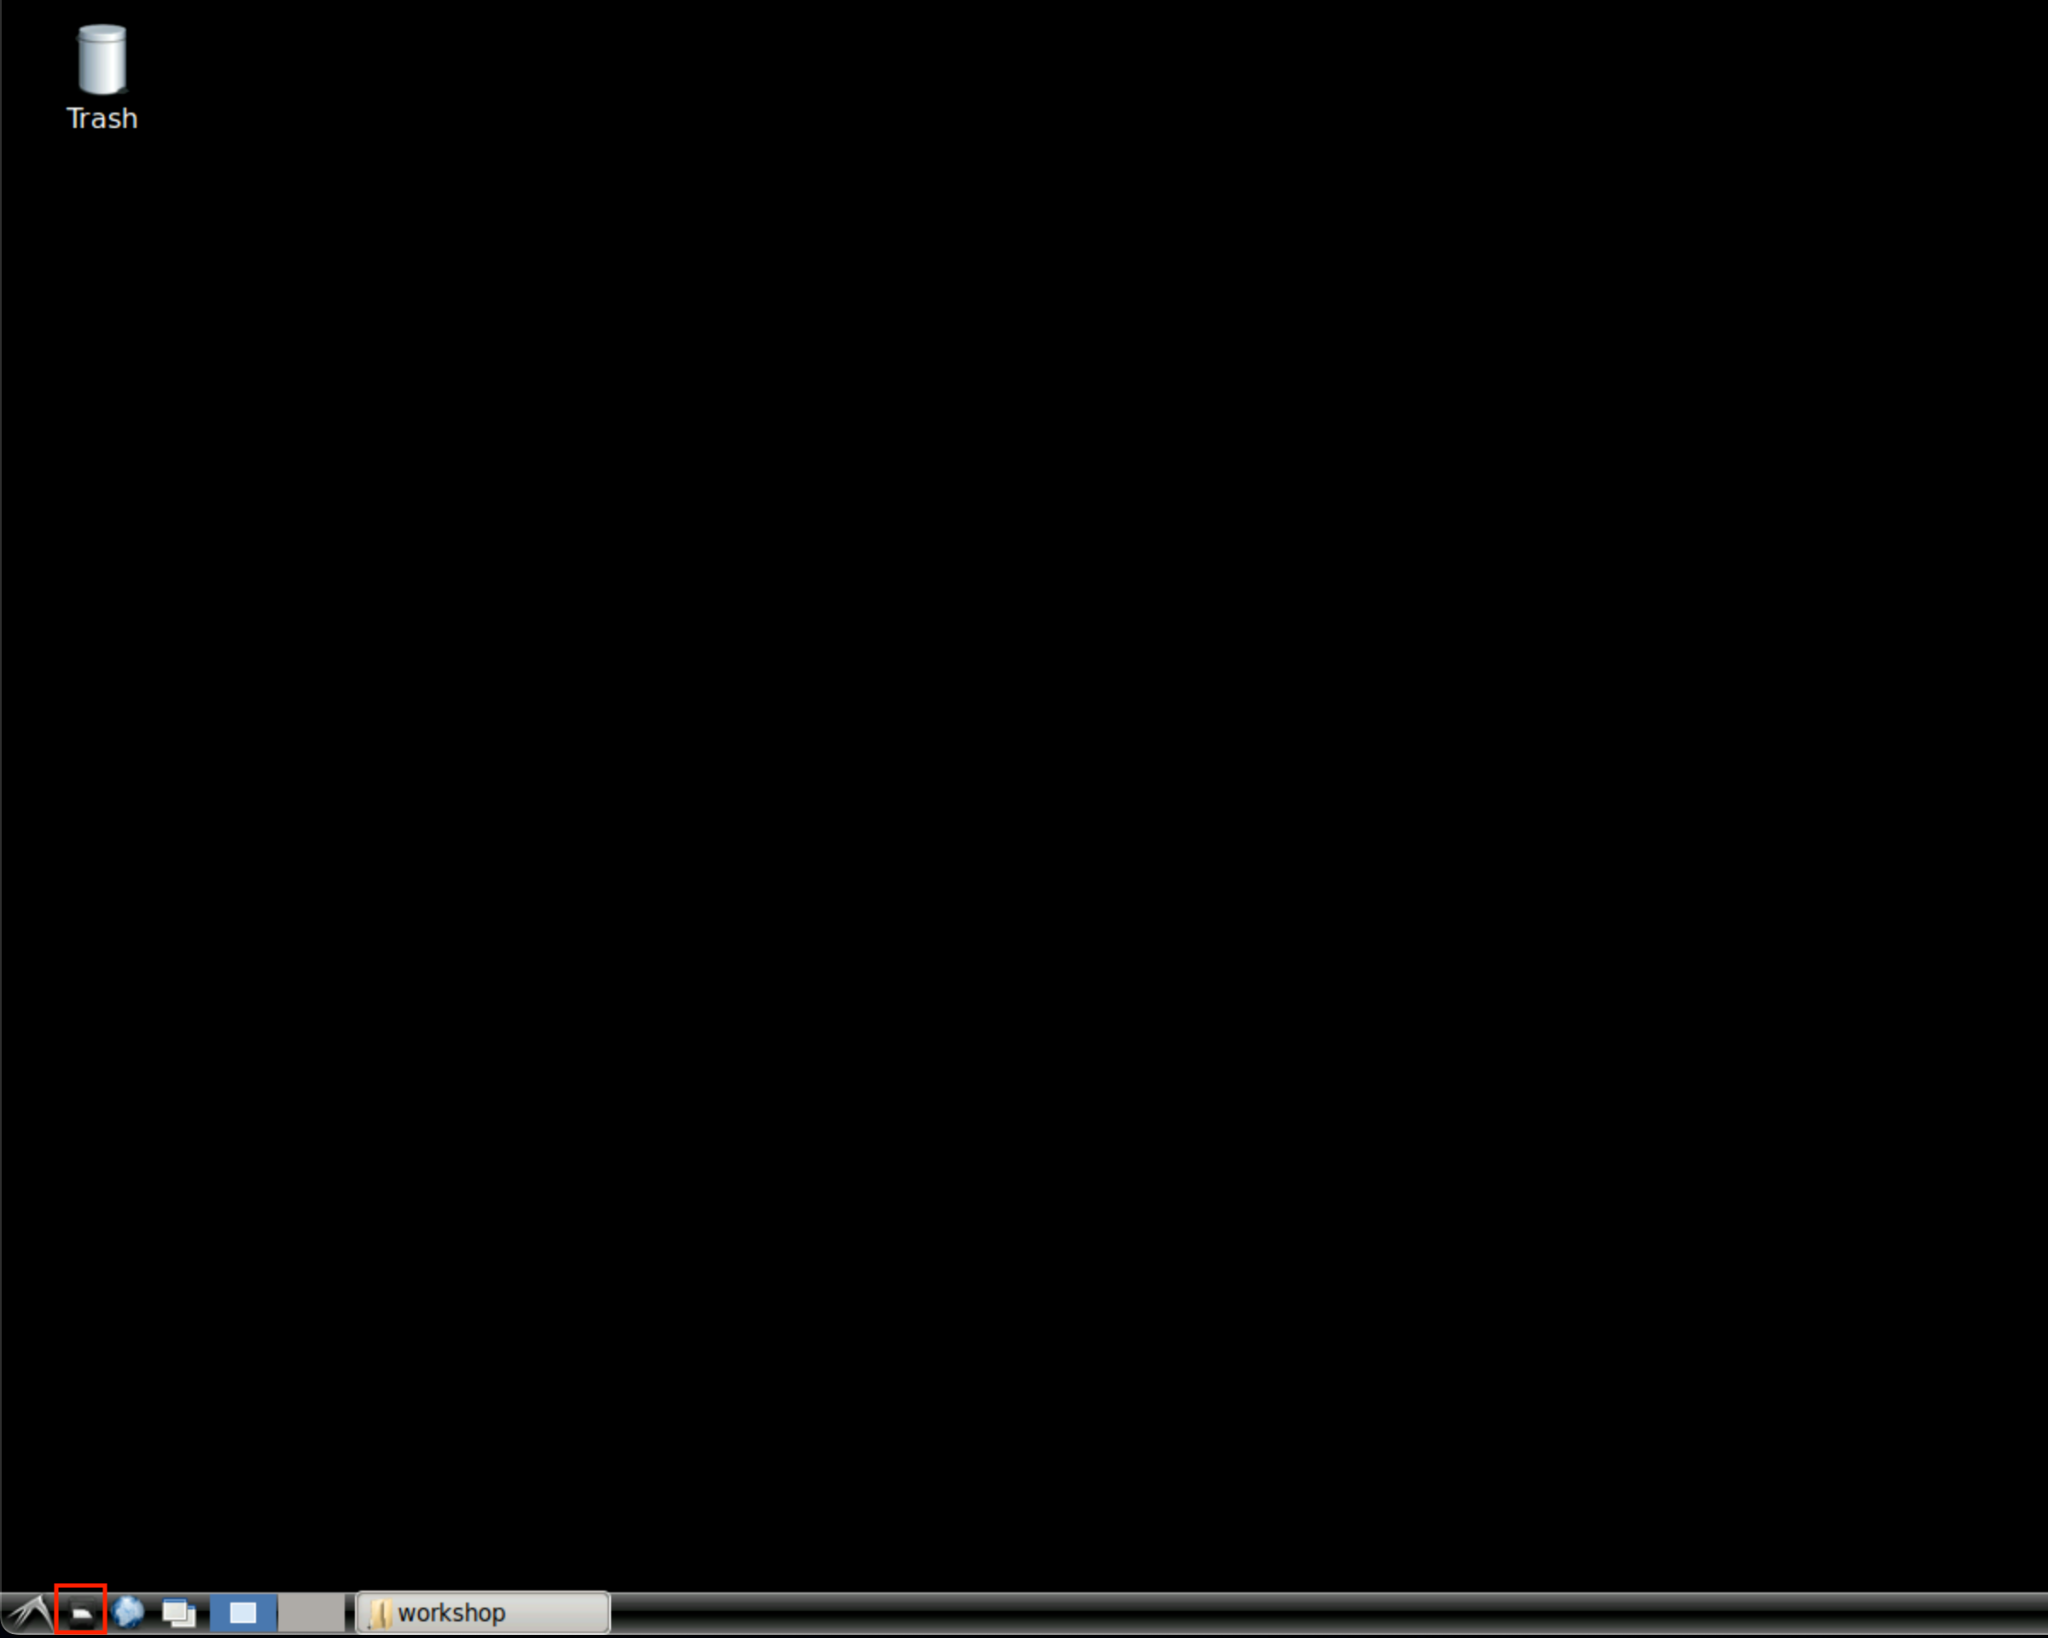
RDP instructions To login to the remote instance, enter: rdp://username:password_supplied_by_instructor@your.ip.address in the connection URI, like the screenshot below. Note: this is a different username/password than you used to login to Guacamole.
And then press connect on the far right.

API Test Client
We will also need a client software to test our APIs. For this, we are going to use Advanced Rest Client (ARC) - However you can use any other client you want.
Troubleshooting
This section is to help troubleshoot some most common issues found running this workshop.
Cannot login to RDP/SSH
At this point try:
-
Simply refresh your browser window - In most cases this should fix the problem and you will get automatically into the Web Terminal after doing this.
If this does not work, try:
-
Consider deleting cookies of the browser, or
-
Use Chrome Incognito Mode.
These solutions should fix the problem and let you connect successfully. If not, please ask your instructor for help.