Lab 1: Discover and Catalog Non-Mule APIs
Overview
Duration: 30 minutes
In lab 1, we will discover and catalog various non-mule APIs from a Node.js payment service into Anypoint Exchange, our central repository, enabling our enterprise to maximize existing investments through composability and reuse.
Step 1: Navigate to Payments Folder
In the command line, navigate to the folder with the API specifications for the Node JS payments services. This contains the APIs of the microservices that we are going to catalog into Anypoint Exchange.
cd workshop-assets/microservices/paymentsIn the command line,view the contents of the payments folder
ls
Step 2: Configure your Anypoint Credentials in the API-Catalog CLI
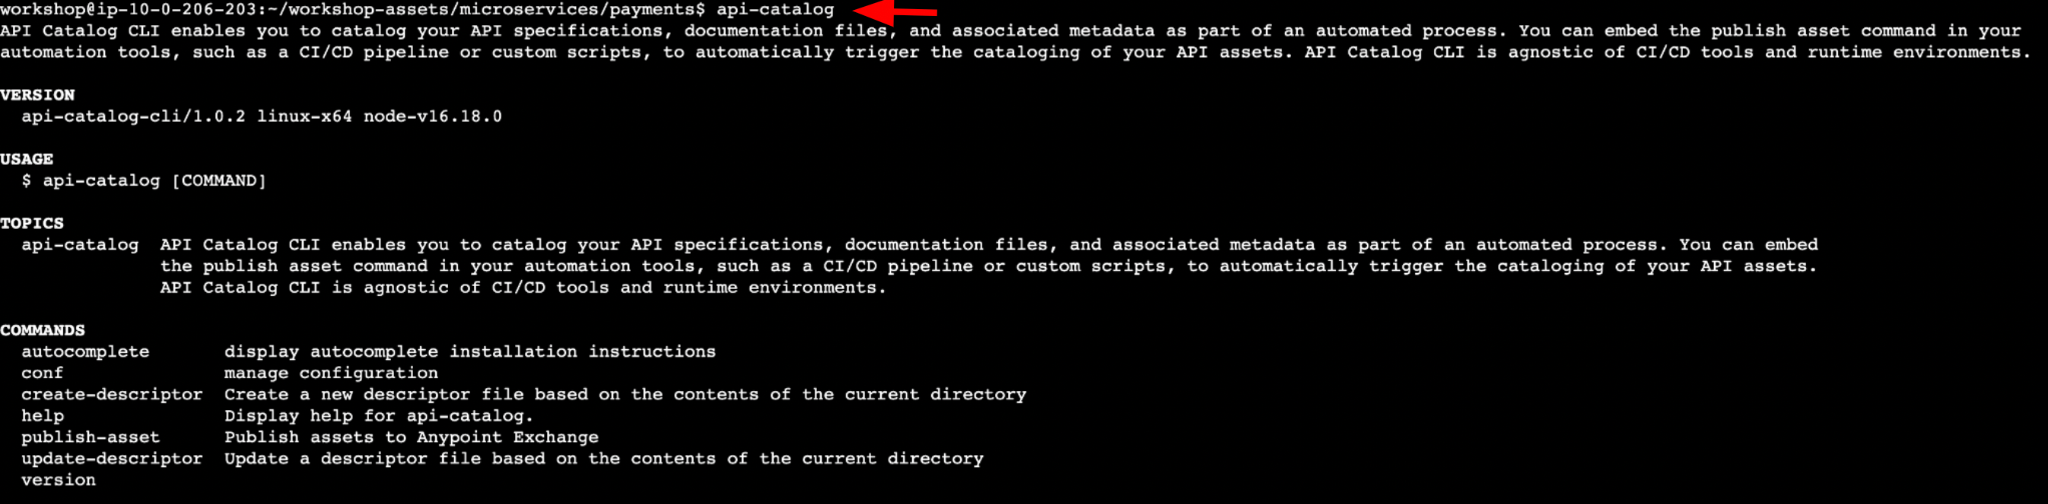
The API Catalog CLI is already pre-installed in your VM. Let’s type it, so that we get the full display of the different options available:
api-catalogYou should see a response like this one.
Step 2a: Configure permissions
Note: Your instructor may have done this step for you.
Using the Anypoint Platform credentials that you received by email, go and login into:
https://anypoint.mulesoft.com/[https://anypoint.mulesoft.com/]
Once you login, before you continue , make sure that you are located at the right Business Group associated with your Workshop class. This way, you will have access to all the assets that we have prepared for you to consume as part of this workshop. For this, click at the top right of the Anypoint Platform console and make sure you are not in the root org.
Note: The name of the business group will vary, depending on the actual name selected when this workshop was initially created. If in doubt, please consult your instructor.
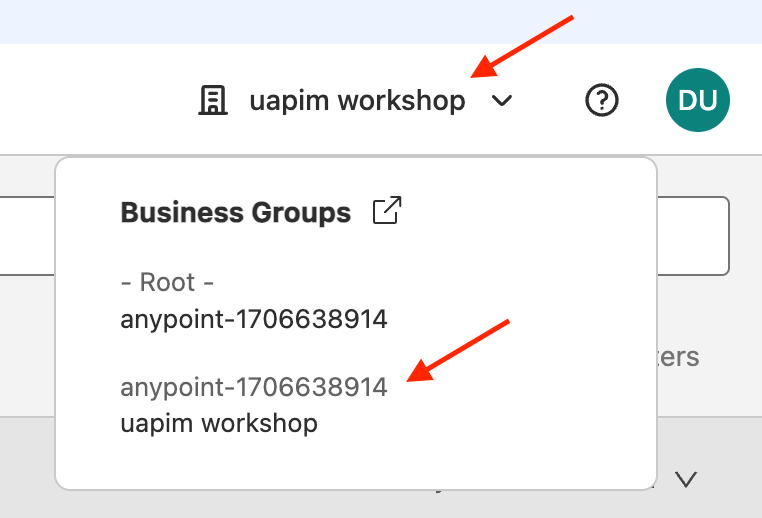
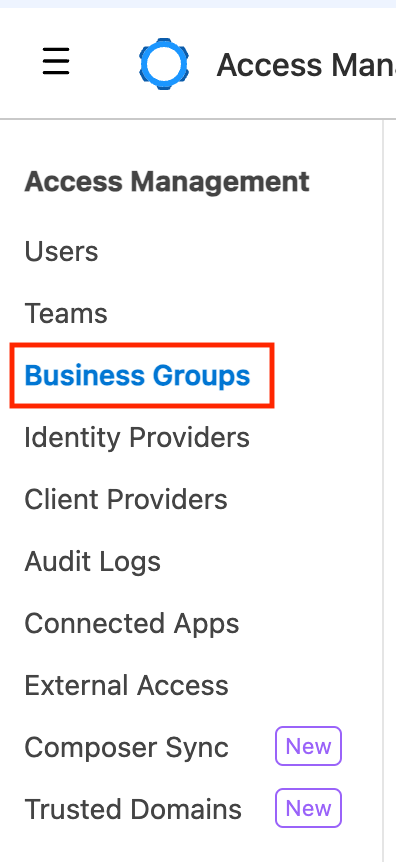
Once you have selected the right Business Group associated with your workshop class, click on Access Management
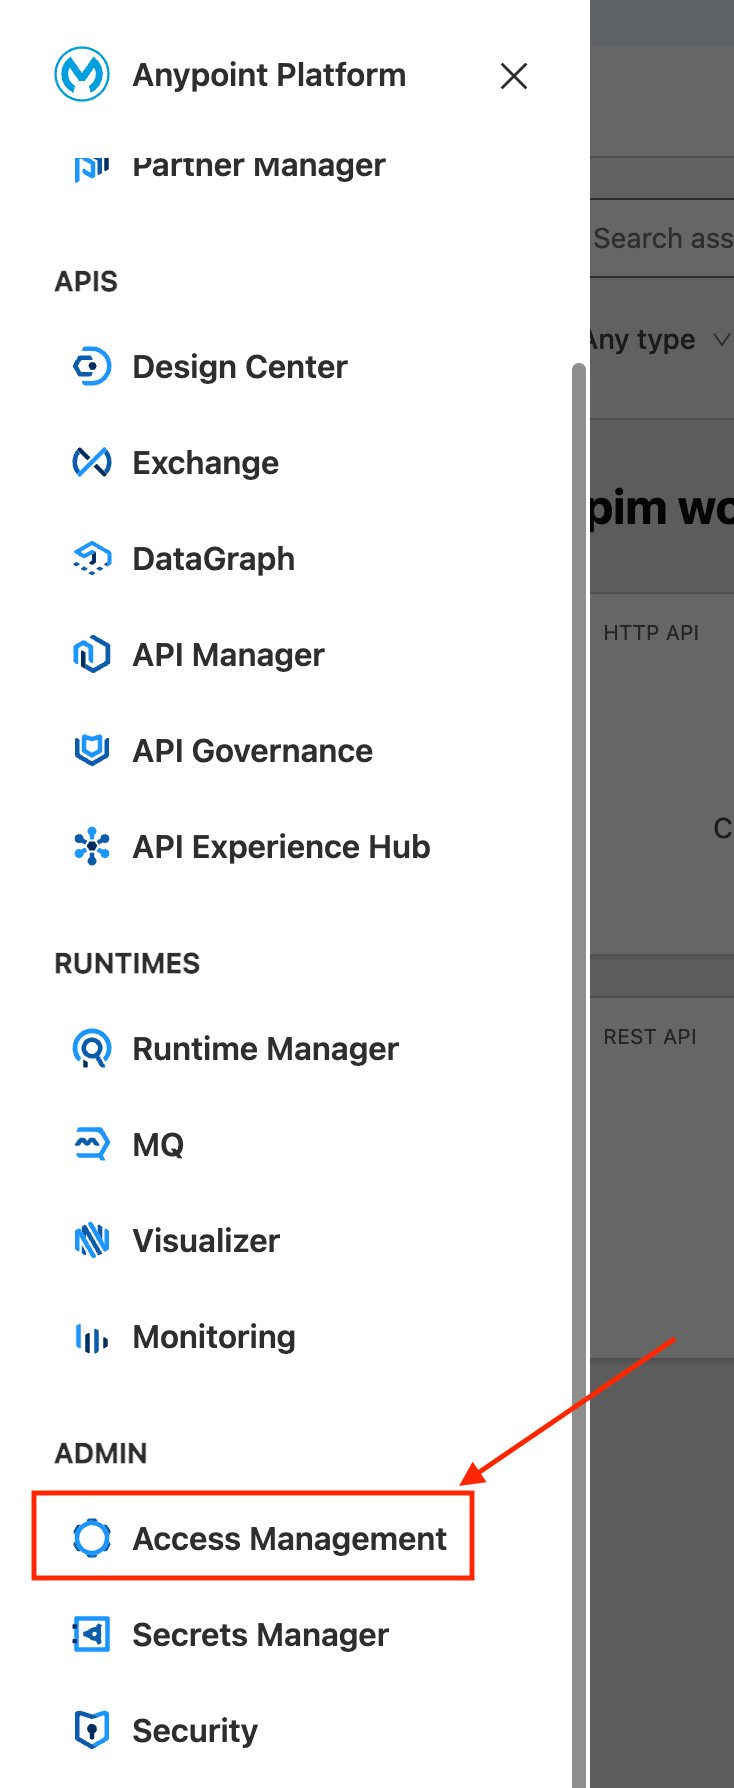
Let’s first add permission to our user to be able to catalog assets into Anypoint Exchange
Find your user from the list and click on it
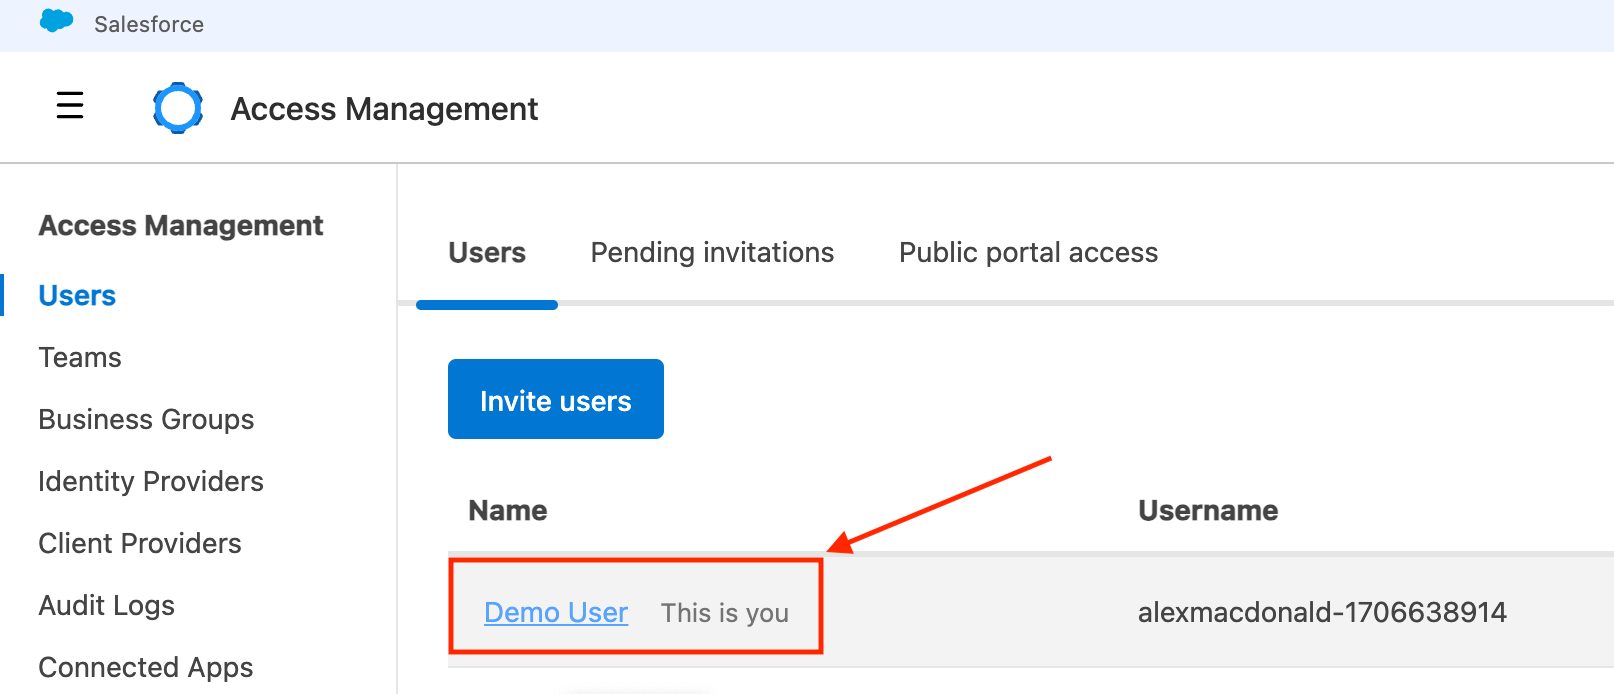
Note : Your username will vary depending on your email used to register your workshop attendance.
Click ‘Add permissions’, click on the arrow left of API Catalog , followed by clicking the box to the right of API Catalog Contributor. You will also need to click the arrow left of Exchange, followed by clicking the box to the right of Exchange Contributor . Then click next on the bottom right.
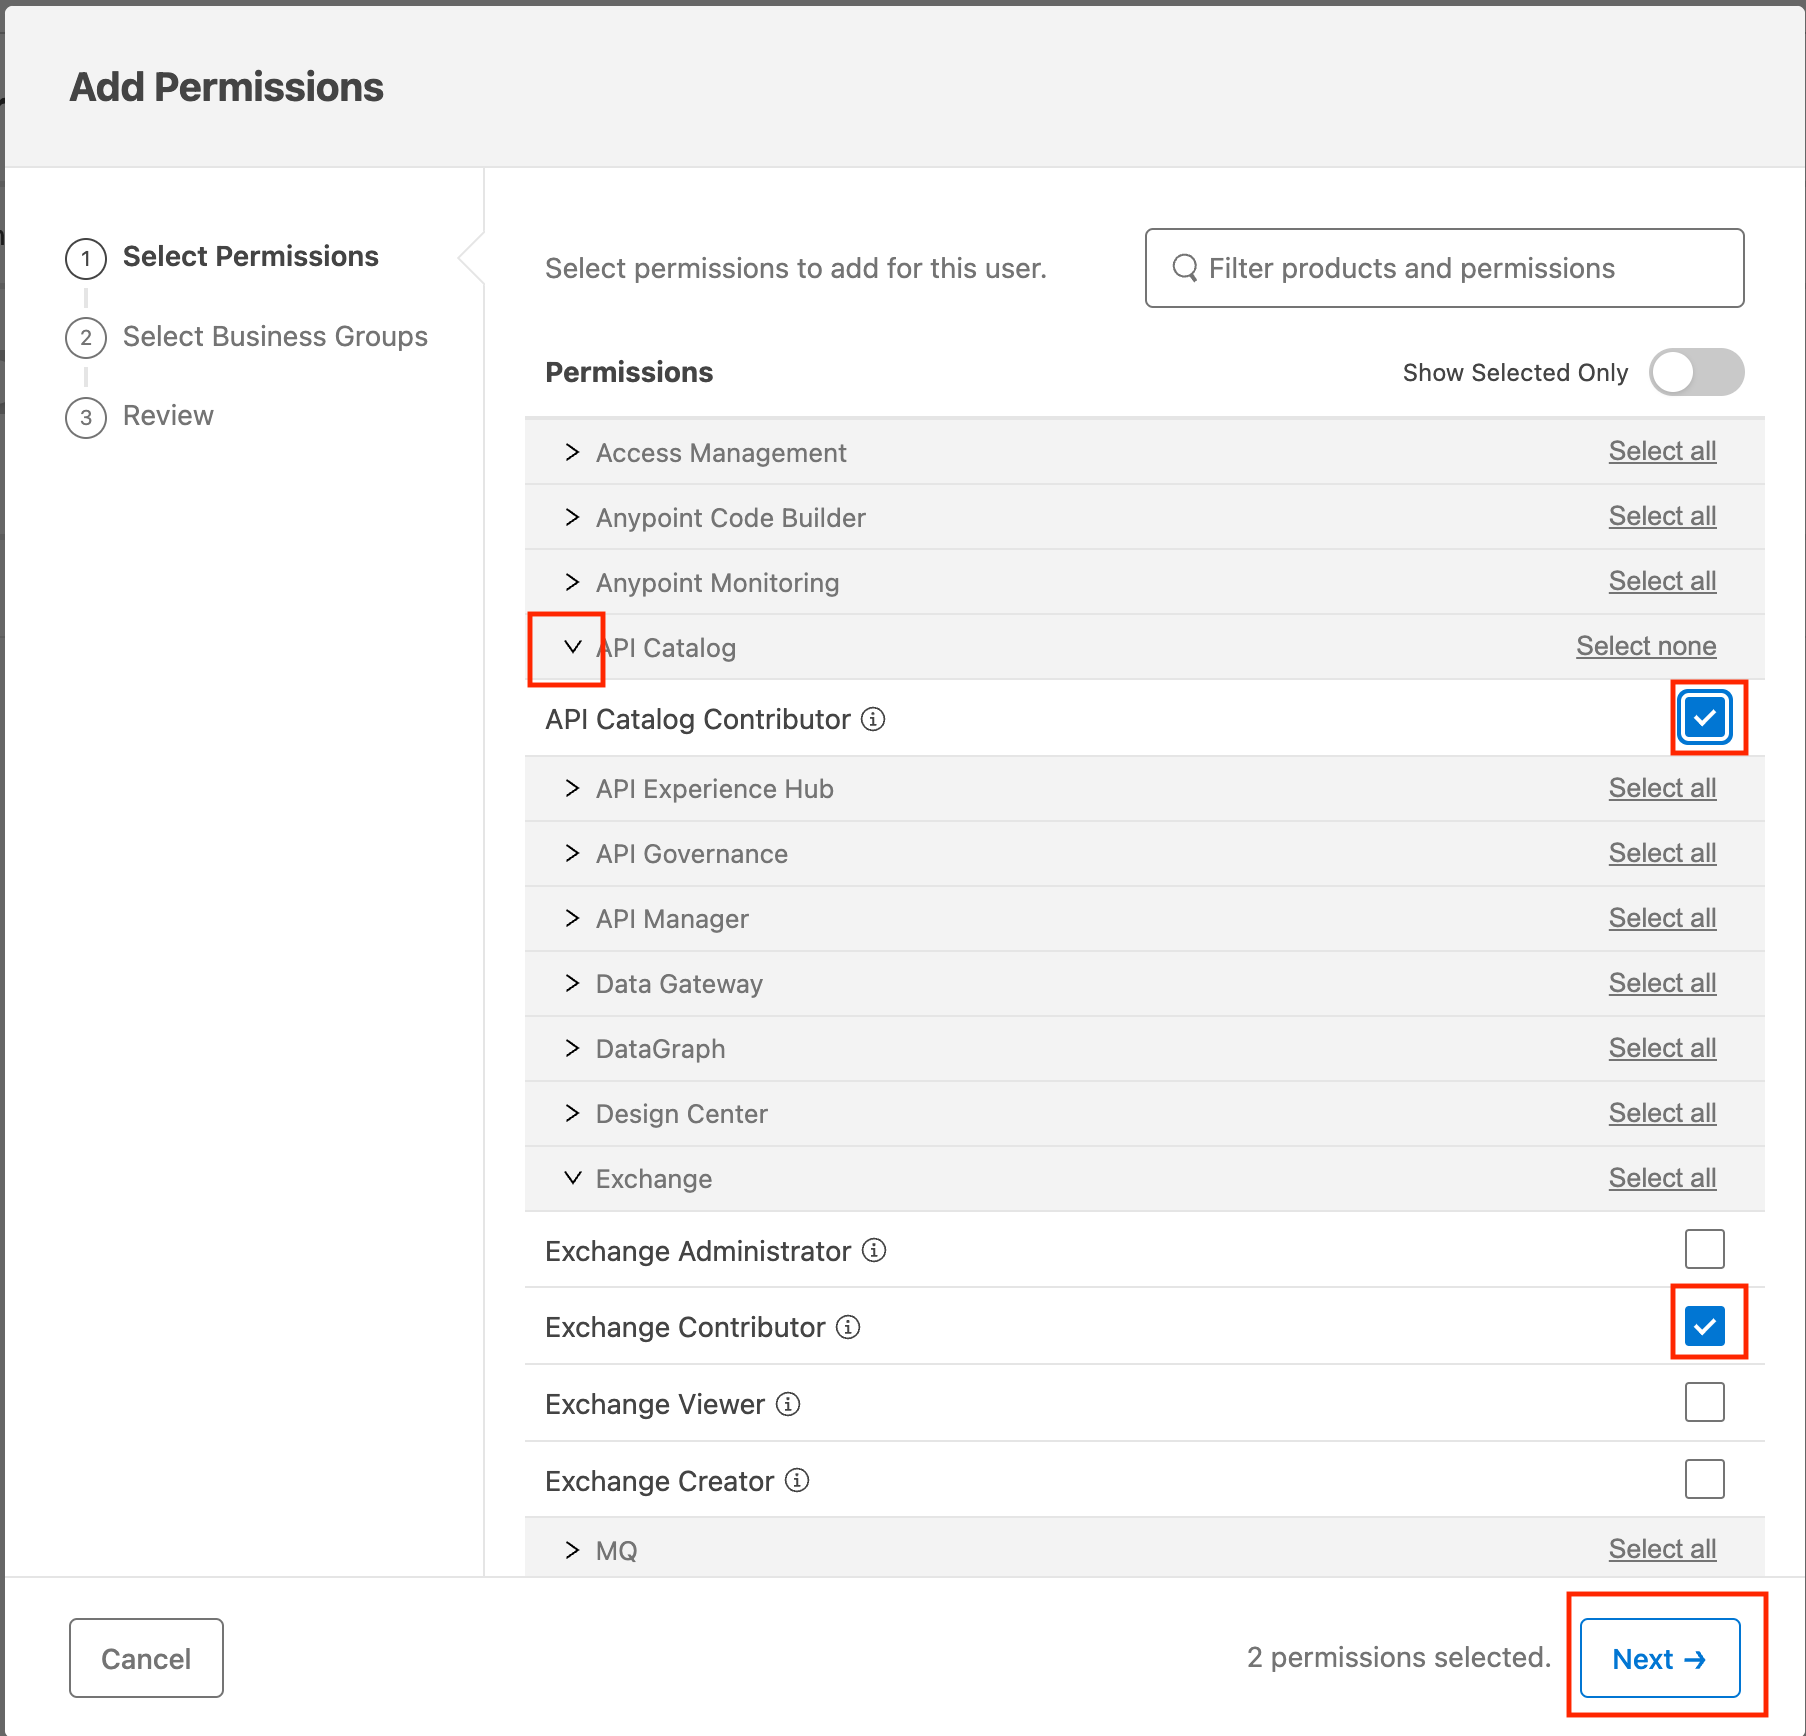
Select all of the business groups, then hit next, and ‘Add Permissions’
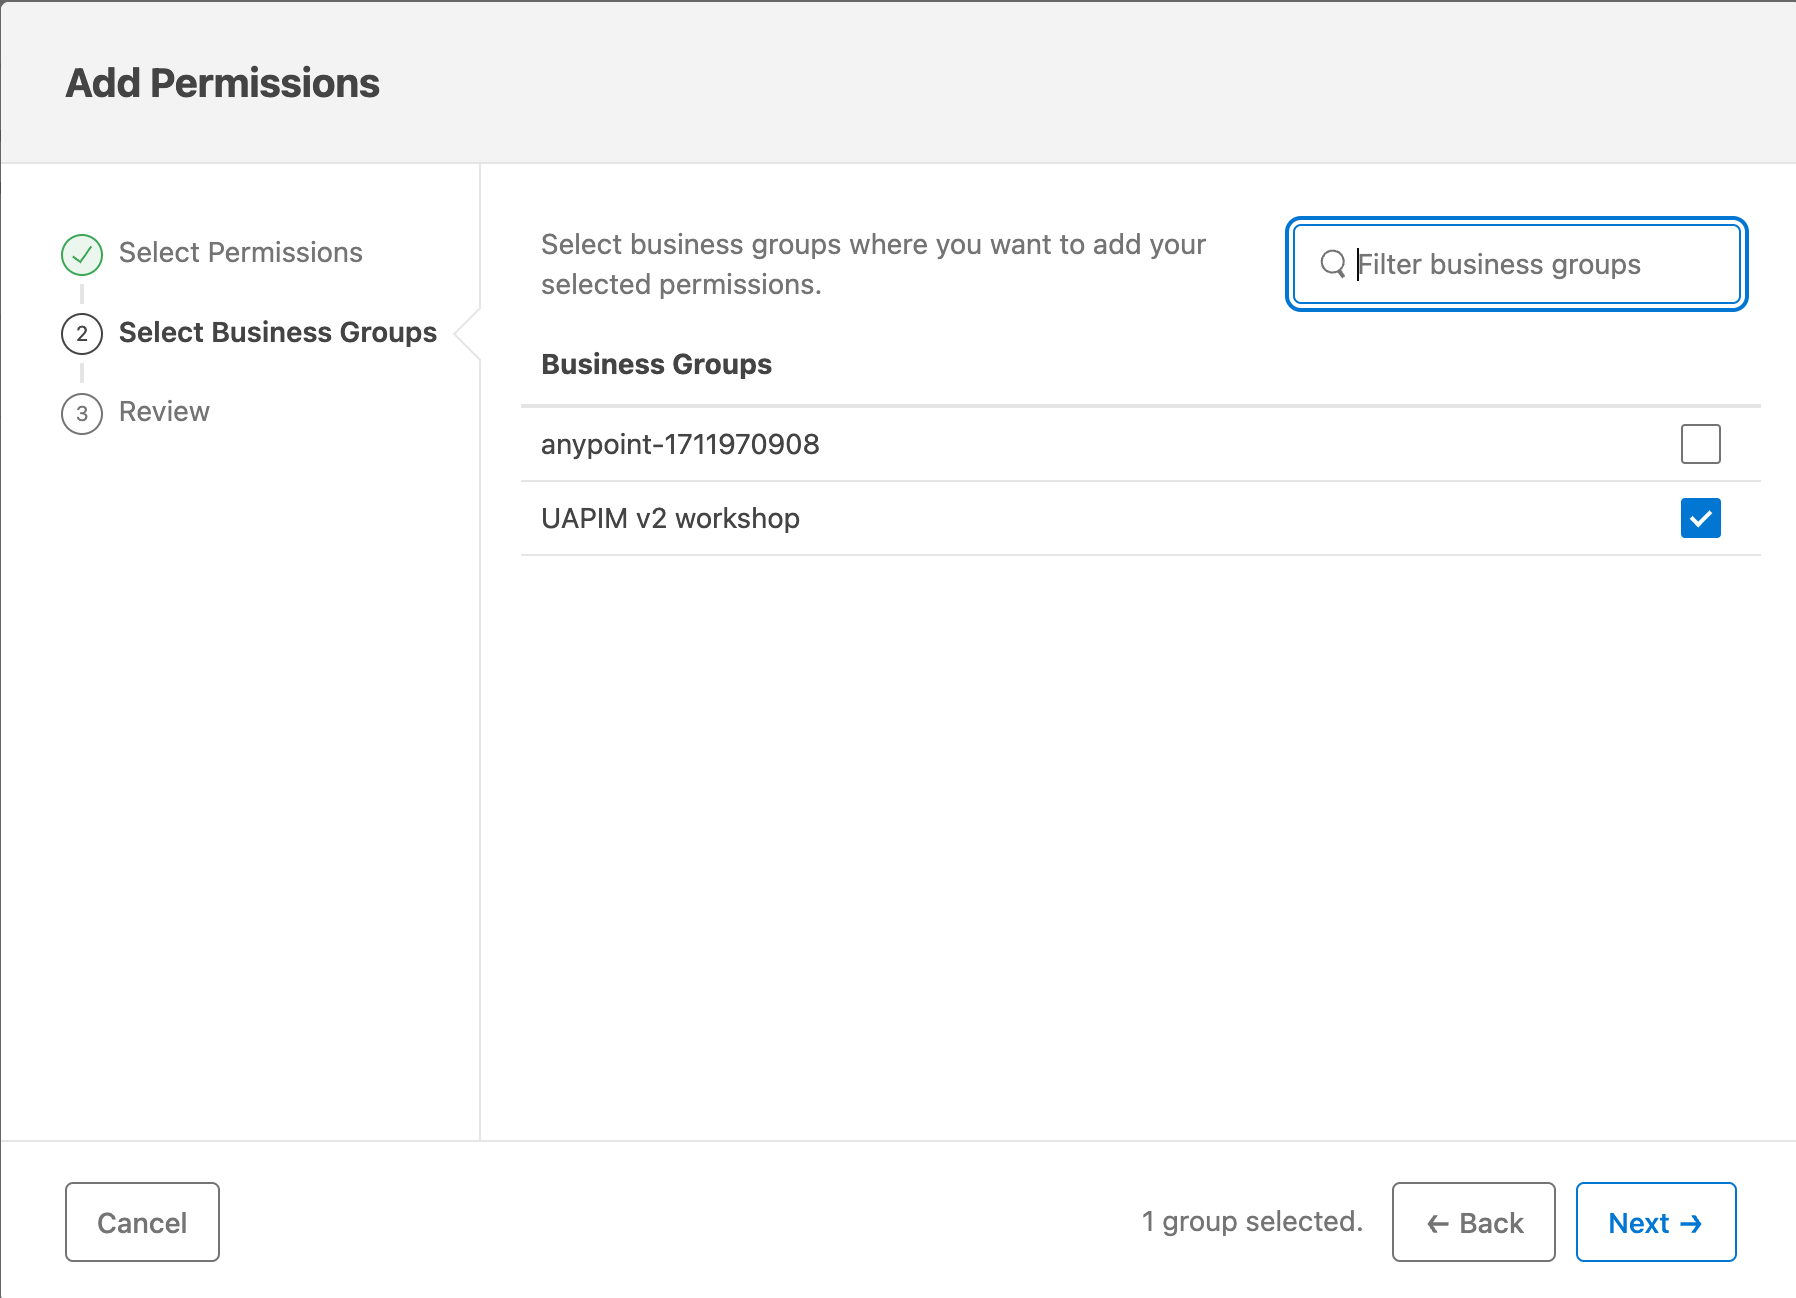
You only need your business group selected from earlier in the lab. Press next.
At the end you should see your Permissions being added to the list underneath, press ‘Add permissions’.


Step 2b: Finish authenticating your CLI
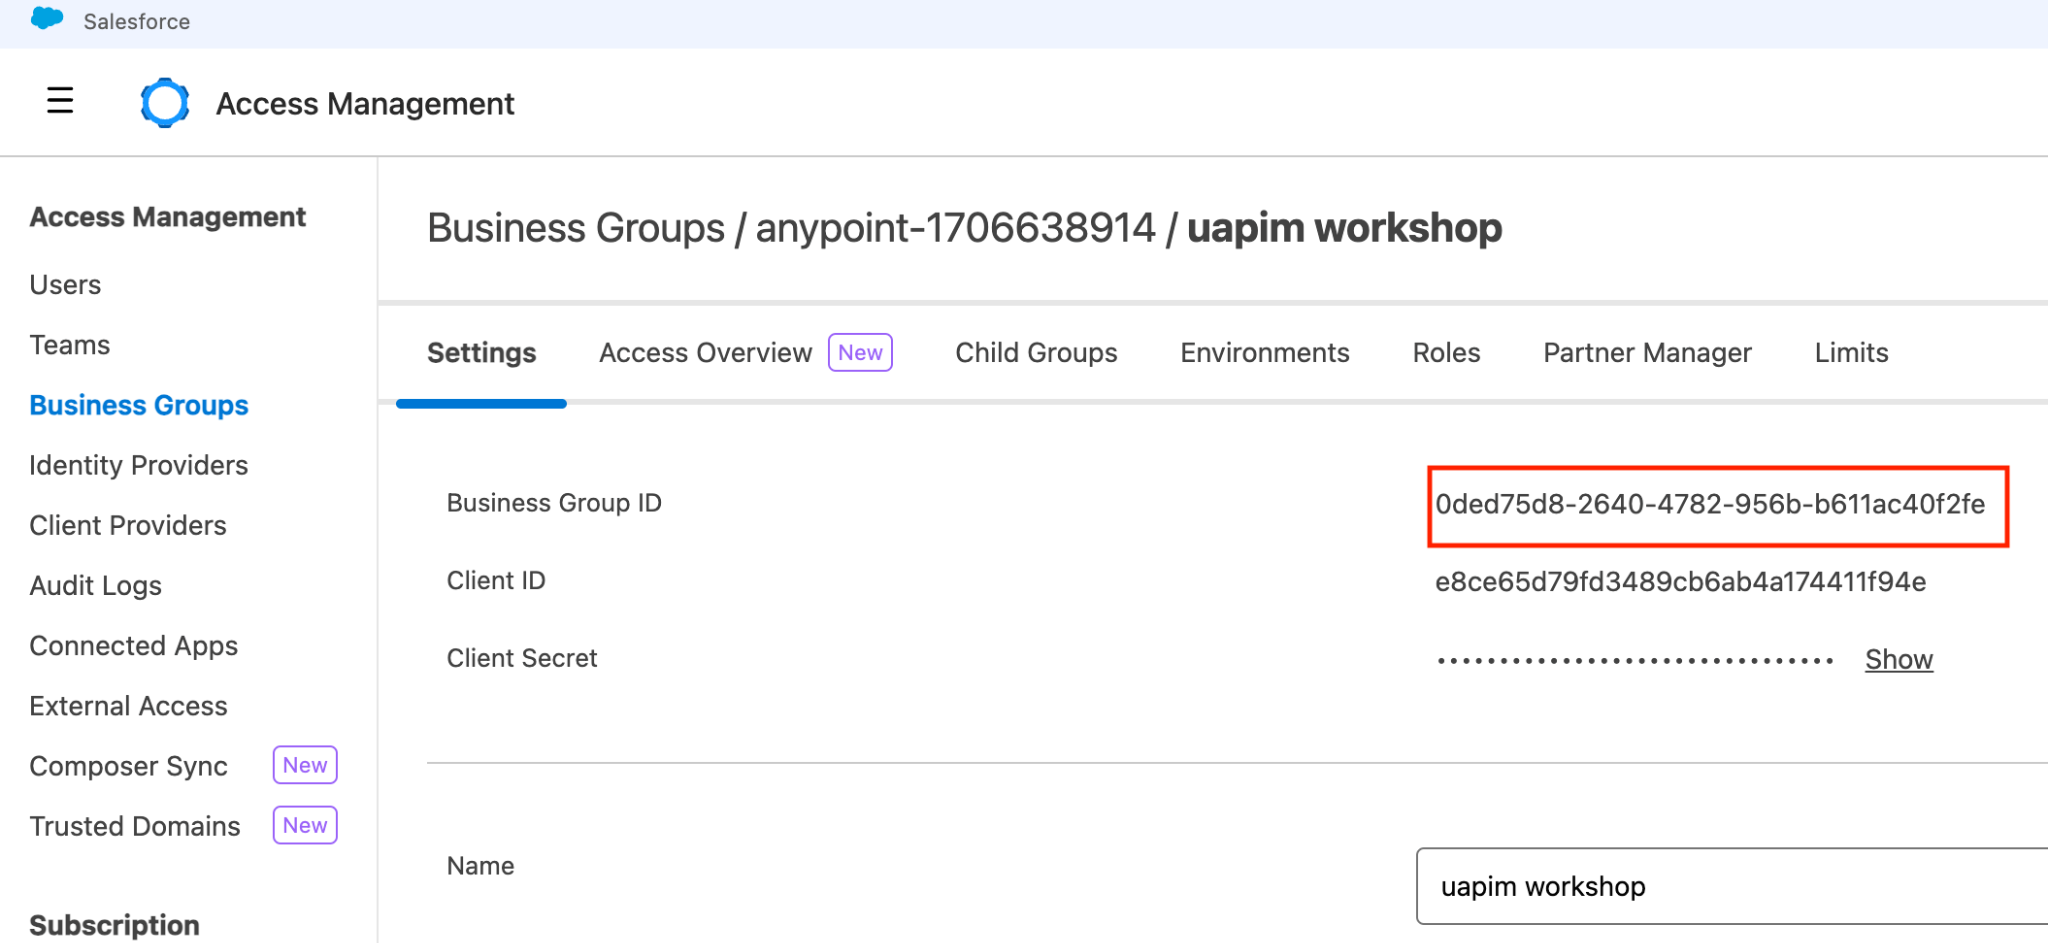
Then, go to the left menu and click Business Groups
Click on your organization (this name matches the name of your Business Group that you selected previously)
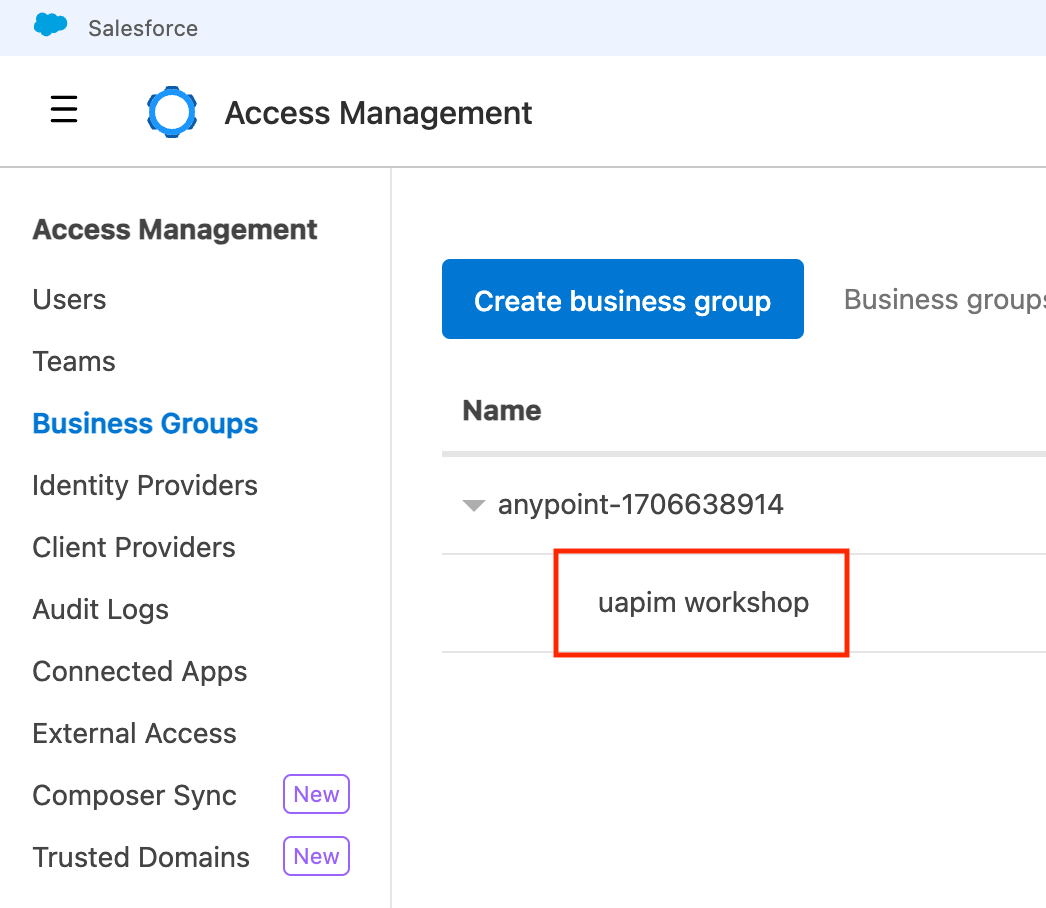
Copy your business group id - We are going to need it in the next step.
Then, navigate back to the command line interface and enter the following commands, replacing the value for each setting with your actual credentials:
api-catalog conf username [YOUR USERNAME]api-catalog conf password '[YOUR PASSWORD]' api-catalog conf host anypoint.mulesoft.comThe password needs to be surrounded by single quotes, if the password has a space or dollar sign it breaks the command.
Do note, the USERNAME here is the one you created, it is not the email address. For the last parameter, enter the value of your business group id that you copied before
api-catalog conf organization [YOUR BUSINESS GROUP ID]
Note: There are multiple ways in which you can authenticate your API Catalog CLI against your Anypoint Platform account - see here for more information
Step 3: Create Descriptor file with the GUI
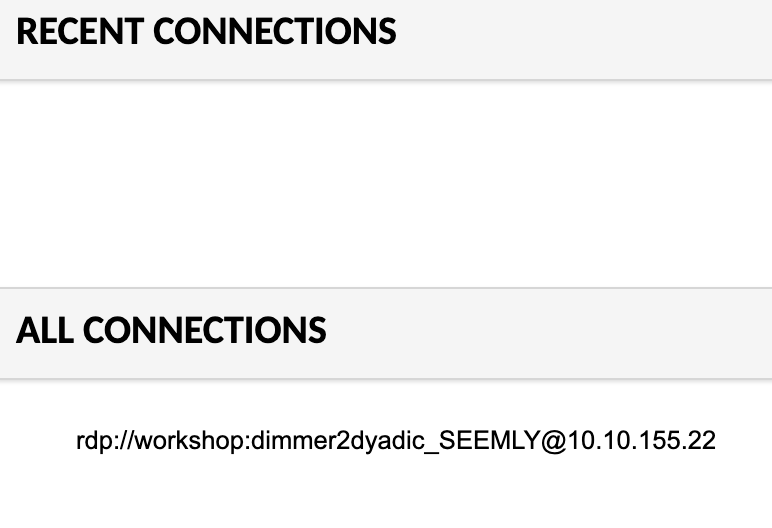
To connect to the LXDE GUI desktop environment enter lin the connection URI, like the screenshot below. As an alternative, you can also do this part of the workshop with SSH instead of the GUI.
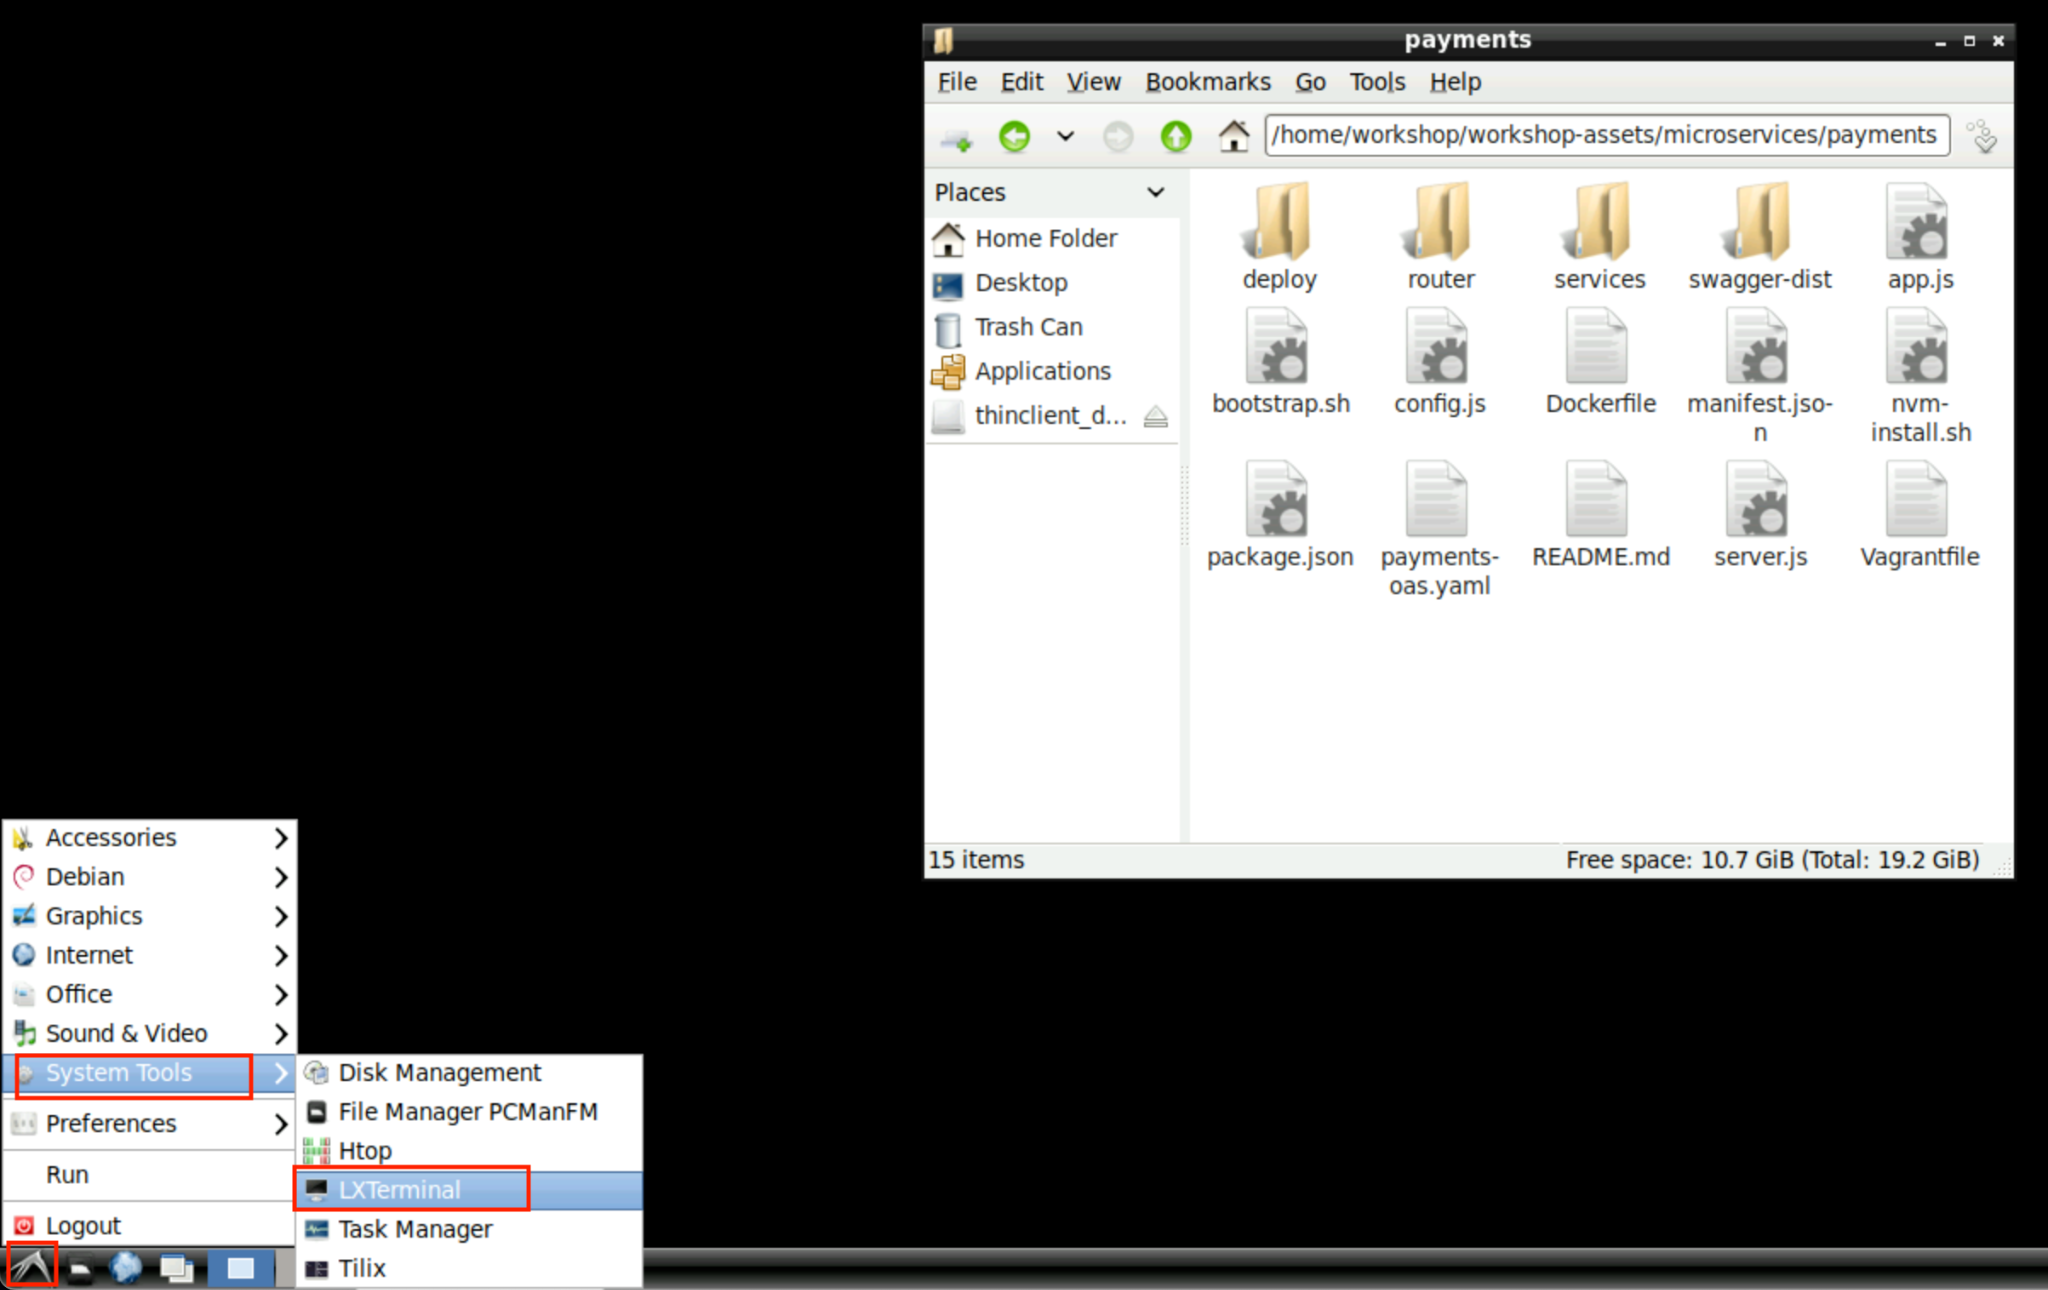
Once you are logged in, open the file manager by pressing the bottom left icon in the red square on the screenshot below, then open the workshop-assets folder in the pop-up.

After opening that file, navigate to the following location:

After you have your window here, click the bottom left icon, open system tools, and open LXTerminal.
After opening the terminal, type and enter the following lines sequentially:
cd ~/workshop-assets/microservices/paymentspwdAnd verify the output of pwd is as specified:
/home/workshop/workshop-assets/microservices/paymentsIn the terminal create the catalog descriptor of all your microservices by typing and entering:
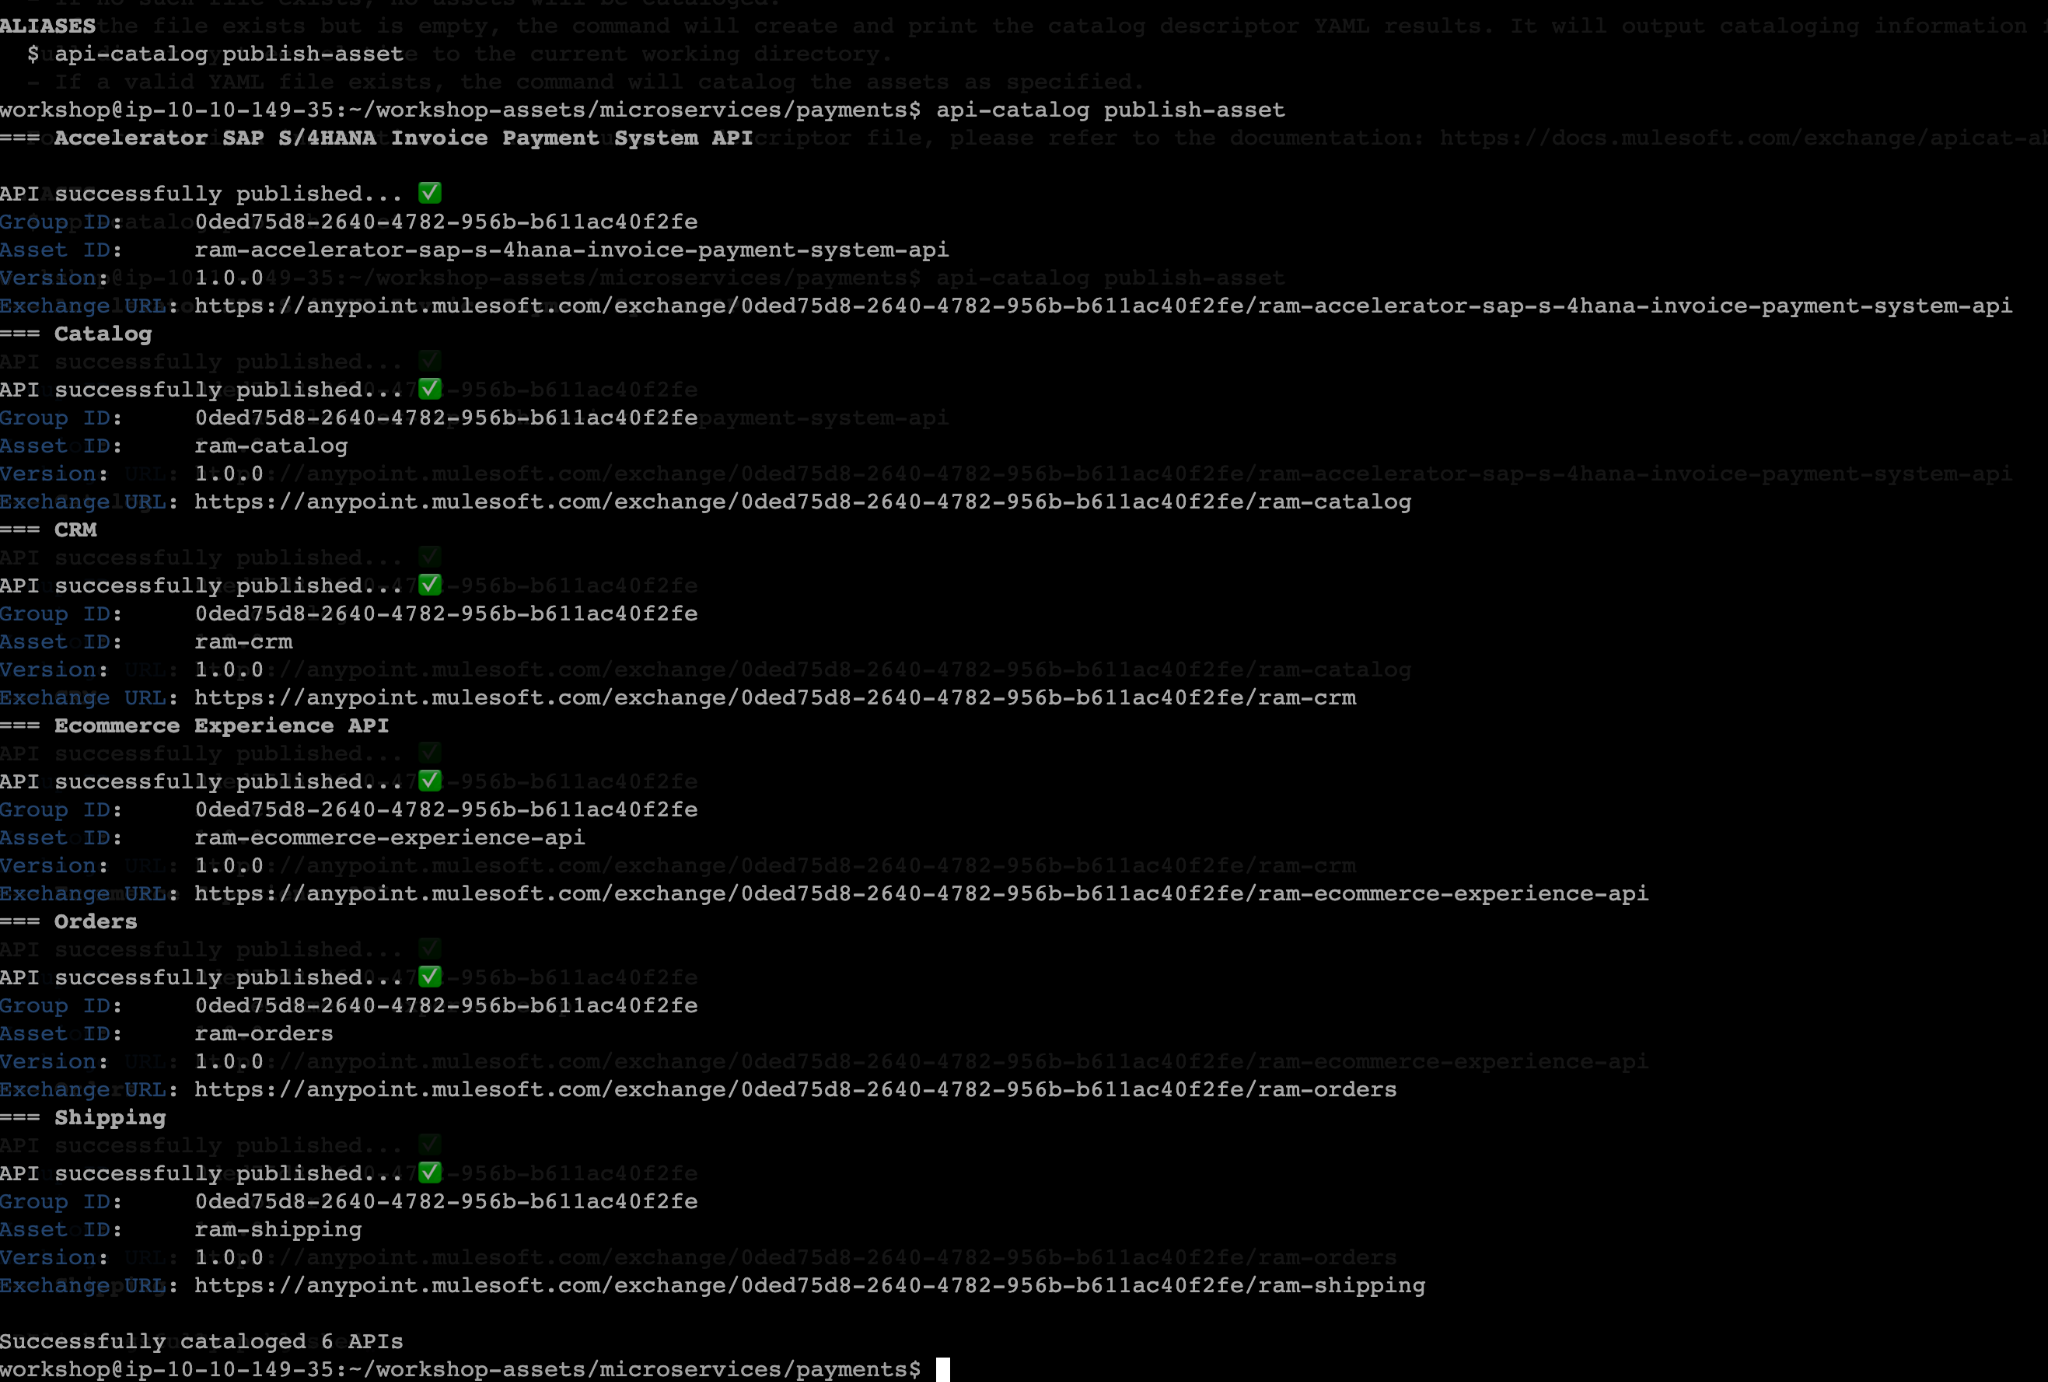
api-catalog create-descriptorThis command will automatically scan the folder for any API specifications. It then will create descriptors with configuration details for each API specification in the directory that the command was executed. Notice the 6 API specifications that were discovered in the folder.

This command created a file named catalog.yaml with all of this information. You are free to open this file and modify it according to your needs. Let’s make some modifications.
Since we are working on a shared Business group, let’s add a prefix to each of the APIs, so that we can easily identify them once published to Exchange.
For this, double click on the catalog.yaml file in the file explorer. This will open a textbox where we can edit the catalog.yaml file.

For each AssetId, add your initials . For example, given my initials are " ram ", this is the final result:
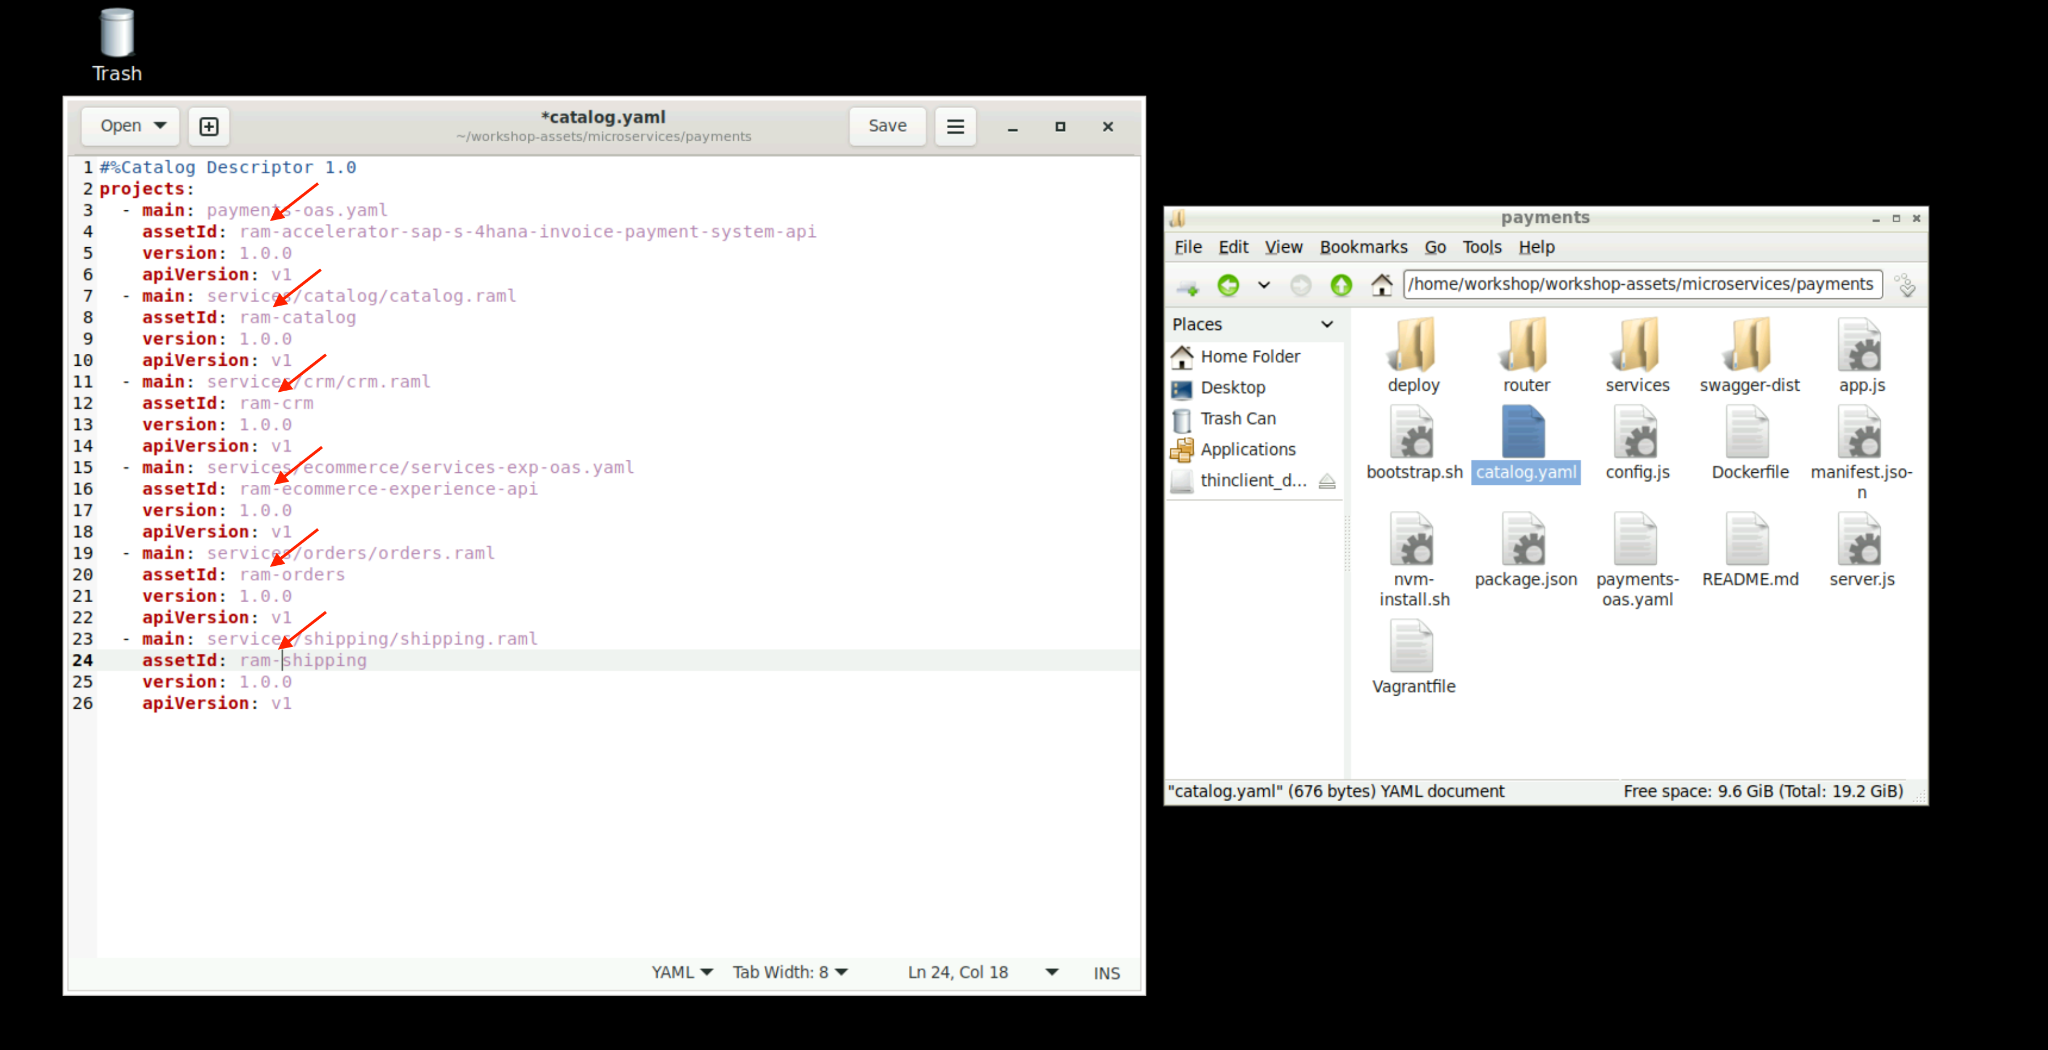
Also, let’s add a tag with your initials, so that we can also use this tag later on to apply the API Governance Ruleset. For this, for each API, enter the configuration tags: [your-initials]
For example, in my case:
tags: ramNote: Since this is a YAML file, indentation is very important , so make sure to identate properly and to have a space after the colons.
For example:

Verify your file looks like this, then press save on the top right corner, and x to close this window.

To finish step 3, re-open the Terminal and type and enter these two lines:
cd ~/workshop-assets/microservices/paymentspwdAnd verify the output of pwd is as specified:
/home/workshop/workshop-assets/microservices/paymentsKeep the terminal open for step 4.
Step 4: Publish the APIs to Exchange
Now, let’s review the available options to publish these discovered APIs into Anypoint Exchange
api-catalog publish-asset -h__ Notice the various parameters that you can add.

Now, given that we have previously configure the authentication to our Anypoint Platform account, let’s simply publish our APIs to Anypoint Exchange:
api-catalog publish-assetThis will publish all the API specifications living in the payments folder into exchange. After a few minutes, you should see 6 different API specifications successfully published as shown below.
Note : if workshop attendees experience problems at this step, please verify you turned off MFA for that user. I f multi-factor authentication is turned on, you will receive an error and will require to mark it as exempt for use with the Anypoint CLI, for this:
-
From the Anypoint Platform main dashboard click Access Management. On the left side of the screen select Identify Providers then Anypoint. Type your account name in the Exempt Accounts search bar and add it to the list exempt list, finally save changes.
NOTE: If you get a permission error, it is likely that there is a missing step. Go back to earlier in this lab and make sure that you added your user the API Catalog Contributor and Exchange Contributor permissions. Also, make sure that you configured your api-catalog cli correctly with the right username, password, host and organization id. If still in doubt, ask your workshop instructor.
Step 5: View non-Mule APIs in Exchange
In the previous step, we used the API Catalog CLI to publish 6 APIs
Including:
-
Accelerator SAP s/4HANA Invoice Payment System API
-
Catalog
-
CRM
-
Ecommerce
-
Orders
-
Shipping

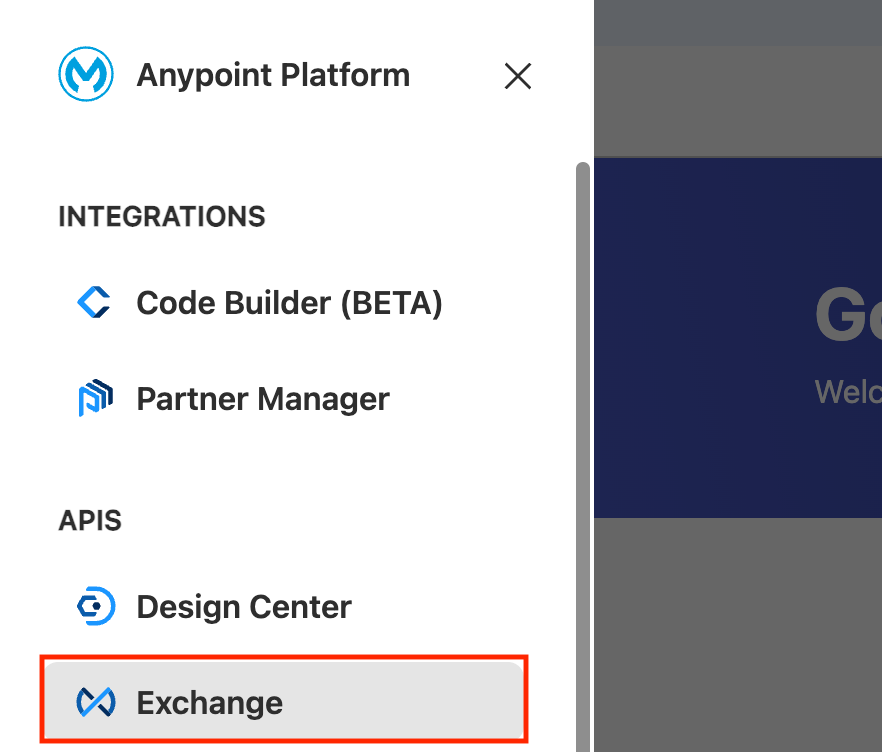
Let’s make sure that these APIs are available in Exchange. For this, navigate tohttps://anypoint.mulesoft.com/exchange/[ https://anypoint.mulesoft.com/exchange/]
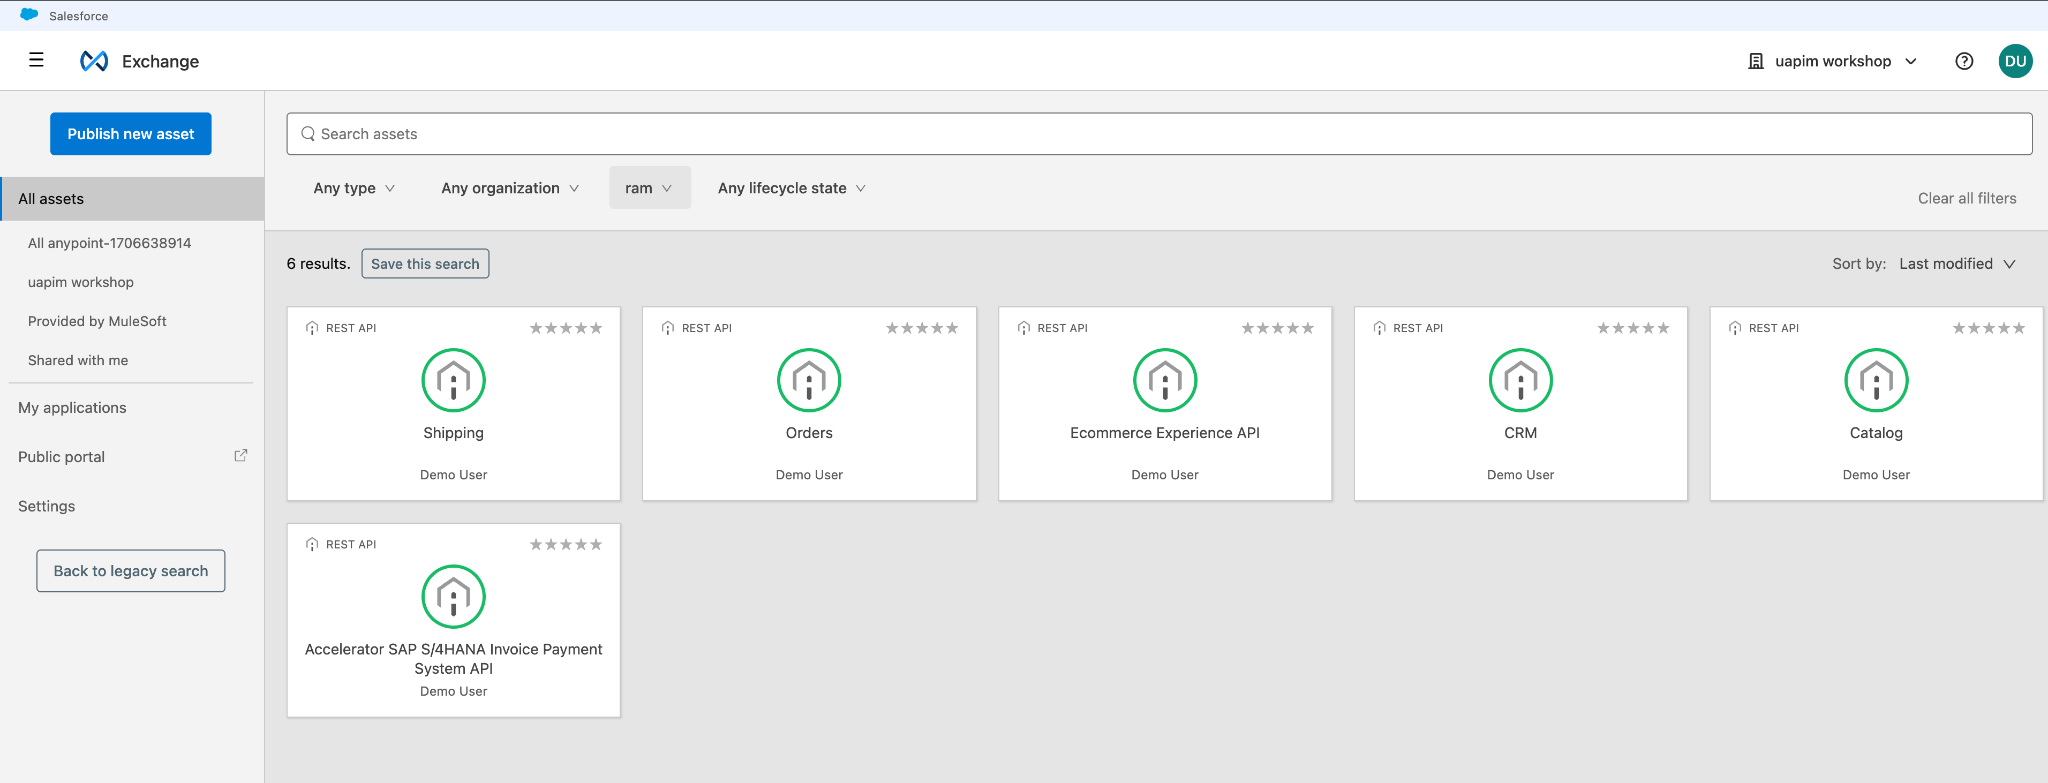
Notice how the 6 non-mule APIs from the payments service are now sitting in our central repository exchange. Developers can now self-serve these assets and gain speed through reuse, let’s see how!
Exchange lets you share assets across multiple Business Groups, so that you can collaborate across different teams and projects if needed. In this case, we just want to see the assets that are available on our Business Group, so within Exchange, on the left menu, click on your Business Group.
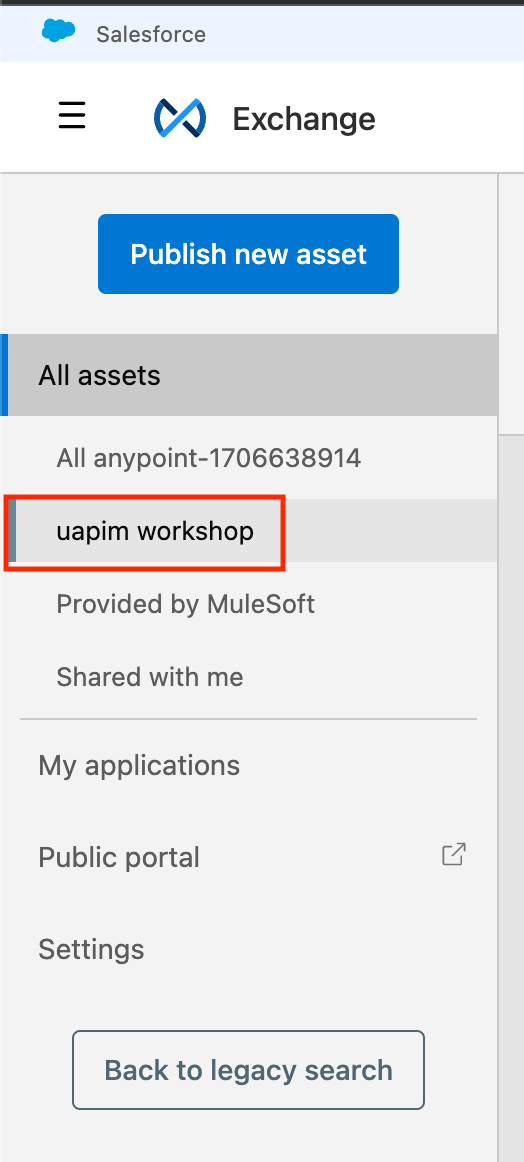
Note: Remember that the name of the Business Group will vary depending on the name chosen by your instructor when provisioning this environment. If you are in doubt, consult with your instructor.
Now, let’s use the provisioned tags to filter out and only see your API Specifications. For this, first make sure that you are in the new search view of Exchange, it is more capable and easy to use
Click on Any tag option
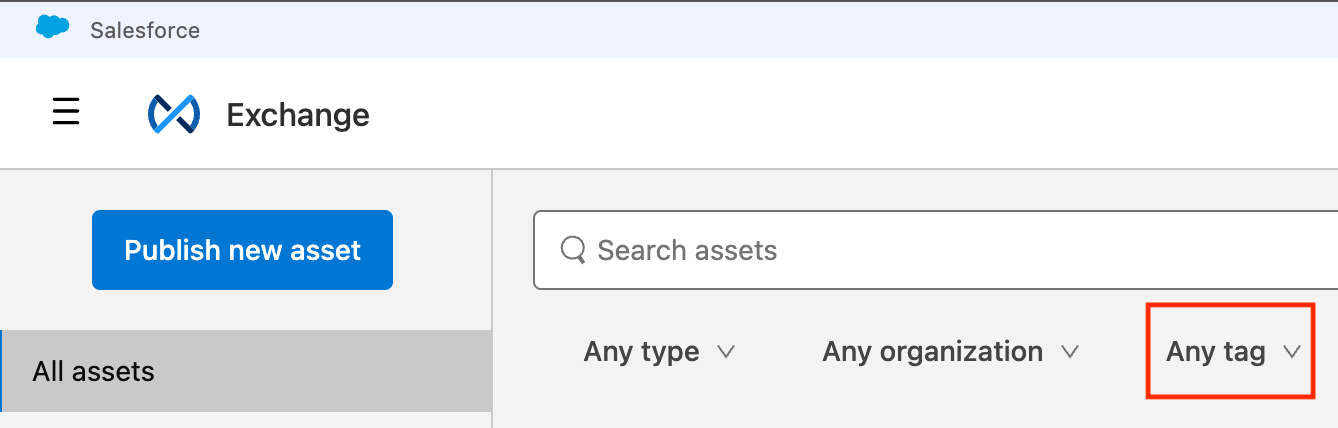
Search for your initials. Once you see them, click on them, followed by Apply
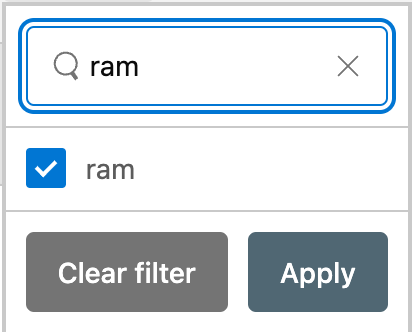
Now, you are only going to see the 6 API Specifications that you published previously.
The tags come especially in handy when grouping together APIs with sensitive information such as PCI or PHI. Using the tags you can group those APIs together and make sure they have the right governance and visibility so you do not run into a situation where you are getting fined for compliance!
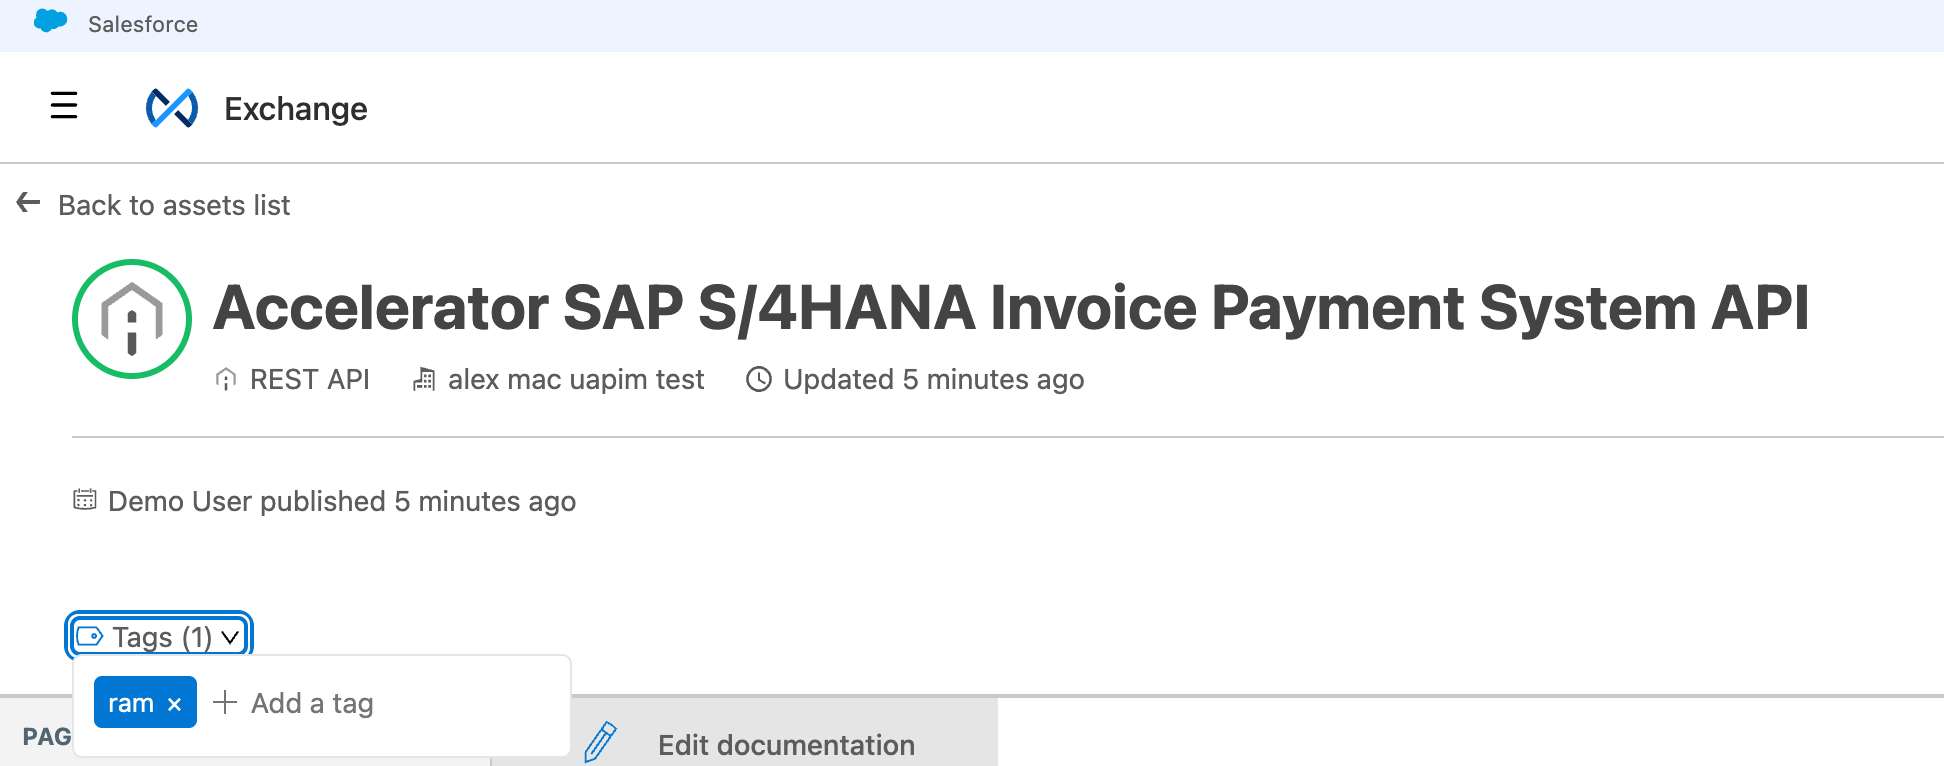
Click on the Accelerator SAP S/4HANA Invoice Payment System API .
Noticed that this API (together with the other ones) were successfully published with the tag that you typed, and this is why it is easier to filter them:
Scroll down and check out the collaboration tooling. Individuals can provide feedback on the API specification in Exchange by rating and commenting.
On the same page, check out the summary of the API endpoints on the left hand side. Notice how you can click on the dropdown arrow to view the endpoint names and operations. You can also click on the dropdown arrow next to types to view the pre-defined data types associated with the API specification. 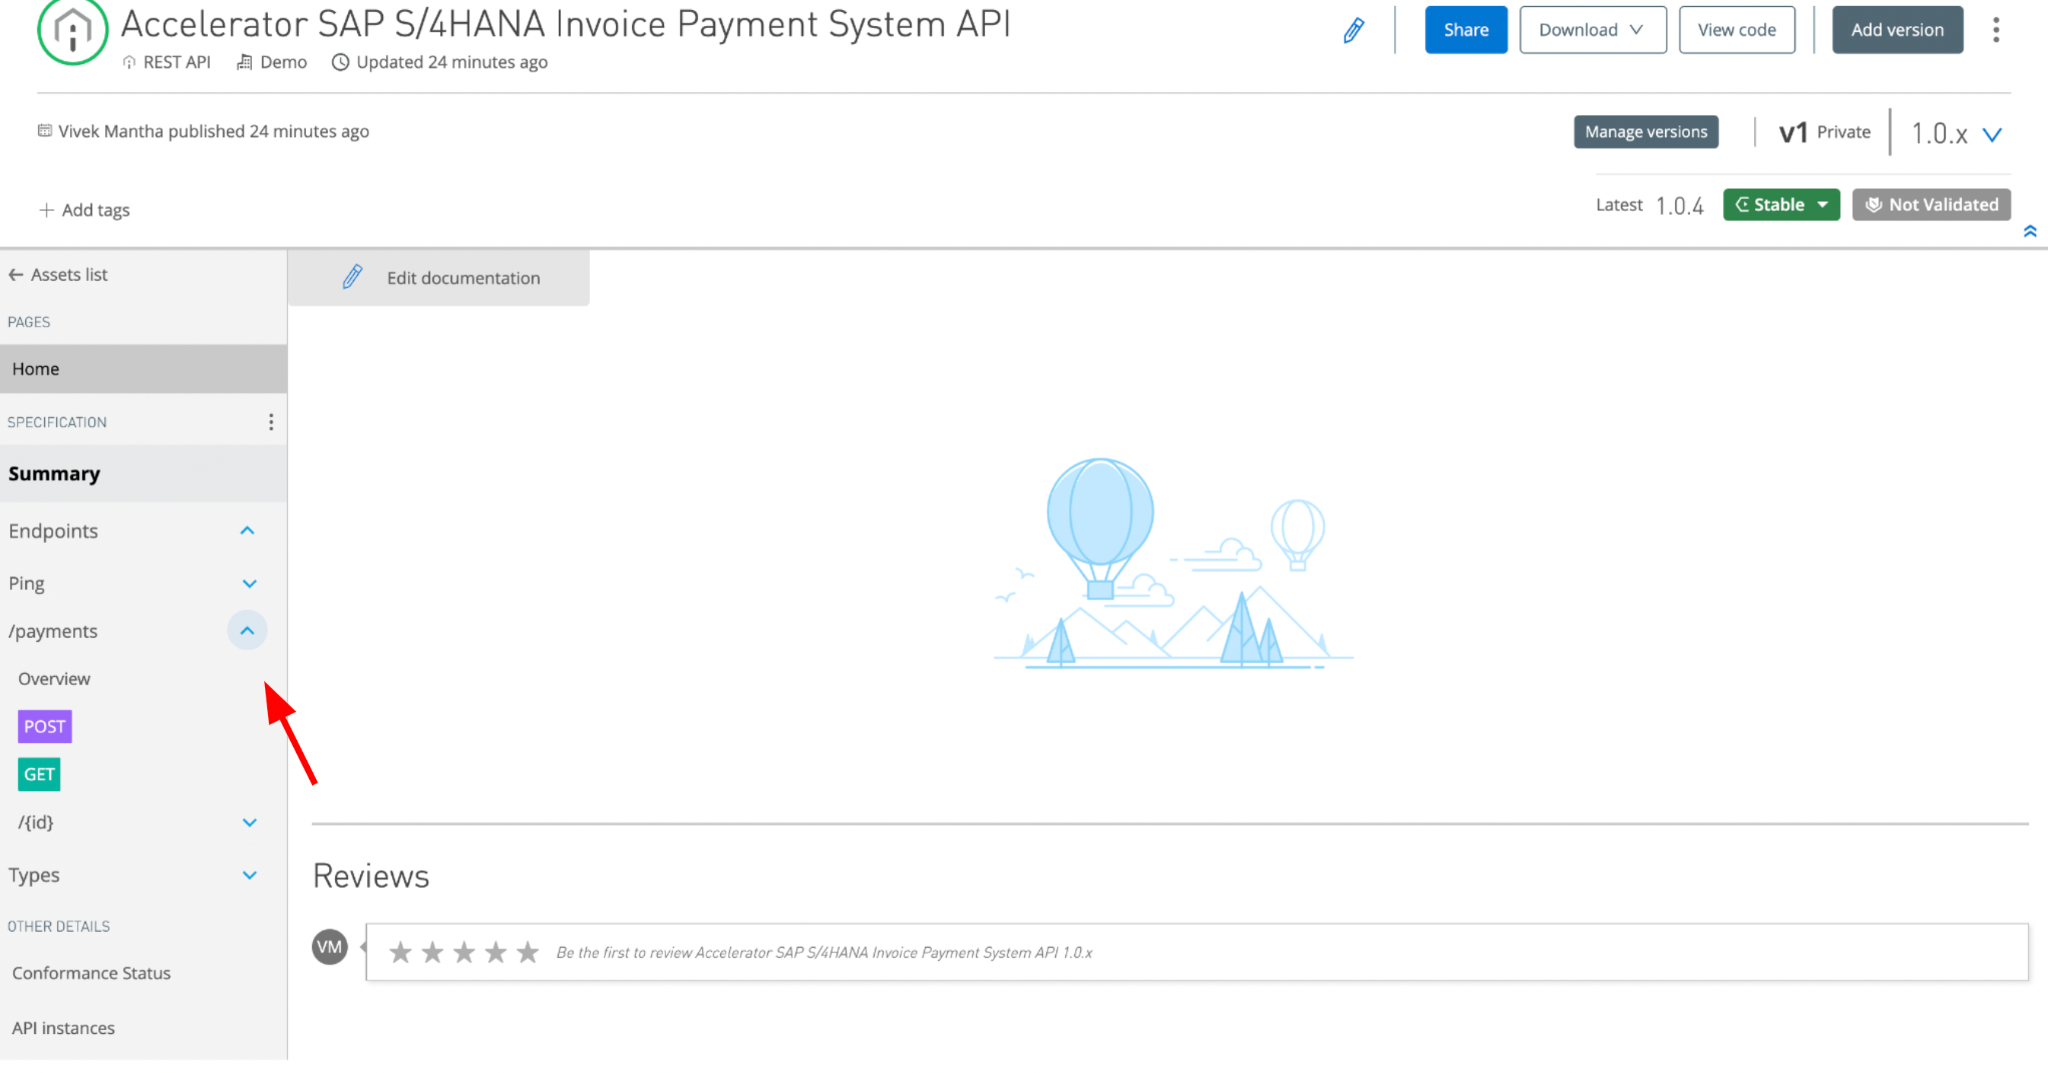
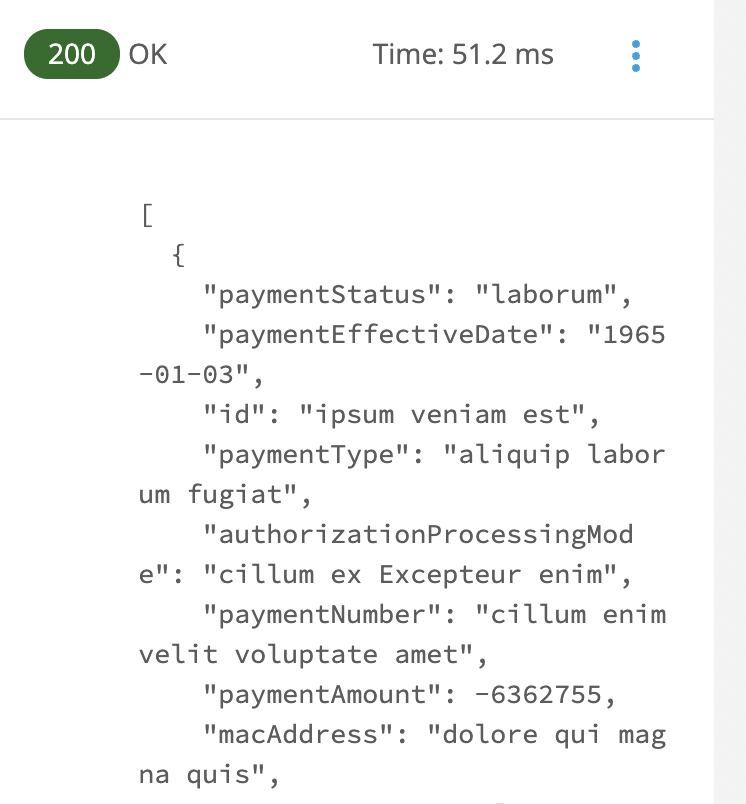
On the same page, click on one of the operations (get or post) under the endpoints. Scroll and notice how you then get a full overview of the operational details. On the right hand side, a mocking service console pops up. Enter a "1" in the parentId parameter field. Then hit send on the right hand side to mock one of the RESTful operations.
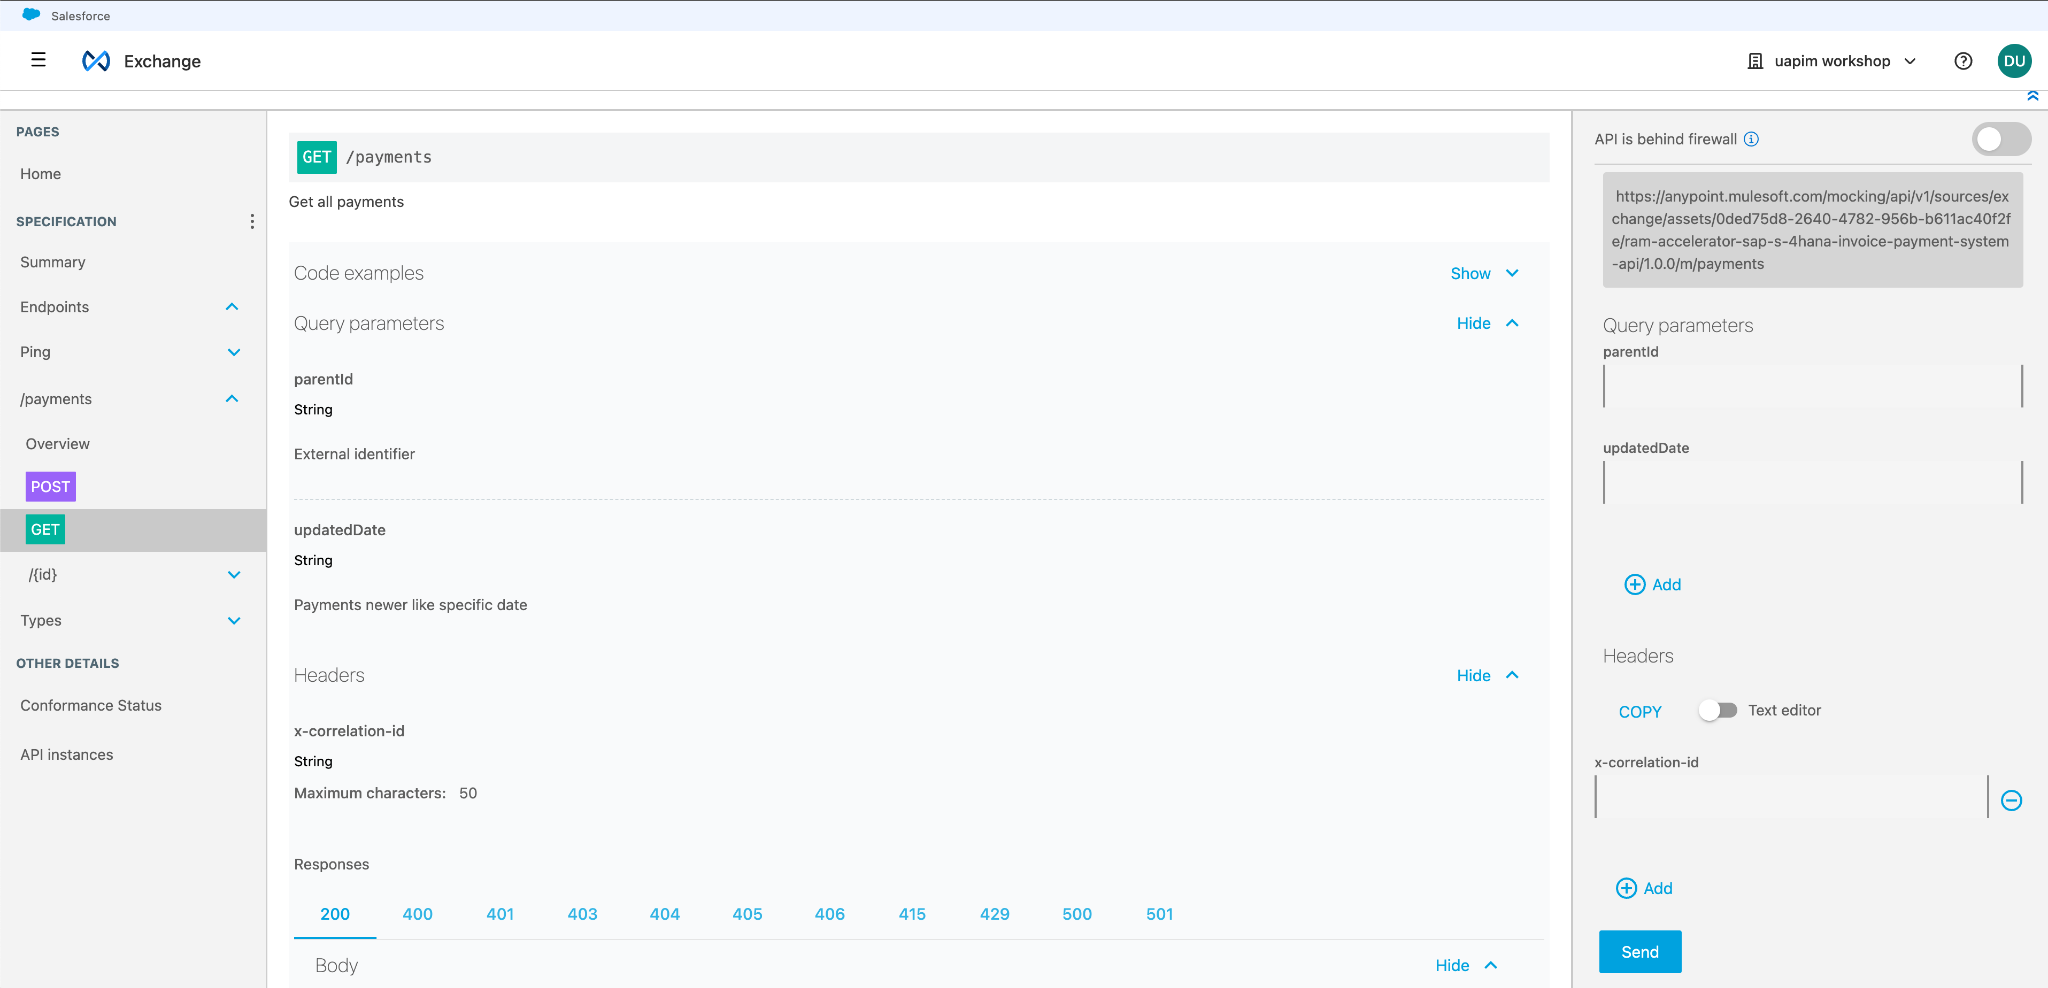
Notice how the mocking service gives a real response. This allows you to know if the API specification is formatted correctly with the right data models before you self-serve and build out an implementation with it.
In a real project you would use the CLI as part of your ci/cd pipeline to automatically discover and catalog apis. In a real project, when the service is pushed into a git repo the pipeline is going to start and pick up that change… if that change happens to be for an api spec of the service then through the cli, it is going to push that new version to exchange.
With Mulesoft’s new API cataloging features. You can finally break down IT silos and bring your assets together in one place, so you can maximize your existing investment through composability and reuse.
Step 6: View asset engagement metrics in Exchange
In the previous step, we leveraged the mock endpoint of an API on Exchange. For Exchange assets, viewers can use the “Asset Usage and Engagement Metrics Dashboard” to view usage and engagement metrics for API specification fragments and REST APIs. The dashboard provides a holistic view of asset usage and consumption within the organization. The usage metrics measure how many times an asset is downloaded from Exchange, imported from API Designer and Anypoint Studio, and the number of dependents and contracts. The asset engagement score is a composite metric that administrators and asset owners can use to measure the usage of the assets in Exchange.
-
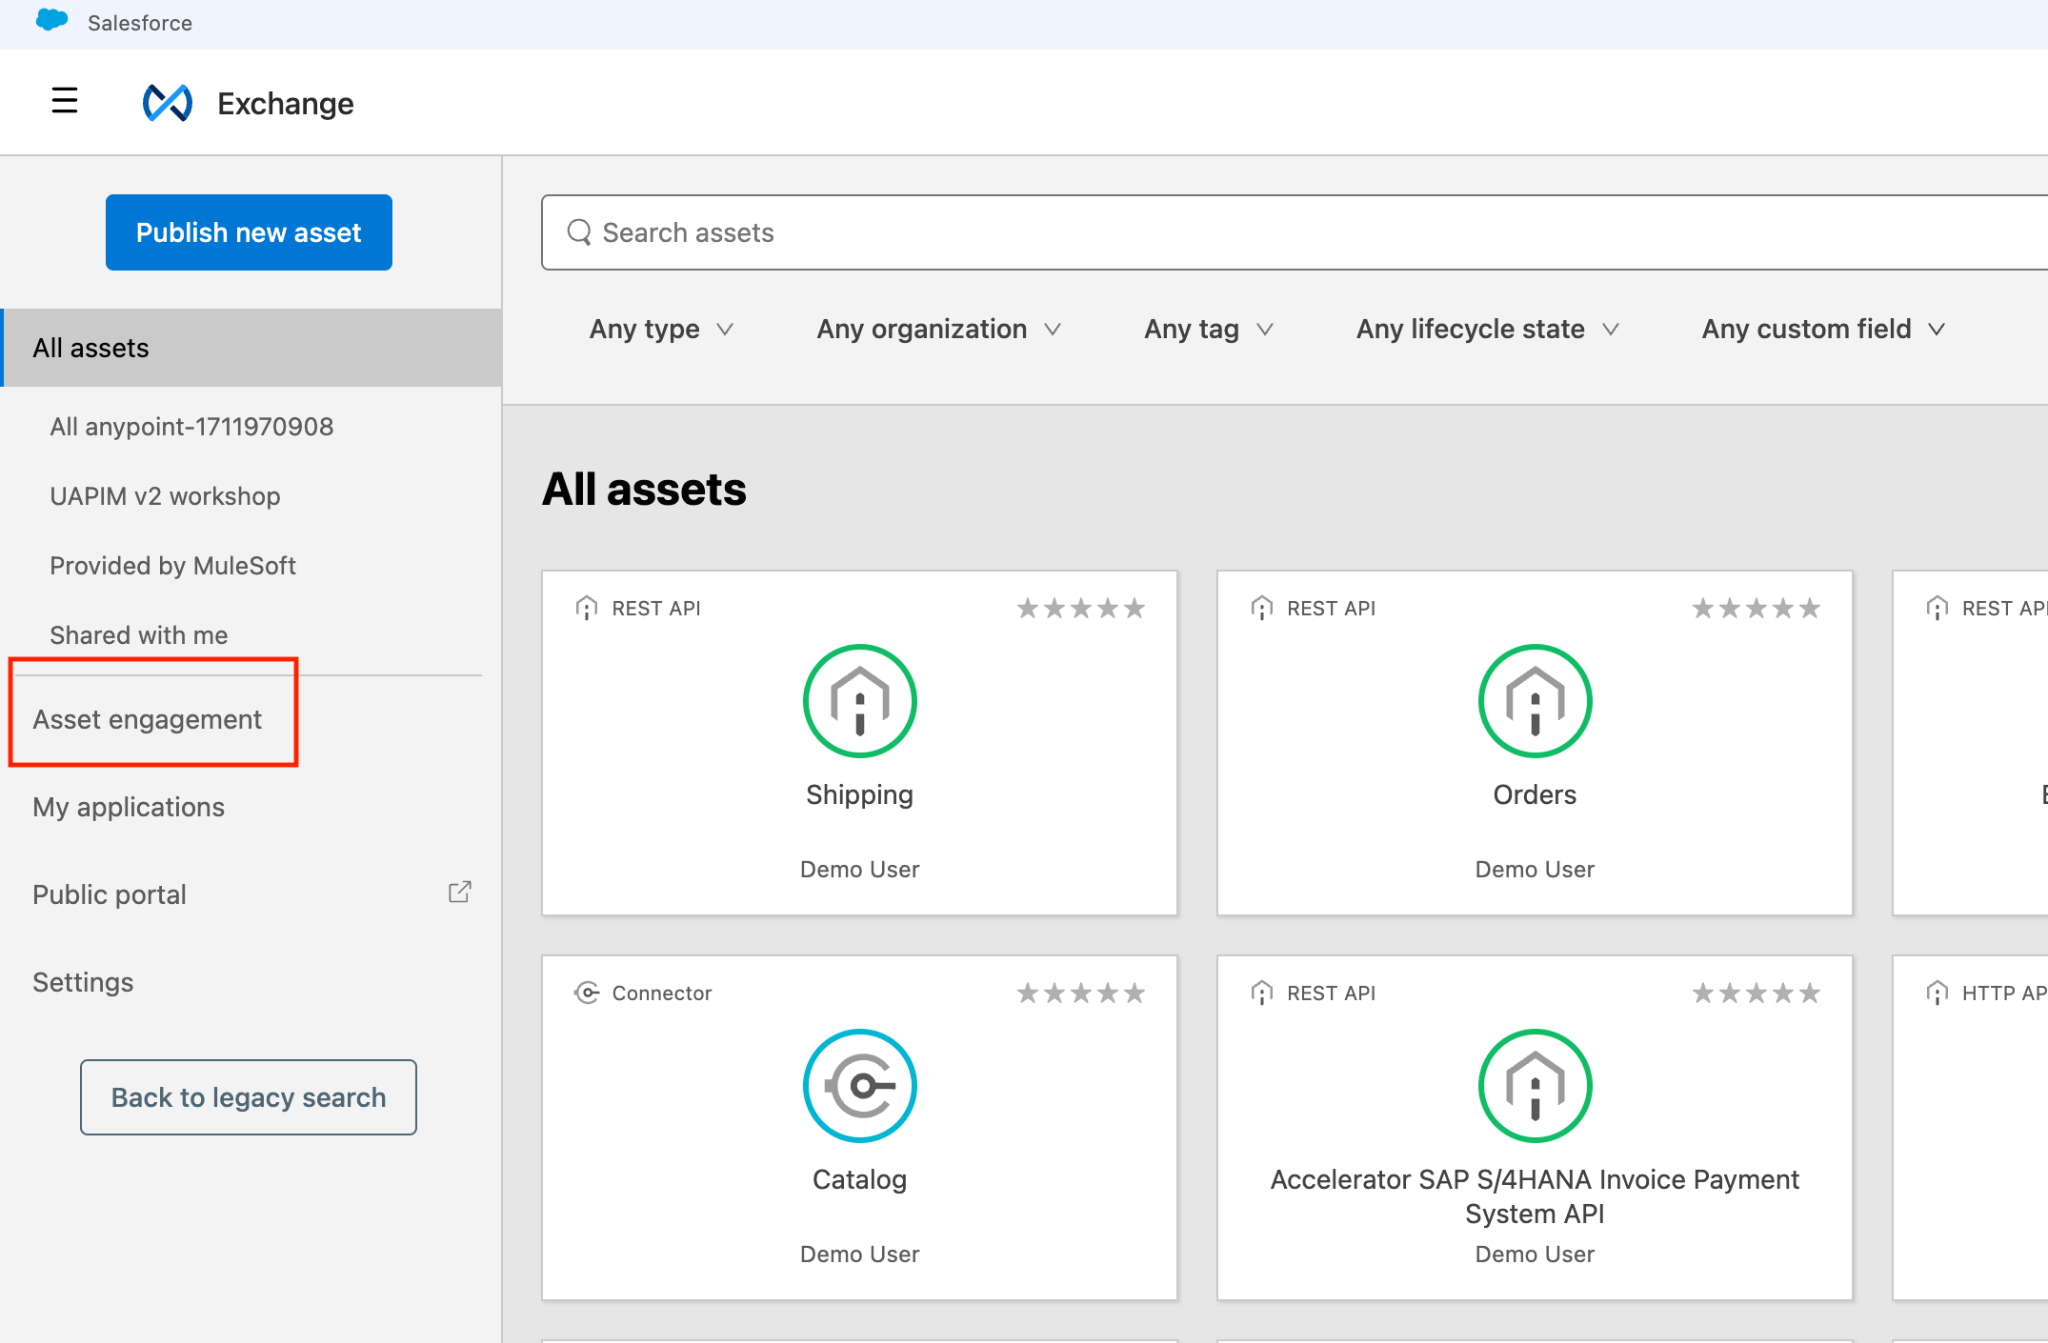
In the navigation bar in Exchange, click Asset engagement .
The following graphic shows the Usage and engagement metrics dashboard:

Note: if this page is blank, please try again after other lab attendees do further work with the assets in the lab.
-
Select a date range from 7 days, 30 days, or 90 days.
The default date range is the last 7 days.
-
If you want to filter by asset type, select an option from Asset type .
-
If you want to filter by an organization, click My Organizations .
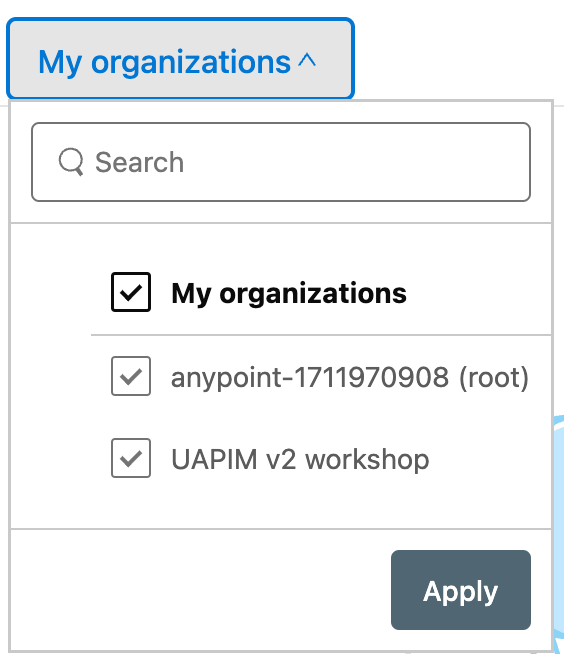
-
Enter the name of an organization in the Search box to search for an organization.
-
Select one or more organizations and click Apply to filter assets by organization.
-
If you want to view metrics for a specific asset in the list of the dashboard, click the link next to the asset name.
The asset details page displays the usage and engagement metric information for the asset.
-
If you want to view the dependents of an asset, click the Dependents row, which contains one or more dependents.
The dialog displays the list of the version’s dependents for that asset.
-
If you want to export the usage data, click Export to CSV .