Lab 3: Configuring mTLS (Optional)
Overview
Duration: 15 minutes
In Lab 2 we deployed a Flex Gateway to protect our Payments API. Following along, in lab 3 we are going to configure Mutual authentication TLS (mTLS) to communicate with the Payments API in the inbound direction through the Anypoint Platform UI. This lab is optional and you can continue to lab 4 if you so choose.
In mutual authentication both the server and client need to validate their identity inorder to communicate. When a server receives the request from a client app to access a resource and if it does not identify the client then it rejects the request. This is where keystore and truststore play an important role in helping identify the party’s identity. In our case, Flex gateway will interact with the calling client (curl command) and validate the certificates.
Pre-requisites
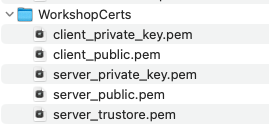
This tutorial will use client as well as server’s public certificate, private key and trust store files to configure TLS context in the Flex gateway. We will be using the curl command to test the mTLS configuration.
Note: The certificate files to be uploaded will be made available by the instructor with all the attendees of this workshop.
Download the certificate files on the local machine
Before we begin with the configuration, we need to save the certificate files on the local machine. Once the certificate files are stored, please note down the location of the files. We will need this location during testing.
Ensure Payments service and Flex gateway are running
-
Using docker, verify the payments service and flex-gateway is running by issuing the following command in :
docker ps
-
If the service is stopped, use below command to run the Payments service.
docker run -d -p 3000:3000 -d mulethunder/payments:1.0-
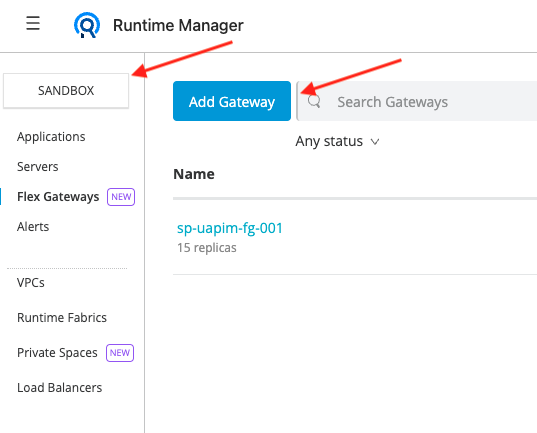
If the Flex-gateway is disconnected, go to the Anypoint Platform and under Runtime Manager go to the stage where you add a Flex Gateway, so that we can simply copy the command to start Flex gateway. Make sure you are within the Sandbox environment. Click on "Add Gateway"
-
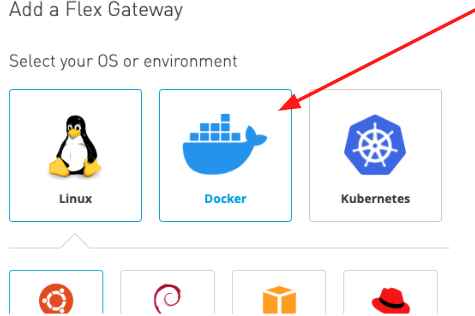
Click on Docker
-
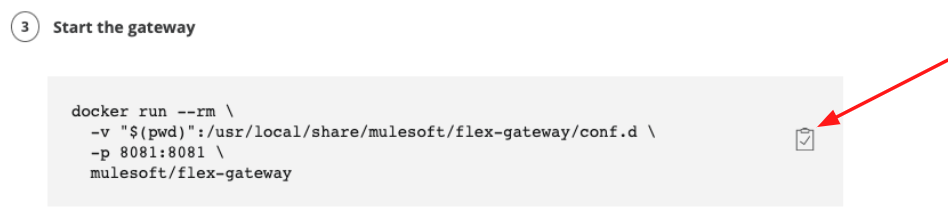
And now let’s copy step 3. Start the gateway
-
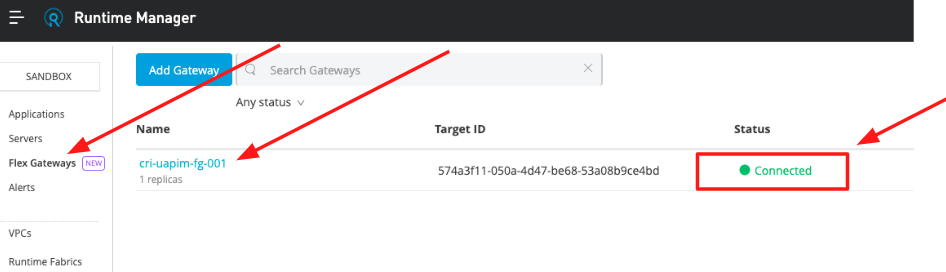
Go back to the Runtime Manager → Flex Gateways in Anypoint Platform web console to verify your Flex Gateway is Connected , up and running.
-
Change screenshot
-
Great, we can now configure mTLS to allow secure communication with this Payments microservice.
Step 1: Configuring mTLS in Flex Gateway
Following steps are the guide to configuring TLS context and applying it to the Payments API service.
Before making any changes to the Payments API settings in API manager, let us start by creating a Secret Group.
On the top left side locate and click on the menu and navigate to the Secret Manager.

Create a Secret Group
-
Make sure the environment is a Sandbox.
-
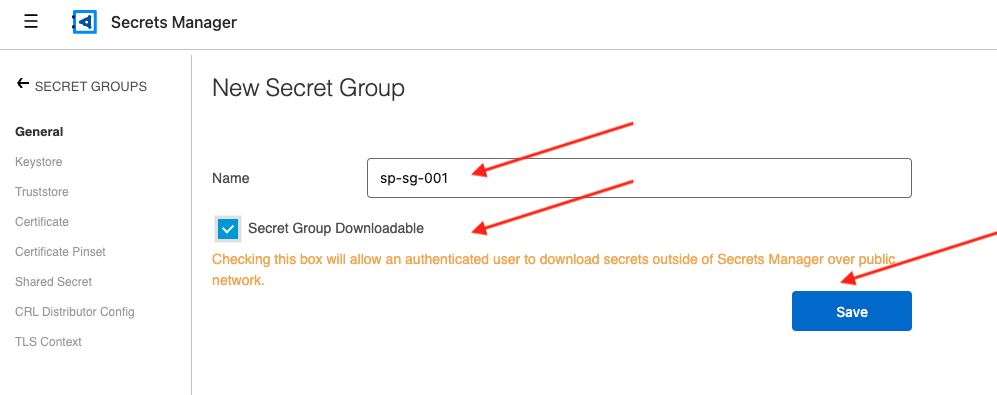
Click Create Secret Group.
image:img_7.png[]
-
Enter a name for the secret group and click Save.
Note: Prefix the name of your secret group with your initials for easy identification, example <initials_sg_001>
+
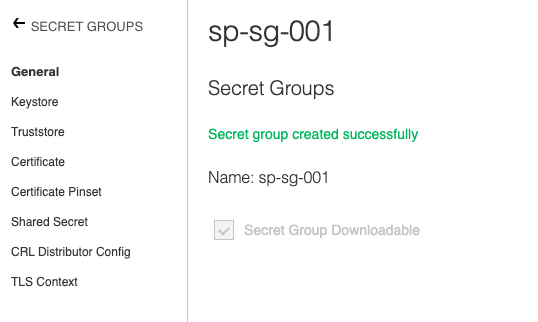
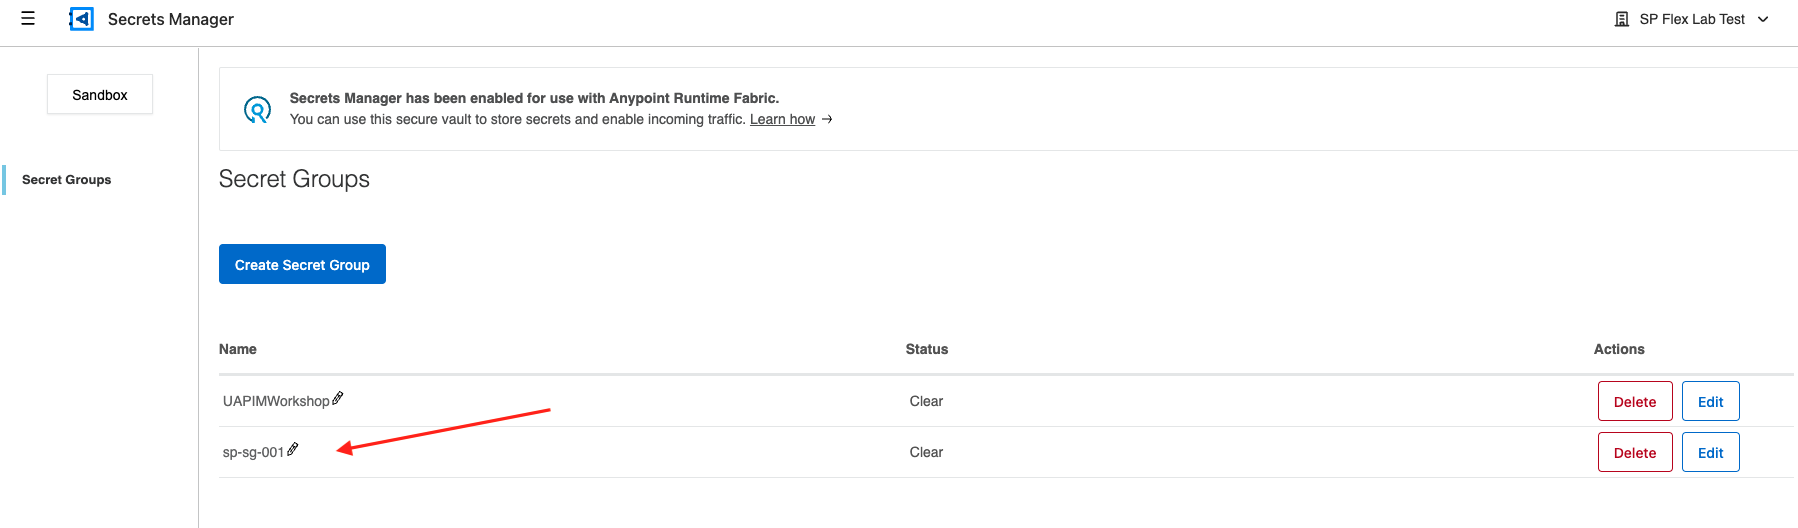
After creating your secret group, it appears in the Secret Groups list view. Now for this lab, we can add necessary secret types, such as a keystore, truststore and TLS Context.
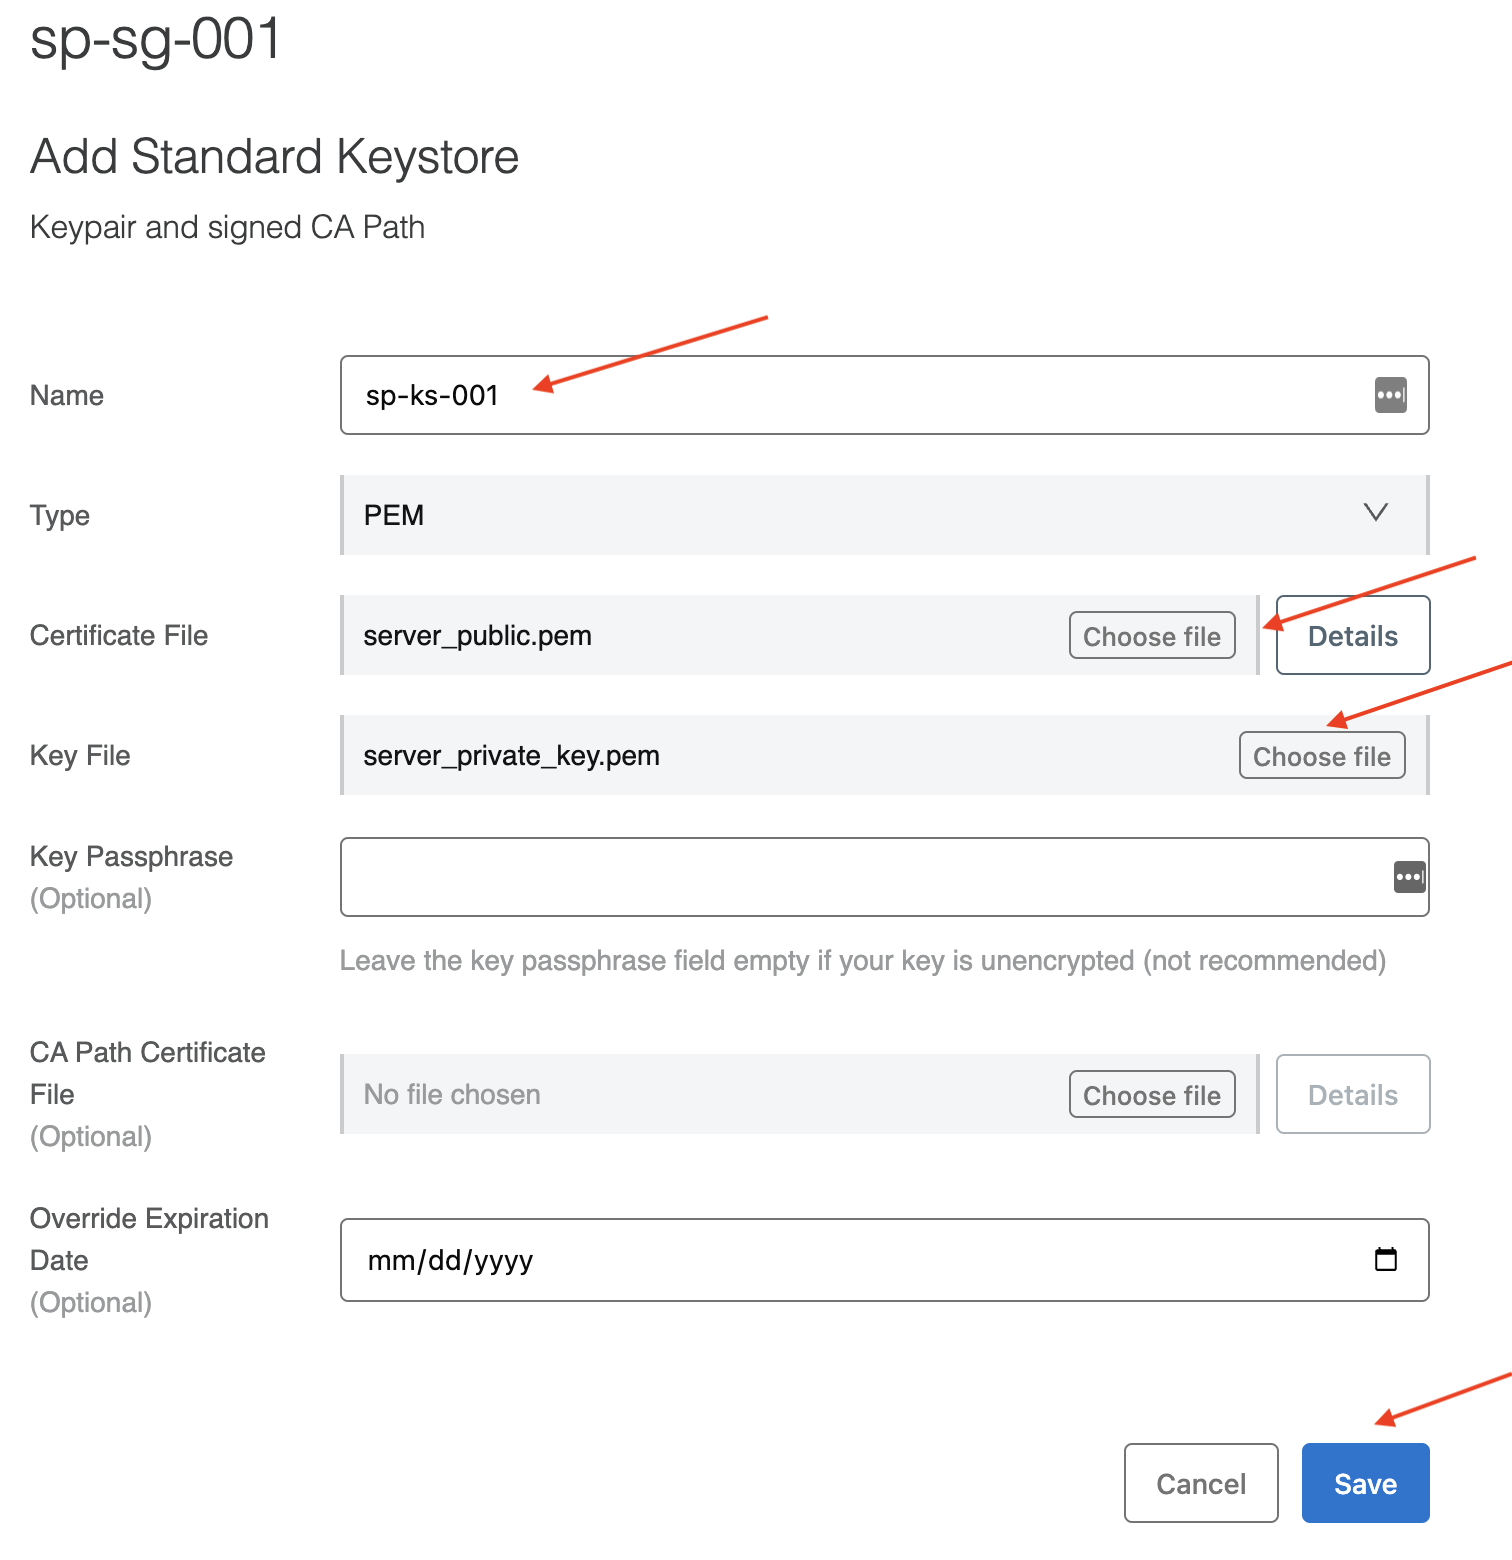
Add a Keystore
Specify the type of keystore to add to the secret group.
| Only PEM format certificates are supported for mTLS configuration. |
-
Select Keystore in the menu on the left, and click Add Keystore.

-
In the Name field, enter a name for your keystore.
Note: Prefix the name of your secret group with your initials for easy identification, example <initials_ks_001>
-
In the Type field, select the PEM keystore type from the drop-down menu.
-
To add a PEM type keystore, you must provide:
-
Certificate File
Click Choose File to locate and upload the PEM certificate file (server_public.pem).
-
Key File
Click Choose File to locate and upload the PEM formatted file that contains the private key for the certificate (server_private_key.pem).
-
Leave other options as default
-
-
-
Click Save.
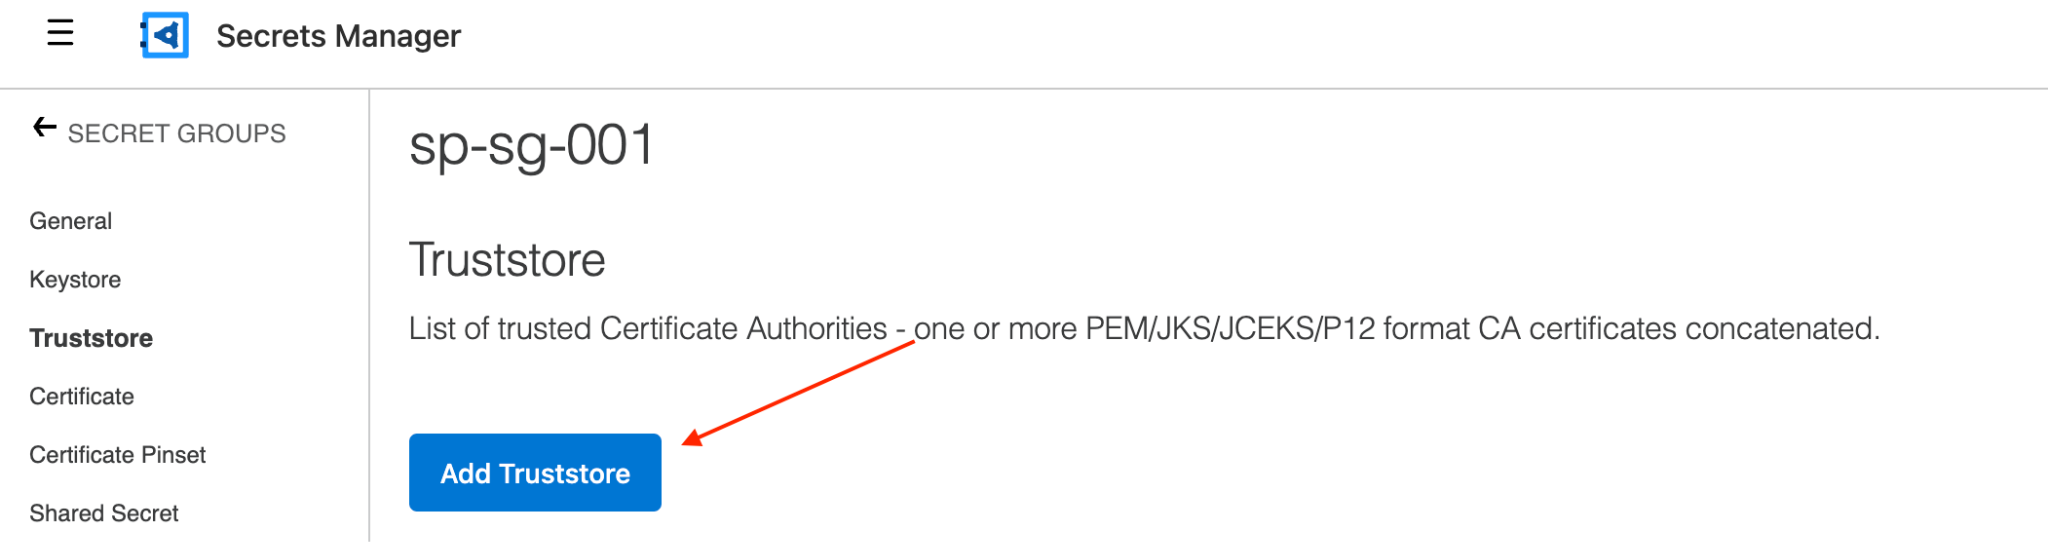
Add a Truststore
Add a truststore for public certificates of trusted servers.
| Only PEM format certificates are supported for mTLS configuration. |
-
Select Truststore in the menu on the left, and click Add Truststore.
-
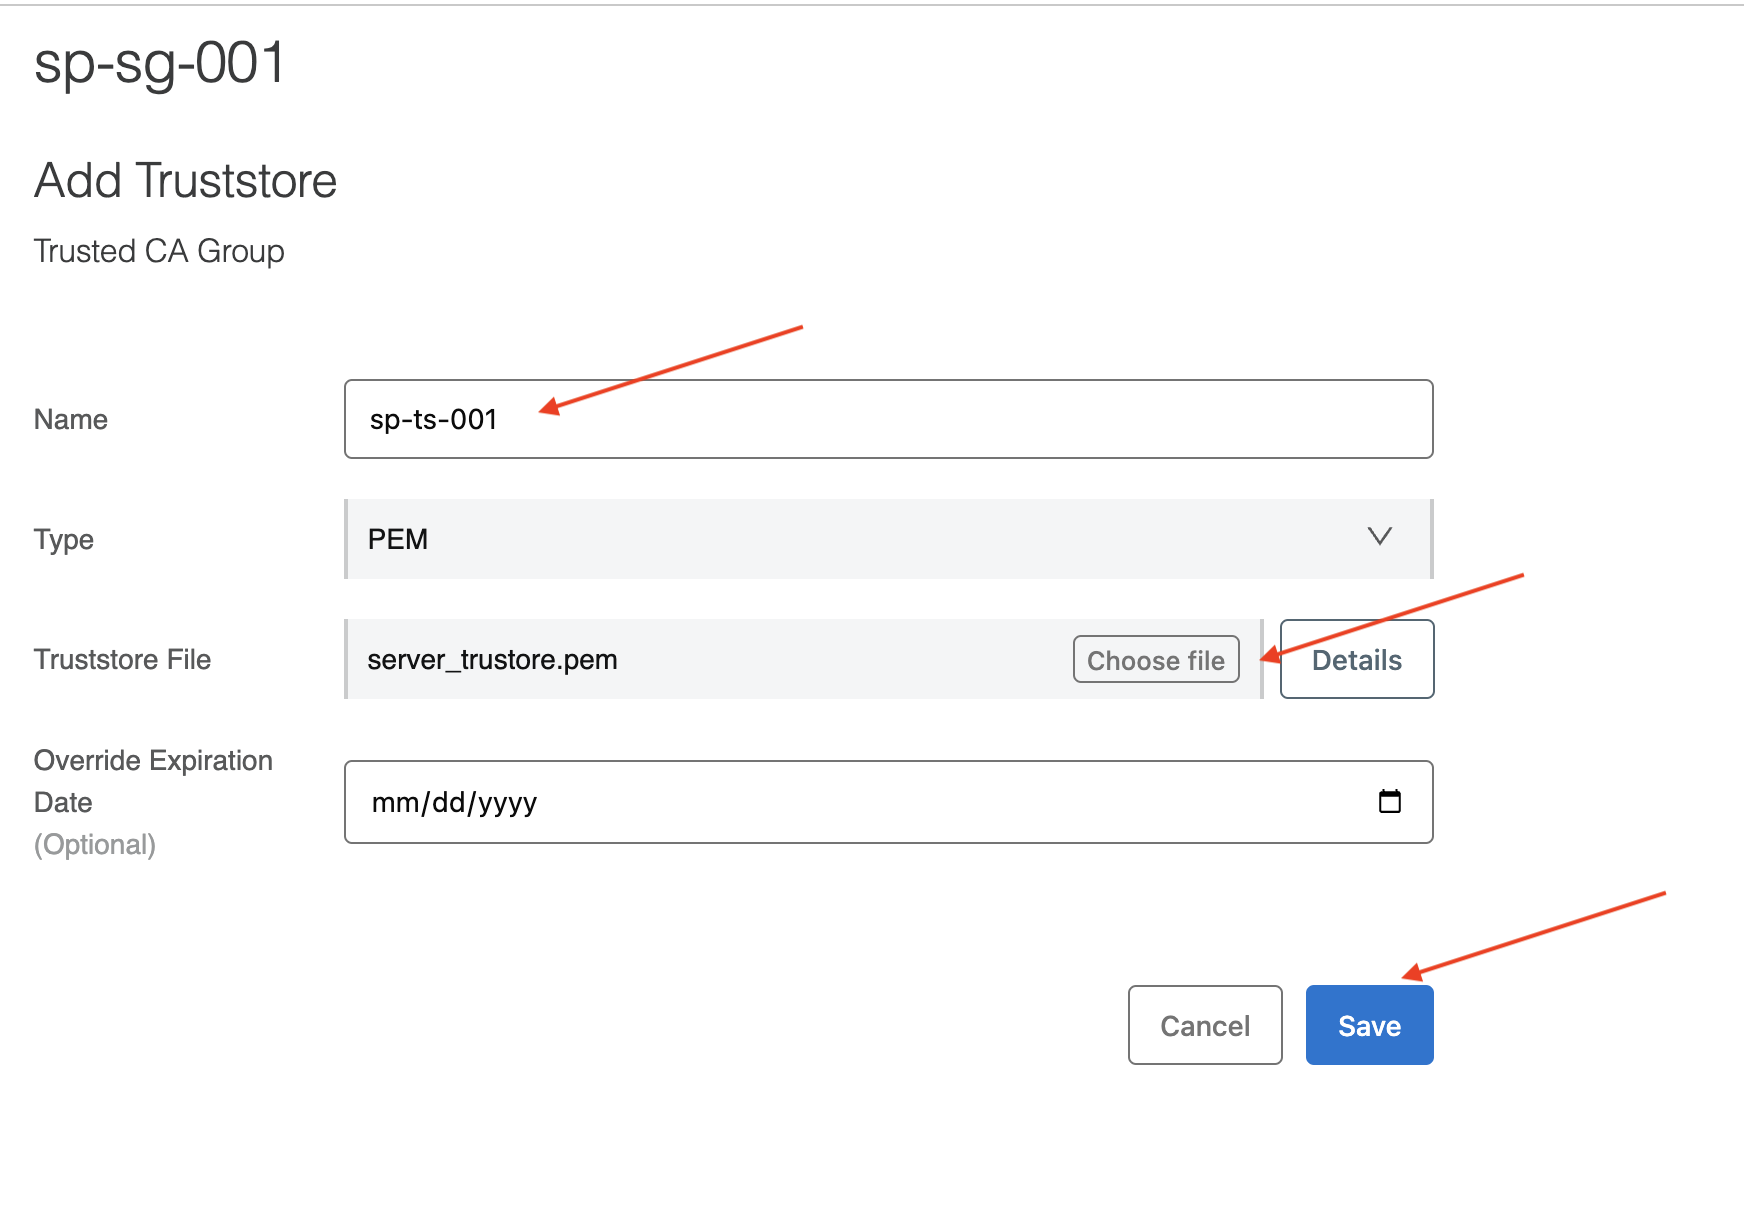
In the Add Truststore screen, add the required information.
-
Name
Enter a name for your truststore.
-
Note: Prefix the name of your trust store with your initials for easy identification, example <initials_ts_001>
-
Type
Select the PEM truststore type from the drop-down menu.
-
Truststore File
Click Choose File and select the truststore file (server_trustore.pem) to upload.
-
Leave other settings as default
+ Click Save.
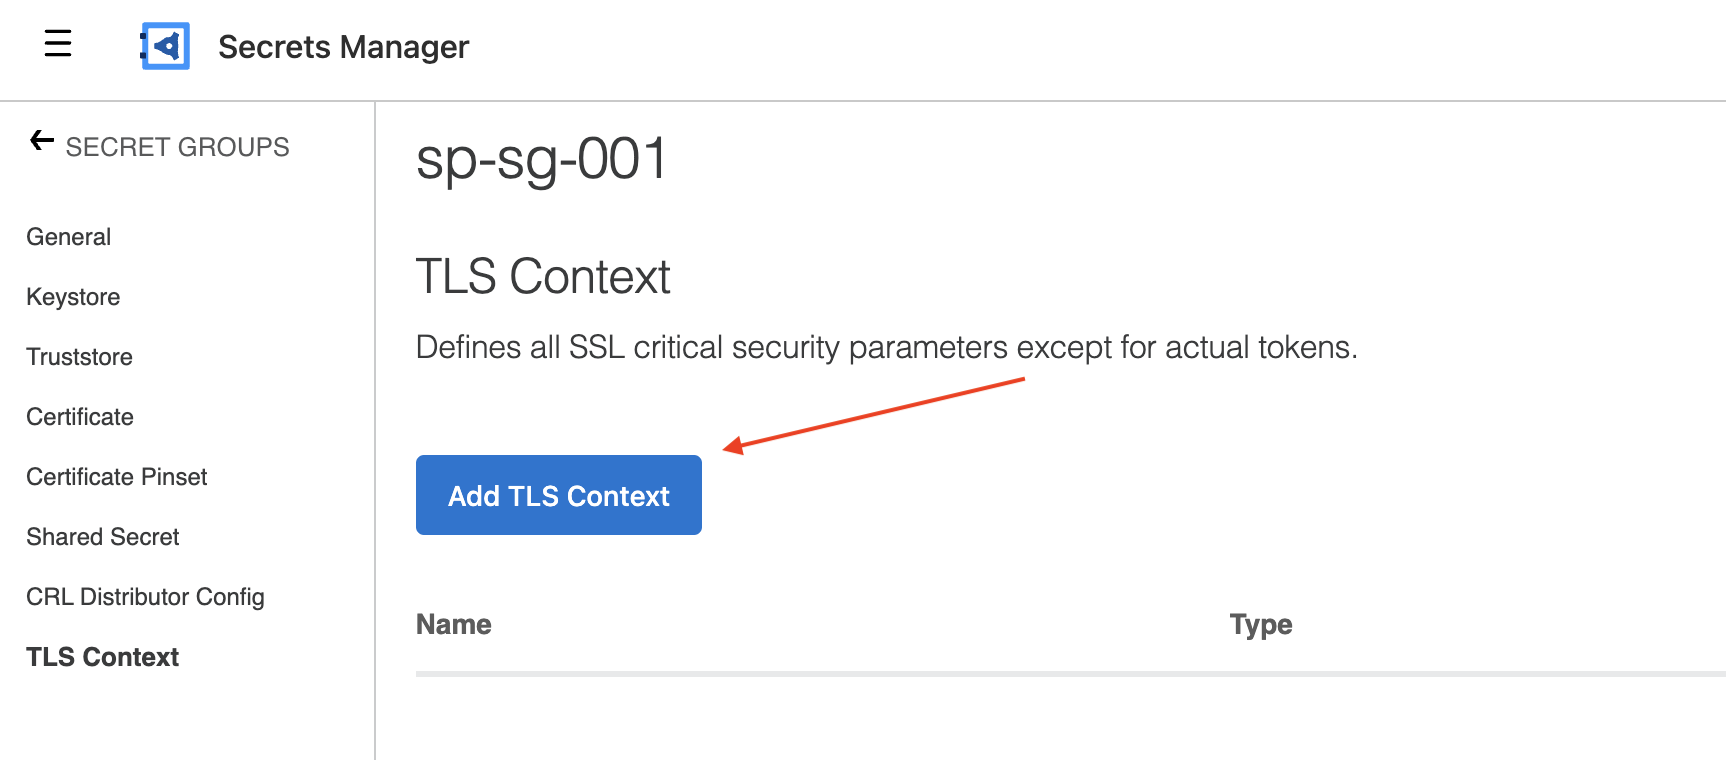
Now we can add a Transport Layer Security (TLS) context to encrypt inbound traffic to our Payments service.
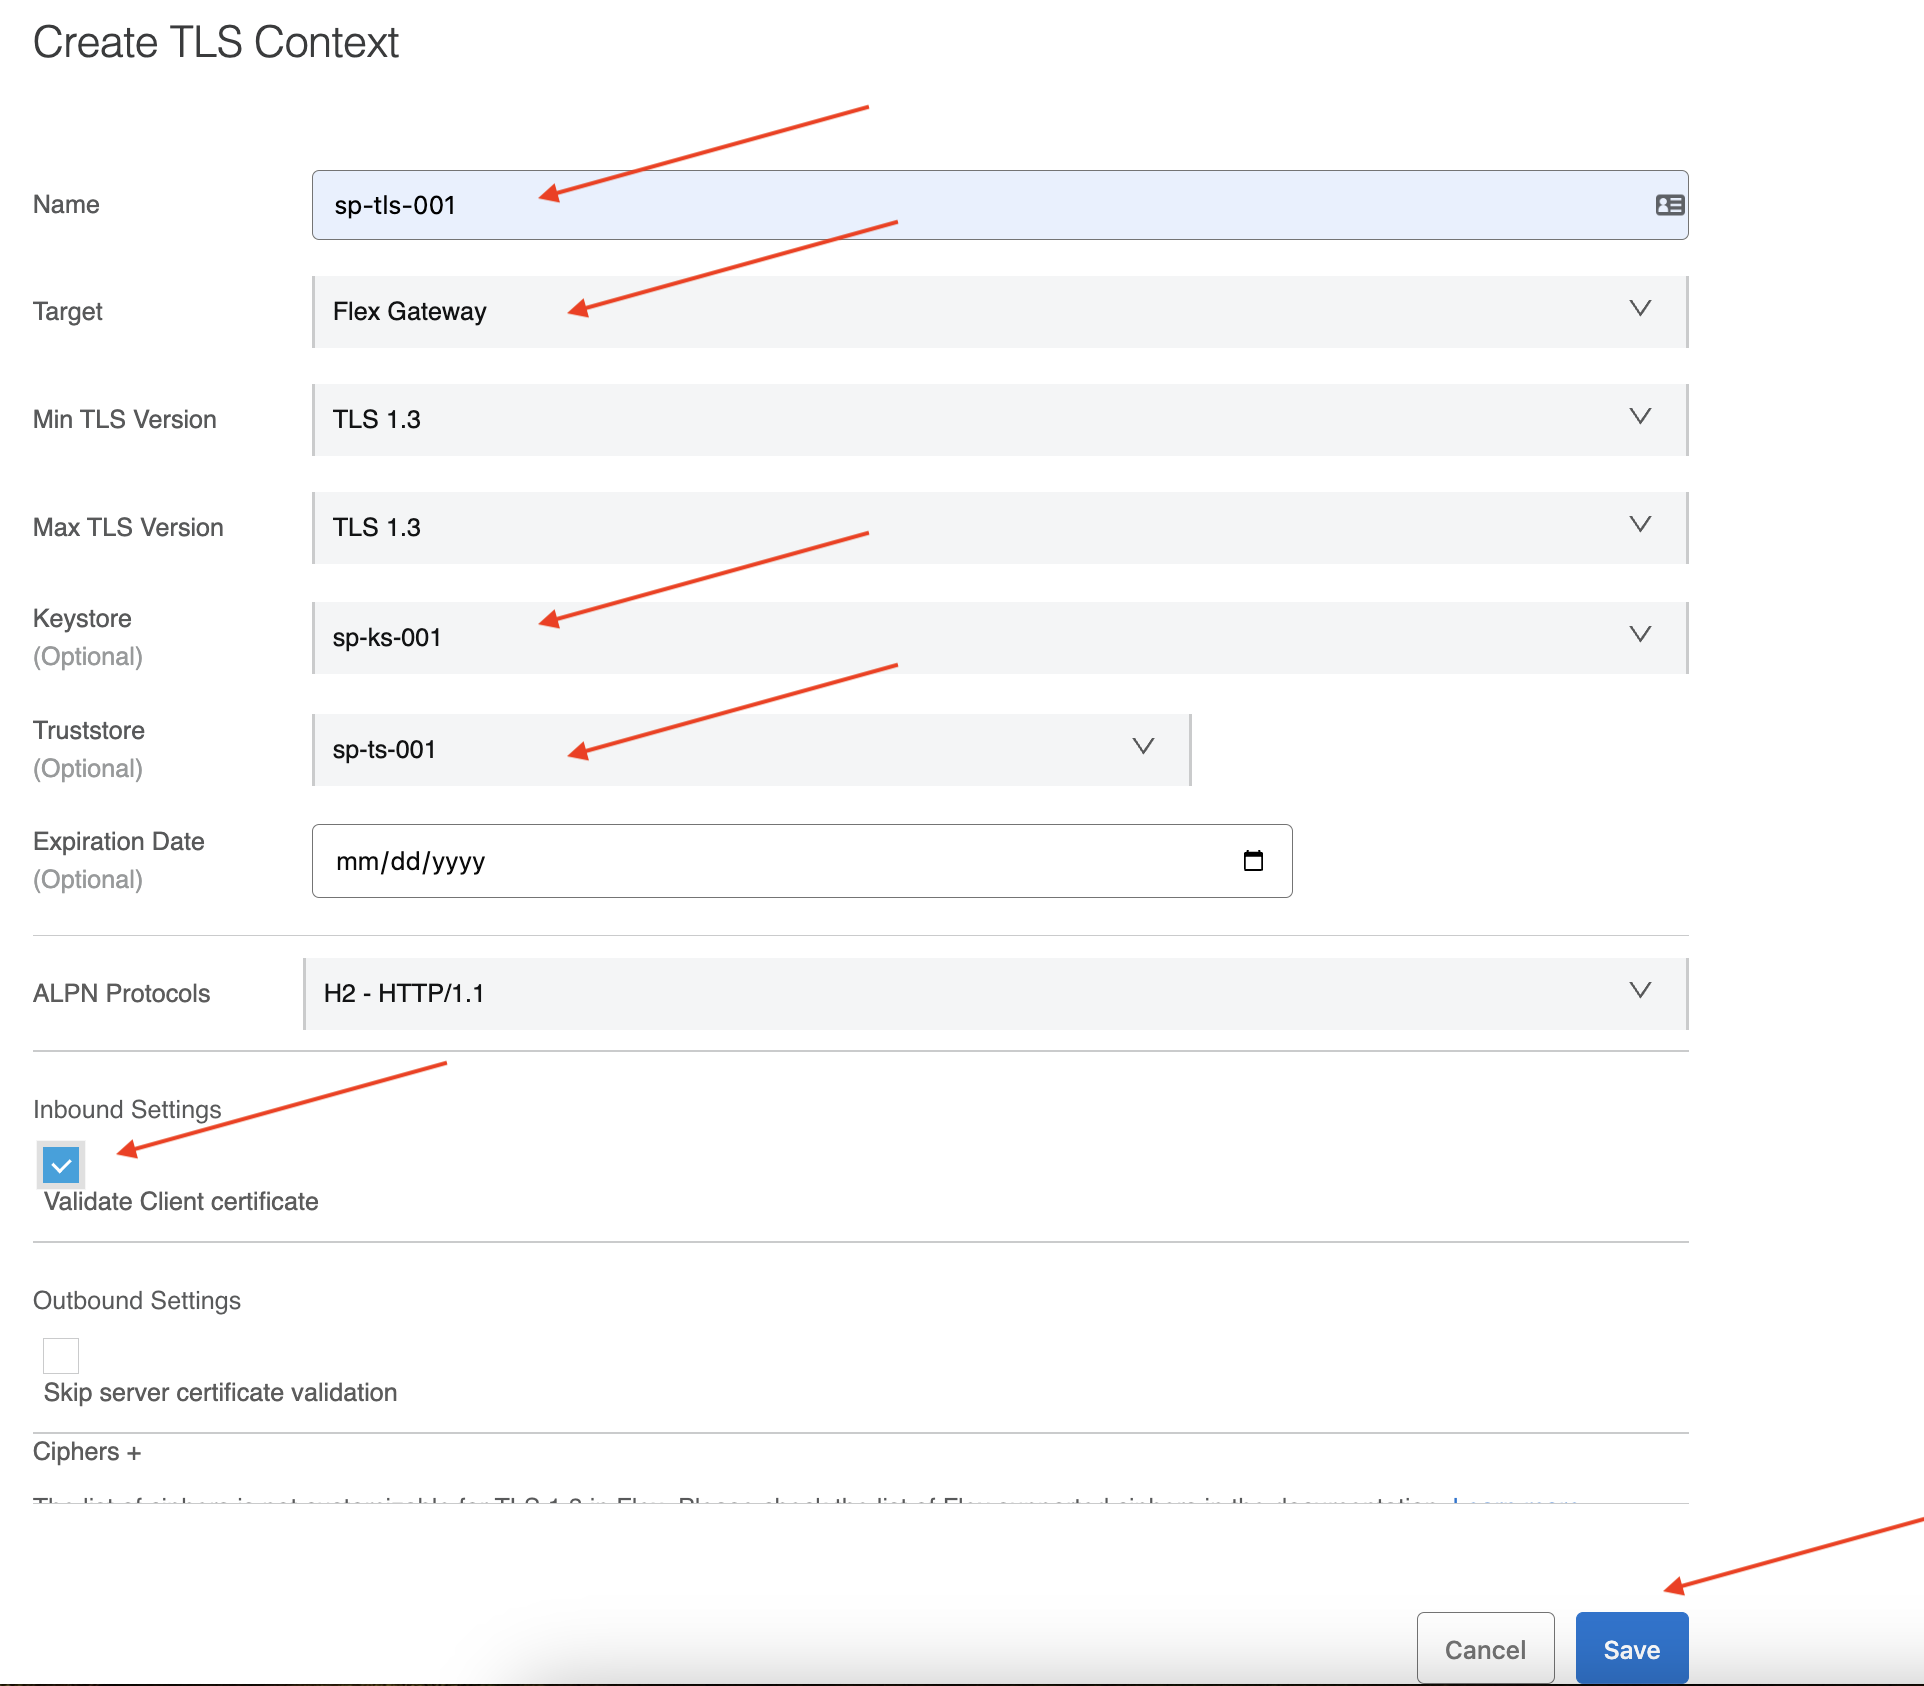
Add TLS Context
Adding a TLS context to your secret group involves supplying a name, target, security information, version, keystore and truststore.
-
Select TLS Context in the menu on the left, and click Add TLS Context.
-
In the Create TLS Context screen, add the required information:
-
Name
Enter a name for your TLS context.
-
Note: Prefix the name of your trust store with your initials for easy identification, example <initials_tls_001>
-
Target
Select Flex gateway to use the TLS context
-
TLS Version
By default, TLS 1.3 is selected. You can change it to TLS 1.2.
-
Keystore
From the drop-down list, select the keystore we created for this lab. This is required for mTLS
-
Truststore
From the drop-down list, select the trust store we created for this lab. This is required for mTLS
-
Inbound Settings
Check the Validate Client certificate option. This is required for mTLS
-
Leave other settings as default
Click Save.
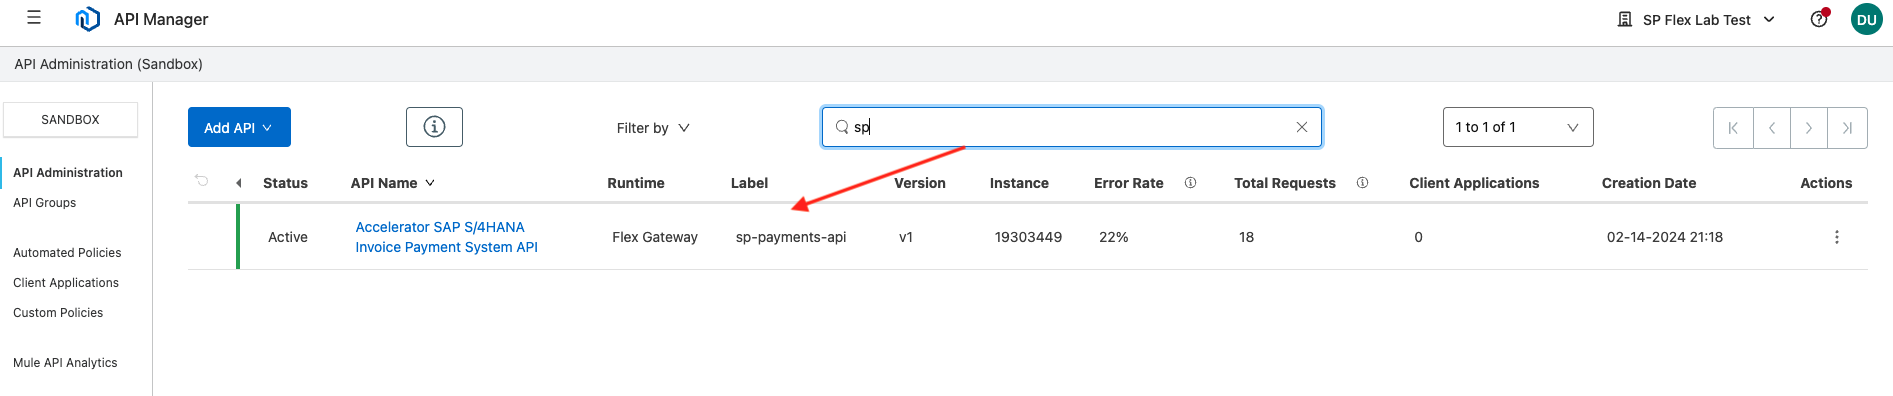
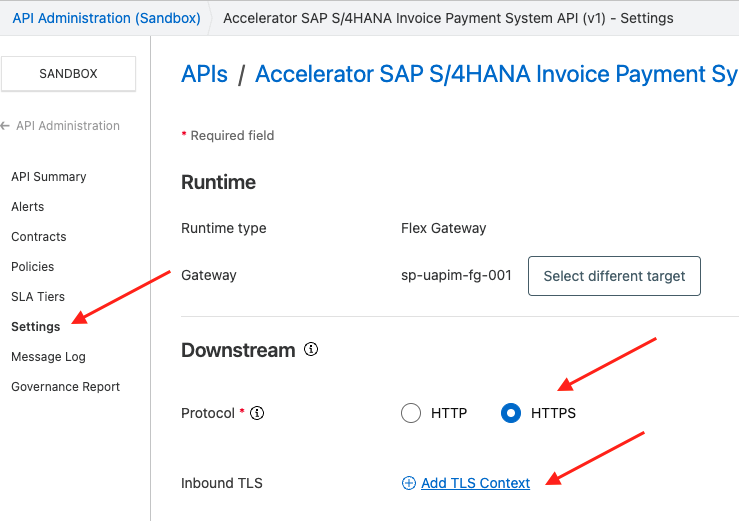
Modify API Manager Settings
In Anypoint Platform, go to API Manager, select the Payments API that we created previously. Make sure it is the one with the label starting with your initials.
-
Once you clicked on your own API. Then, in the left menu, click Settings.
-
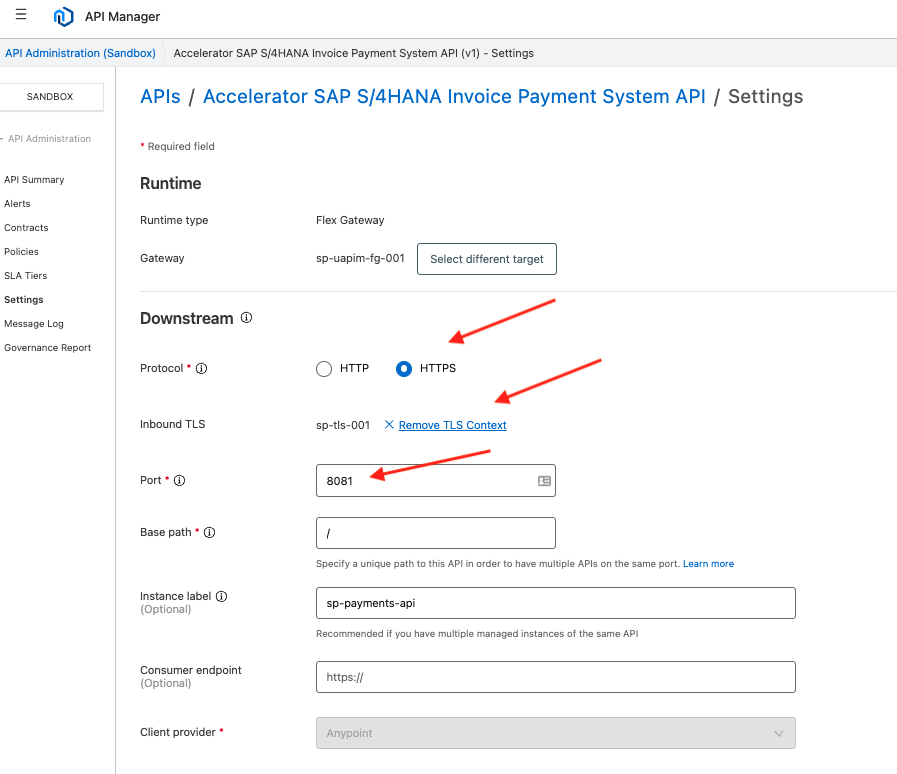
Within settings → Downstream section, select Protocol as HTTPS. Selecting this radio button might change the port.
-
Make sure Port is set to 8081.
-
Selecting protocol as HTTPS also enables the option to add TLS context.
-
Click on the Add TLS Context link
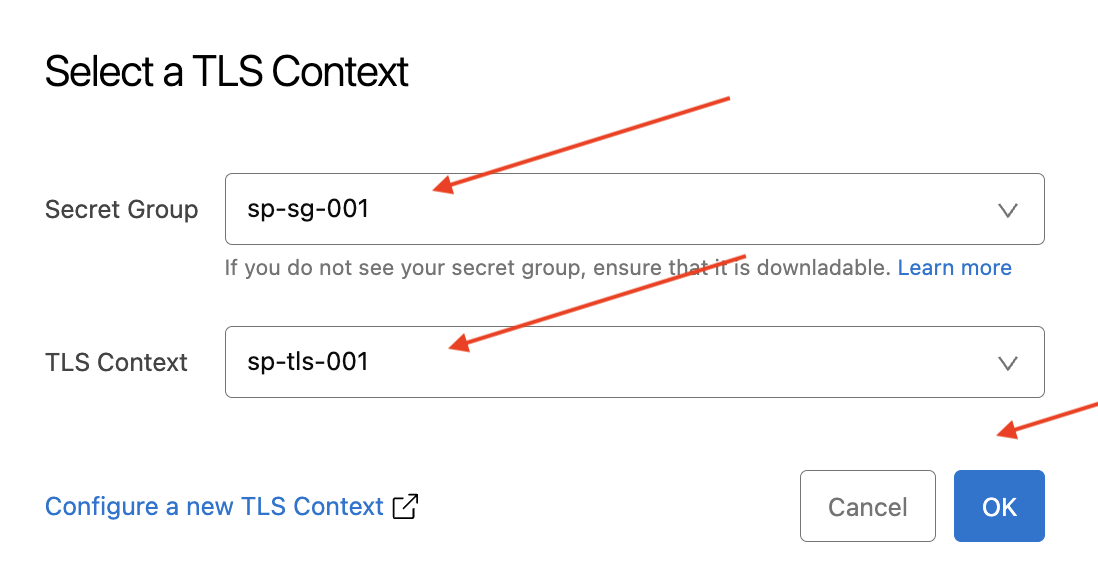
-
Select the Secret Group and TLS Context that we created in the previous steps.
-
Click OK
The Downstream section should look as below,
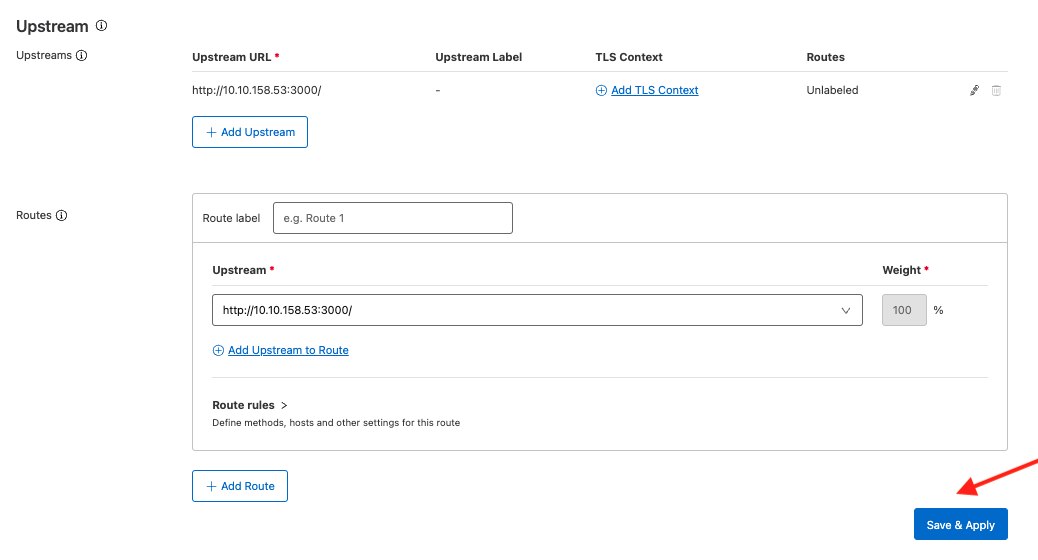
There are no changes to the Upstream section.
+ Click Save & Apply
After you click Save & Apply, you can also verify the changes being applied in the VM

Step 2: Testing mTLS
-
Now, let’s test our mTLS configuration using curl command
Open the terminal on your machine and paste the following curl command
Curl command to copy:
curl https://mule-uapim-workshop.com:8081/payments \--header 'Authorization: Basic bWF4Om11bGU=' \--cert <file_path>/client_public.pem \--key <file_path>/client_private_key.pem \--cacert <file_path>/server_public.pem \--resolveabout:blank[ mule-uapim-workshop.com:8081]:<external-ip> -vYou’ll need to add your file paths and your external IP address. Below you can see an example of a curl command with these values.
Example curl command (reference, do not copy and paste):
curl https://mule-uapim-workshop.com:8081/payments \--header ‘Authorization: Basic bNF33m22bGU=’ \--cert ~/Downloads/Files/certificates/client_public.pem \--key ~/Downloads/Files/certificates/client_private_key.pem \--cacert ~/Downloads/Files/certificates/server_public.pem \--resolve mule-uapim-workshop.com:8081:54.201.155.141 -v |
Note: For this lab we are using mule-uapim-workshop.com as the domain which will be resolved to the private ip address of your allocated VM.
-
IMPORTANT : For this lab we are using self-signed certificates registered for the domain mule-uapim-workshop.com . Outside of this lab, if you plan to use CA signed certificates then you do not need to mention --cacert <file_path>/server_public.pem \ in the above testing script.

-
Make sure that you get a successful 200 message response and are able to see the payload. Notice the TLS handshake communication between the flex gateway server and our terminal acting as the client who is requesting the Payments service get resource.
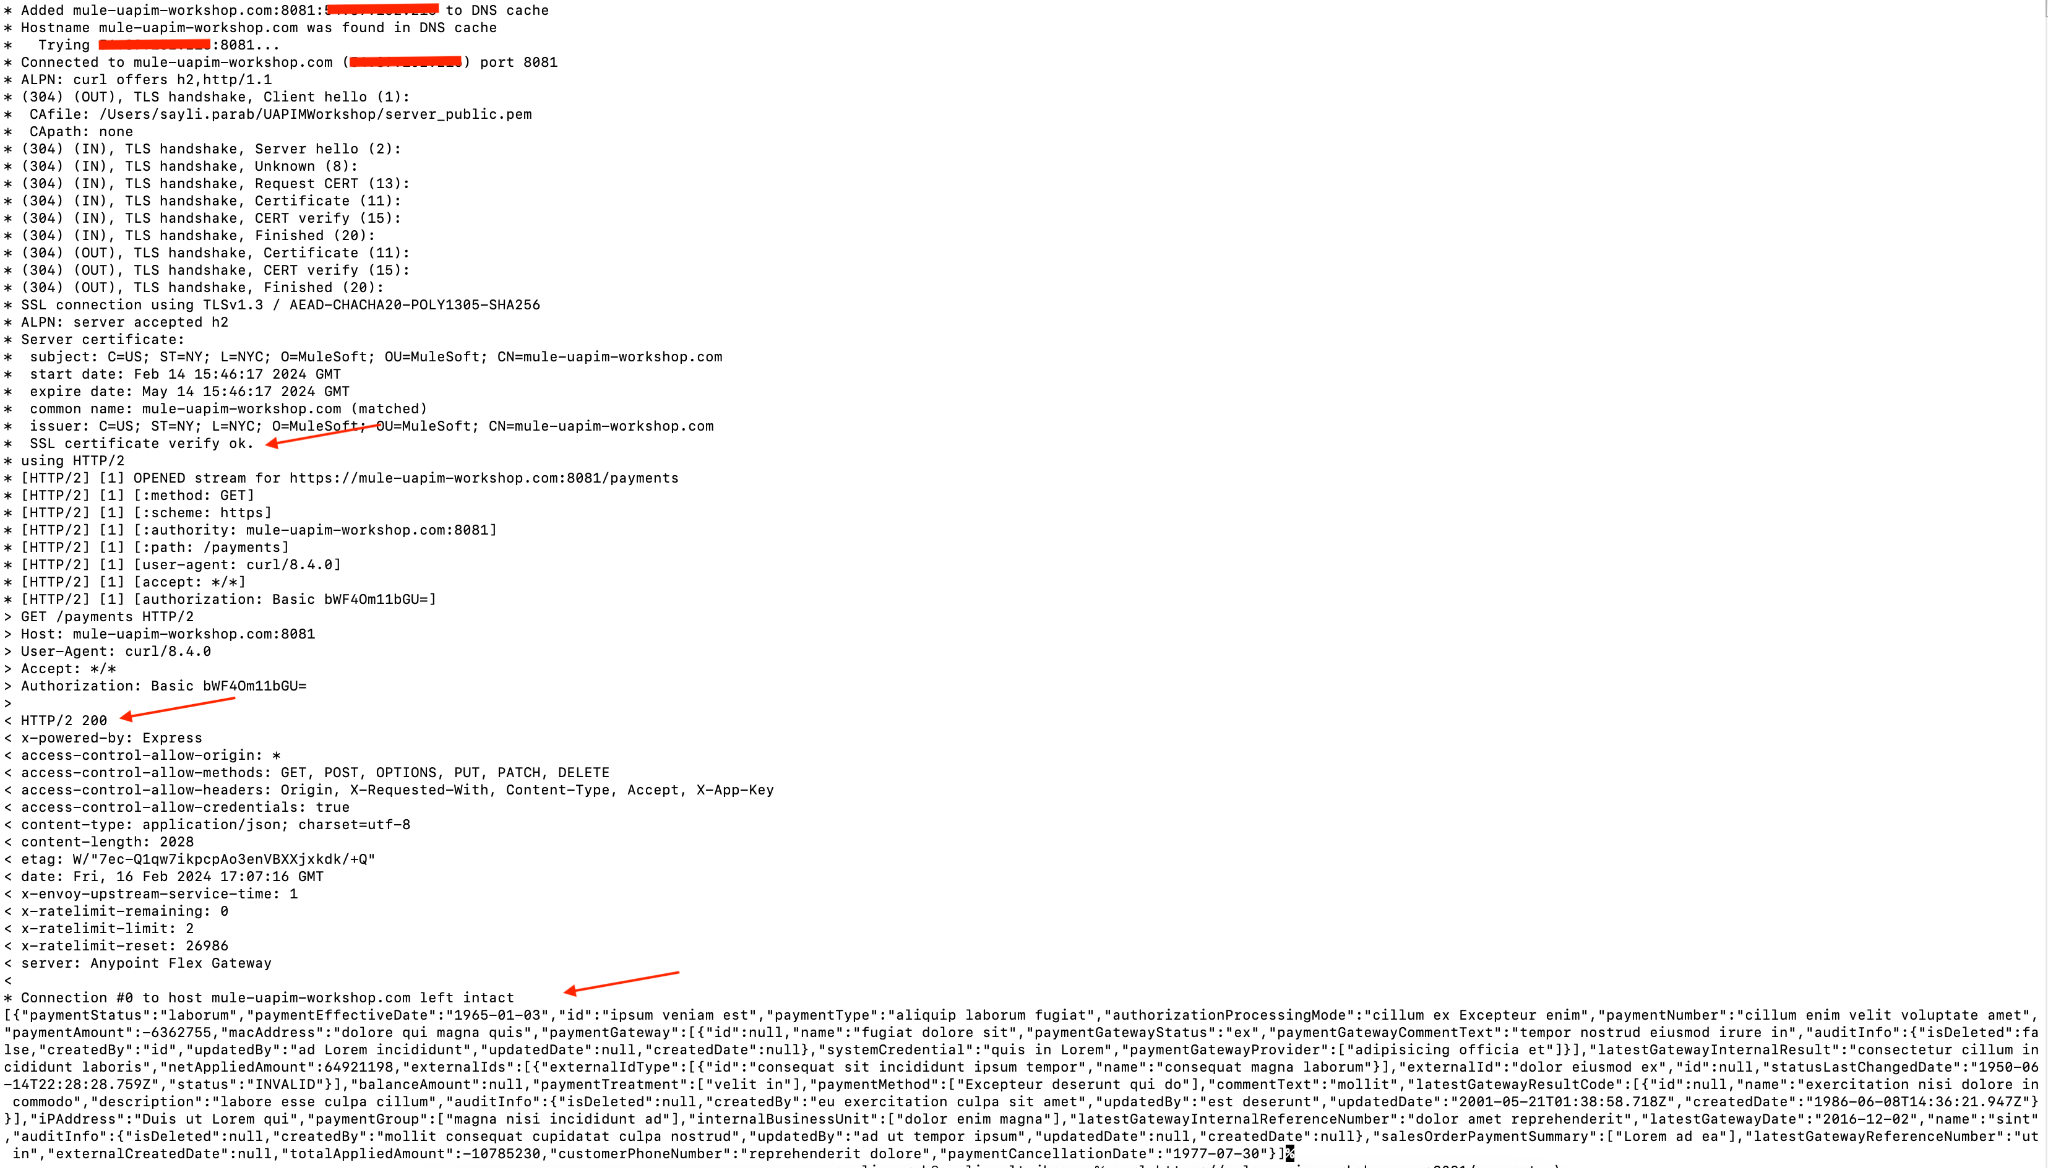
Congratulations! We have now successfully applied mTLS to our payments service.
Step 3: Troubleshooting
-
429 - Too Many Requests
We applied Rate limiting policy to this API in Lab 2 as part of securing Payments service. This is a valid error. You can also disable this policy by navigating to API manager → Select Policies → Click the options icon and toggle the Policy enabled button to disable it.
-
503 - Service Unavailable
Make sure the payments service is running on docker in the VM console. You can test by using the below command.
docker psIf the service is not running use the below command to activate the service.
docker run -d -p 3000:3000 -d mulethunder/payments:1.0-
TLSv1 protocol version
Restart the vm instance via link provided in the email
In this Lab, we have shown you how to configure mutual TLS for Flex Gateway to provide valid and secure access to the microservice, using our Anypoint Control Plane.