Lab 4: Securing APIs at runtime using Flex Gateway Policy Development Kit (Optional)

Step 1: Manage your API through Flex
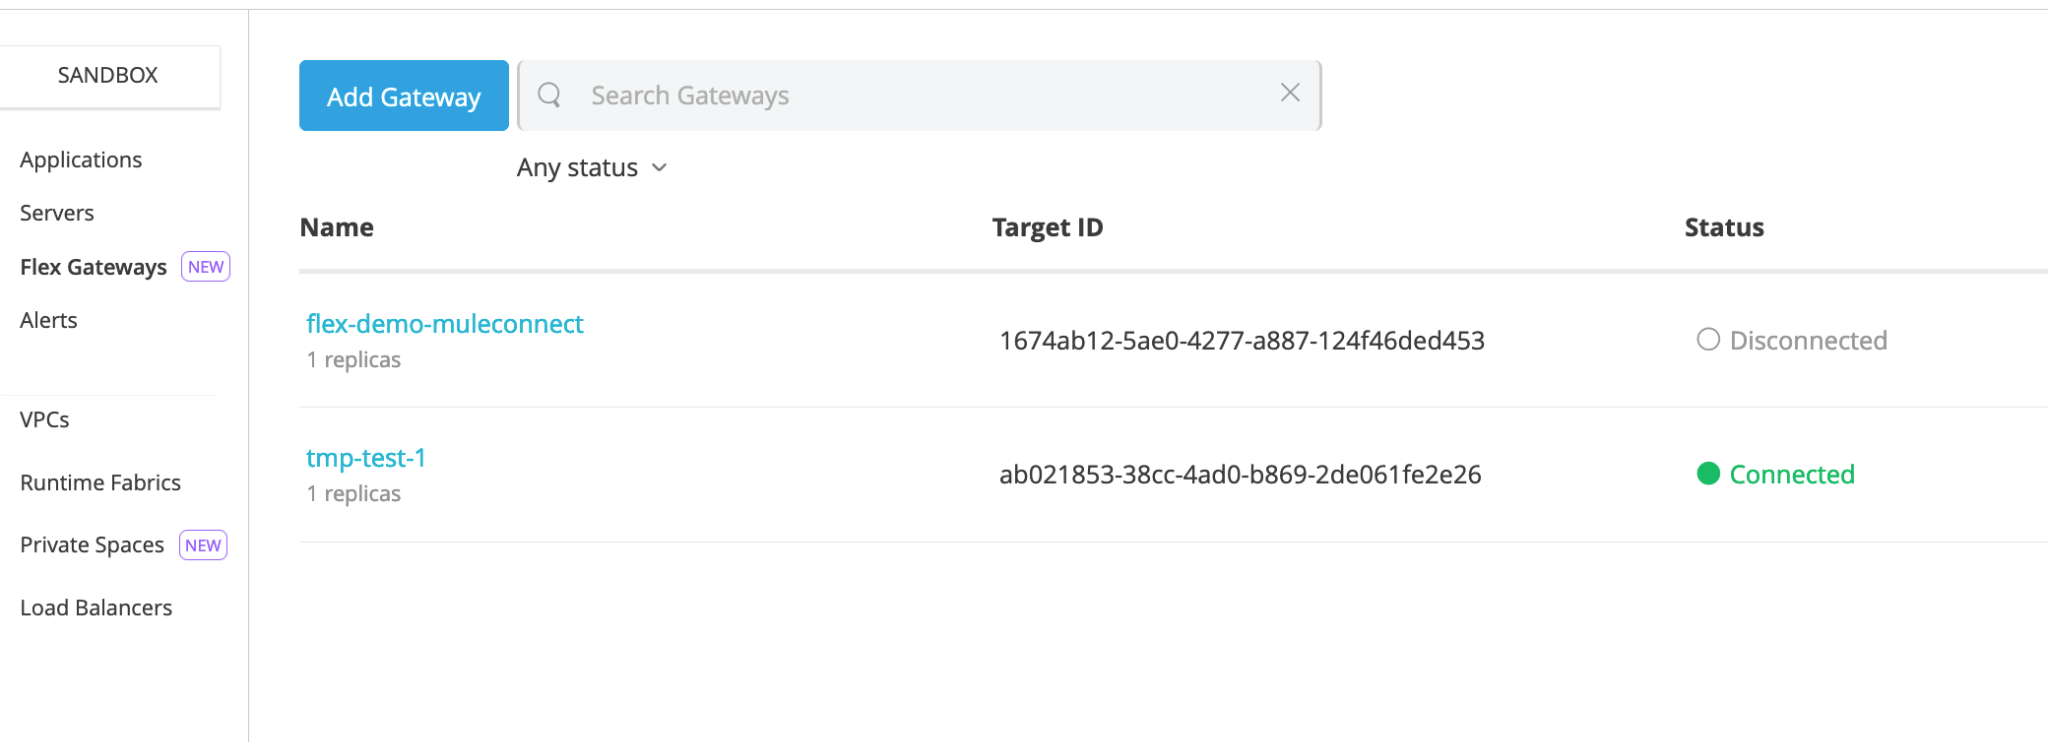
Step 1.2: Configuring a gateway for the UEFA Euro 2024 API
We have made available a simple API that returns the data for the players in the UEFA Euro 2024:
|
The matching API Specification is in Exchange: "UEFA Euro 2024 Players"
Step 2: Create your own custom policy with PDK
Objective: To validate the request payload with an HMAC hash that is provided as a header.
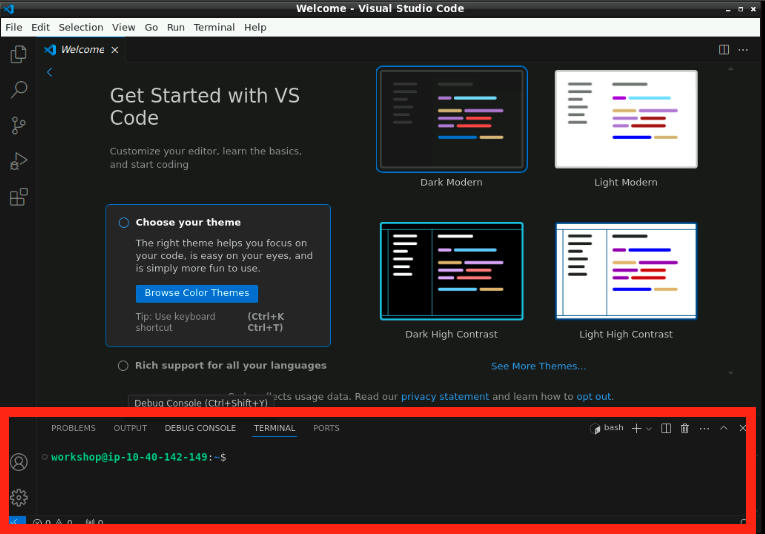
For this Step you need to be logged into the Step environment. Make sure you have Visual Studio Code open.
Step 2.1 Create a new project and policy
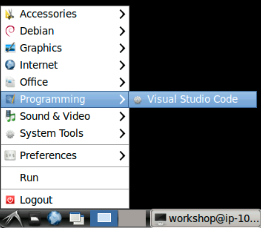
To create a new project open the Terminal in Visual Studio Code (Drag the lower limit of the editor upwards)
anypoint-cli-v4 pdk policy-project create --name <my-custom-policy-teamID>This command creates a folder with the name of the project.
Navigate to Visual Studio Code, File → Open Folder → <your project>
Initialize the Rust libraries
Run the following command in the project’s home directory:
make setup| If you get an error message, wait a couple of seconds and run it again. |
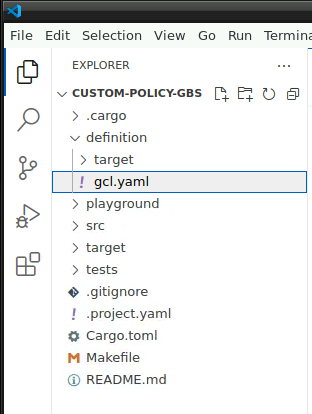
After running the make setup command, the policy’s root directory contains the following directories and files shown in the directory tree:
|
Create a new policy definition
Edit the file definition/gcl.yaml to add the configuration parameters for the Policy Configuration (for API Manager):
|
Generate the Rust source for the Policy Schema
The configuration parameters you define in the gcl.yaml appear as variables in the src/generated/config.rs file after you run the make build-asset-files command. You set any user input you need for implementing the Rust source code in the gcl.yaml file.
make build-asset-filesmake build-asset-files propagates the changes to src/generated/config.rs and generates the policy’s target files.
Step 2.2 Register a Local Flex Gateway
A Flex Gateway registration.yaml file must exist in the playground/config directory. Create this file by running the registration command in that directory .
-
The registration of a Flex Gateway for development purposes MUST be local
-
Please create a register-local.sh file through the Visual Studio Code Explorer in
playground/configwith the docker run command shown below. -
Remember to set your local flex name
-
The IDs are provided for this workshop:
# Please write the whole command in 1 line
docker run --entrypoint flexctl -u $UID:$GID -v "$(pwd)":/registration  mulesoft/flex-gateway registration create
   --client-id=3ad34f141c654462a46de0fc408c23f5
   --client-secret=0b3c47374bB84bA682c6F406D1a9005b
   --environment=dc1e5e09-cc64-4305-8667-08e9ba40d6f8
   --organization=29613010-e8b4-42ea-9fbc-0f1d3f4e123e
   --output-directory=/registration
   --connected=false
   pdk-policy-flex-<teamId>
Run the script with:
cd playground/config
sh ./register-local.sh
Step 2.3 Edit the Rust code
Edit Cargo.toml
Add these dependencies to the <project home>/Cargo.toml. Add them to the [dependencies] section:
|
Edit the policy source code
Create src/hmac.rs
This module provide the routine to validate MD-5 and SHA-256 HMAC hashes:
// Copyright 2023 Salesforce, Inc. All rights reserved.

use hmac::Hmac;
use pdk::logger;

use hmac::Mac;

use md5::Md5;
use sha2::Sha256;

type HmacMd5 = Hmac<Md5>;
type HmacSha256 = Hmac<Sha256>;


/***************************
 * Verify the message against a key provided
 */
pub fn verify(message: &Vec<u8>, secret_key: String, hash: String, alg: String) -> Result<(), String> {

    // Decode the provided hash from hex
    let decoded_hash = match hex::decode(hash.clone().into_bytes()) {
        Ok(bytes) => bytes,
        Err(_) => {
            // Log and return an error if the hash is invalid
            logger::info!("====== Policy Violation, invalid signature hash");
            return Err("HMAC validation failed, invalid signature hash".to_owned());
        },
    };

    logger::info!("======= Validating for {alg}");
    let original_body = String::from_utf8(message.clone()).expect("Our bytes should be valid utf8");
    logger::info!("======= Body: {original_body} ");

    // Create an HMAC context using the provided secret key
    match alg.as_str() {
        "SHA-256" => match HmacSha256::new_from_slice(&secret_key.as_bytes()) {
            Ok(mut mac) => {
                // Update the HMAC context with the message
                mac.update(message.as_slice());

                // Verify the HMAC against the decoded hash
                if mac.verify_slice(&decoded_hash).is_err() {
                    // Log and return an error if the validation fails
                    logger::debug!("==== Policy Violation, HMAC validation failed");
                    return Err("SHA-256 HMAC validation failed".to_owned());
                } else {
                    logger::info!("==== Verified!!");
                }
            },
            Err(_error) => {
                // Return an error if the secret key is invalid
                return Err("Invalid configured secret key".to_string())
            }
        },
        "MD-5" => match HmacMd5::new_from_slice(&secret_key.as_bytes()) {
            Ok(mut mac) => {
                // Update the HMAC context with the message
                mac.update(message.as_slice());

                // Verify the HMAC against the decoded hash
                if mac.verify_slice(&decoded_hash).is_err() {
                    // Log and return an error if the validation fails
                    logger::debug!("==== Policy Violation, HMAC validation failed");
                    return Err("MD-5 HMAC validation failed".to_owned());
                } else {
                    logger::info!("==== Verified!!");
                }
            },
            Err(_error) => {
                // Return an error if the secret key is invalid
                return Err("Invalid configured secret key".to_string())
            }
        },
        _e =>  {
                // Return an error if the algorithm is invalid
                return Err("======Unsupported algorithm {alg}".to_string())
            }
    };

    // Return success if the HMAC validation is successful
    Ok(())
}
Edit the src/lib.rs
-
To import the hmac.rs into the code: Add these lines below the “use pdk::… “ headers:
use serde_json::json;
mod hmac;-
Replace the request_filter function
Replace the request_filter function with the code below. This code gathers the configuration properties from the Policy and invokes the validation function for HMAC hashes. In case of errors it prevents the request thread from progressing.
async fn request_filter(request_state: RequestState, _config: &Config) -> Flow<()> {
    logger::info!("============ START");
    let headers_state = request_state.into_headers_state().await;
    let headers_handler = headers_state.handler();

    let hmac_algorithm: String = _config.hmac_algorithm.clone();
    let secret_key: String = _config.secret_key.clone();
    let signature_header_name: String = _config.signature_header_name.clone();
    let signature_header_value: String = headers_handler.header(&signature_header_name).unwrap_or_default();
    let content_length = headers_handler.header(&"Content-Length");

    let body_state = headers_state.into_body_state().await;
    let body_handler = body_state.handler();


    // Log the header value
    logger::info!("======= Header name: {signature_header_name} with header value {signature_header_value}");


    //Get the body
    let body = body_handler.body();

    // Validate the hash if the request has no body
    match content_length {
        Some(cl) => {
            logger::info!("==== Content-Length: {cl}");
            match cl.parse::<u64>() {
                Ok(len) => {

                    // Nothing to verify
                    if len == 0 {
                        logger::info!("==== Empty request body accepted");
                        return Flow::Continue(());
                    }
                    logger::info!("==== Verifying request body");
                    // Verify the HMAC signature hash with the empty body.
                    // If the verification fails, reject the request and log the error.
                    match hmac::verify(&body, secret_key, signature_header_value, hmac_algorithm) {
                        Ok(_v) => {
                            let original_body =  String::from_utf8(body).expect("Our bytes should be valid utf8");
                            logger::info!("==== Request body accepted: {original_body}");
                            return Flow::Continue(()) ;
                        },
                        Err(e) => {
                            logger::info!("==== Error during verification: {e}");
                            let response_body = json!({
                                "error": e
                            }).to_string();
                            return Flow::Break(Response::new(400).with_body(response_body))
                        }
                    }
                },
                Err(_e) => {
                    logger::info!("==== Content-Length: not parseable: {cl}");
                    let response_body = json!({
                        "error": "========= Unable to parse content-length {cl} "
                    }).to_string();
                    return Flow::Break(Response::new(400).with_body(response_body))

                }
            }
        },
        None => {
            logger::info!("==== Request body accepted by content-length error");
            return Flow::Continue(()) ;
        }
    }
}
Build the Custom Policy Flex Gateway
cd <project home>
make build
Step 2.4 Configure the Local Flex Playground
In order for you to test your policy as you develop you need to configure the playground parameters.
Edit the api.yaml file located within playground/config to allow the tests to connect to the echo service:
# Copyright 2023 Salesforce, Inc. All rights reserved.
---
apiVersion: gateway.mulesoft.com/v1alpha1
kind: ApiInstance
metadata:
  name: ingress-http
spec:
  address: http://0.0.0.0:8081
  services:
    upstream:
      address: http://<Your-INGRESS-EXTERNAL-IP-Address>:9001
      routes:
        - config:
            destinationPath: /
  policies:
    - policyRef:
        name: test-hmac-policy-v1-0-impl # This value will be overriden during 'make run' execution
        namespace: default
      # Fill the config with a policy configuration that matches the schema specified in the policy
      # definition gcl.yaml. Eg:
      # config:
      #   someProperty: desiredValue
      config:
        {
          signatureHeaderName: Signature,
          hmacAlgorithm: MD-5,
          secretKey: my secret and secure key
        }
Allow the Local Flex in Docker to connect to UEFA 2024 Players
The Flex service we created in Step 1 runs on Kubernetes on the same server where we will run our test of the HMAC validation policy.
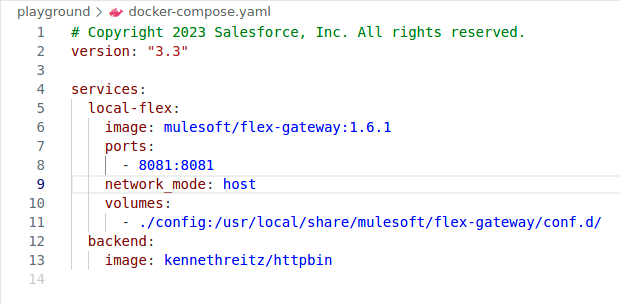
To allow the Local Flex in Docker to connect to Kubernetes on localhost add the following to the playground/docker-compose.yaml:
|
Run the Custom Policy Flex Gateway
From the project’s root directory build and run your project with:
make runVerify Flex is running
Check that the Flex Gateway from the registration is now up and running in the output of the console. You should see the policy being applied:
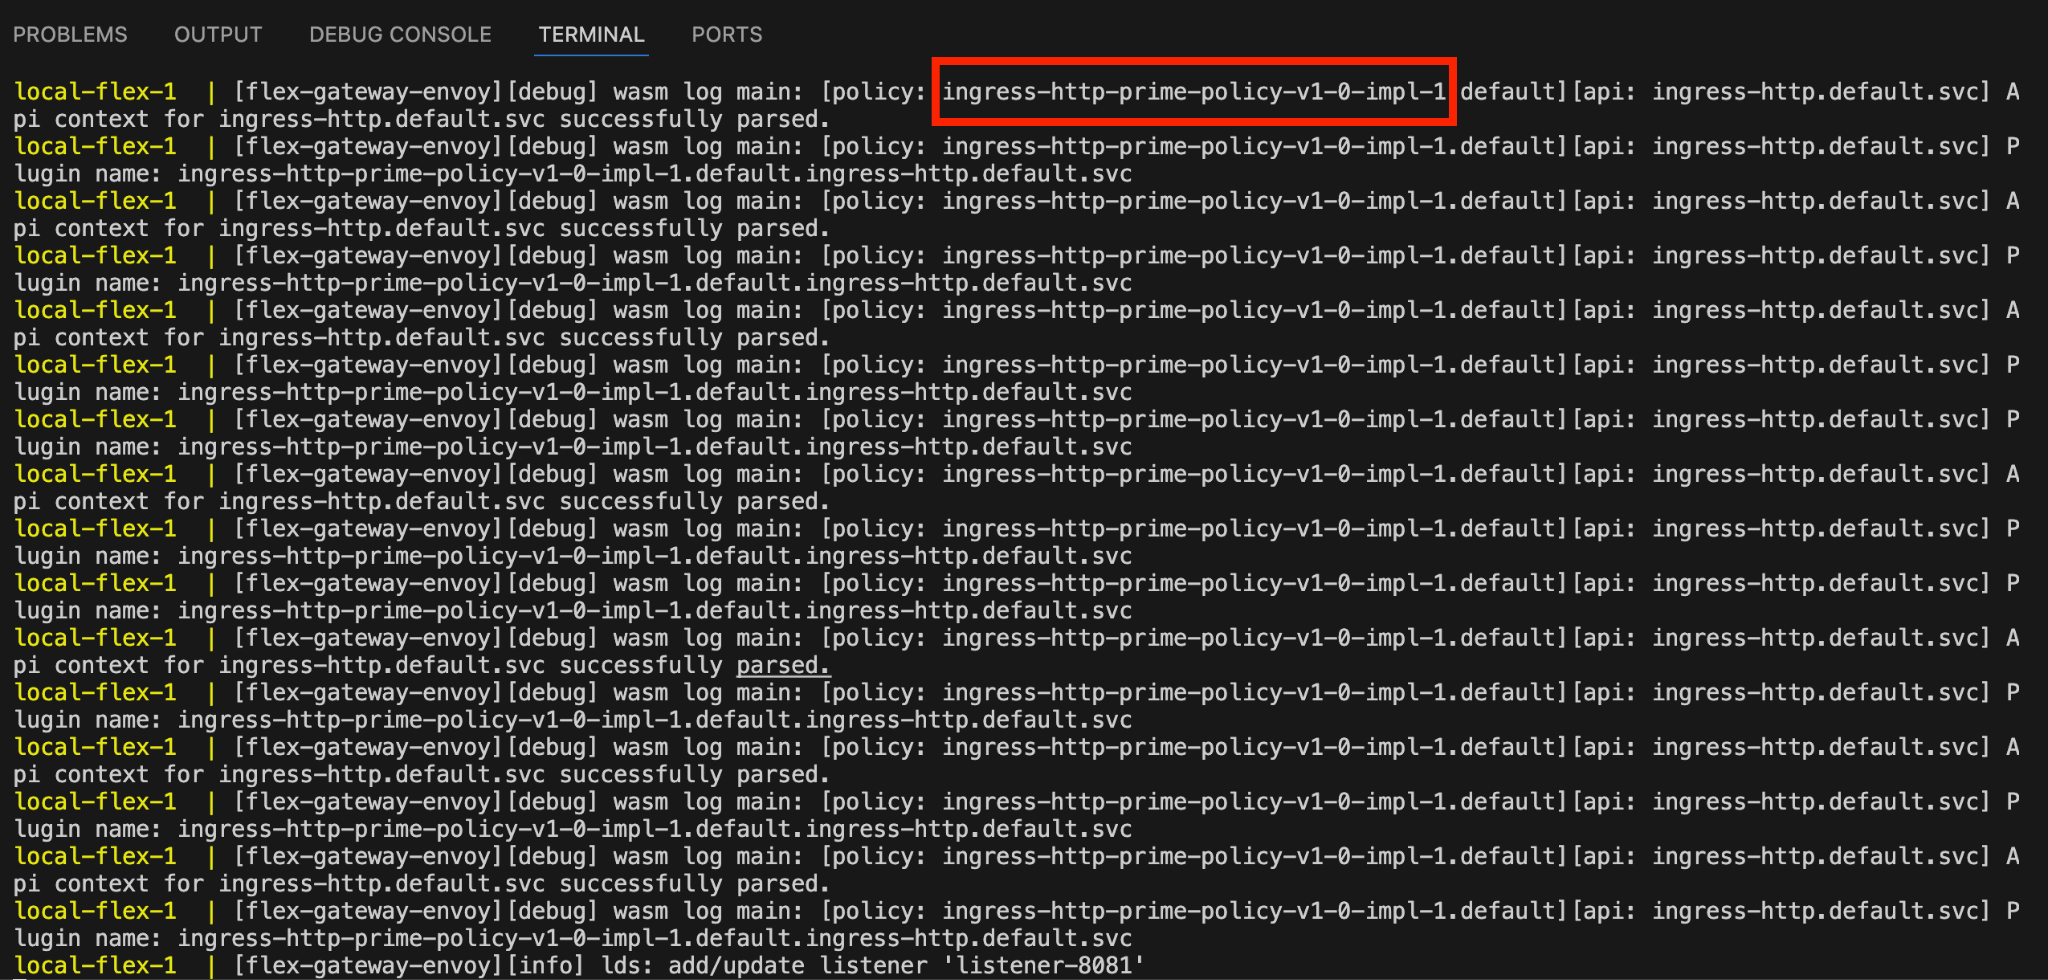
Now you can open a new Terminal (in Visual Studio Code), and try it out.
| You can use https://emn178.github.io/online-tools/md5.html to generate an HMAC MD-5 with key “my secret and secure key” to verify the results |
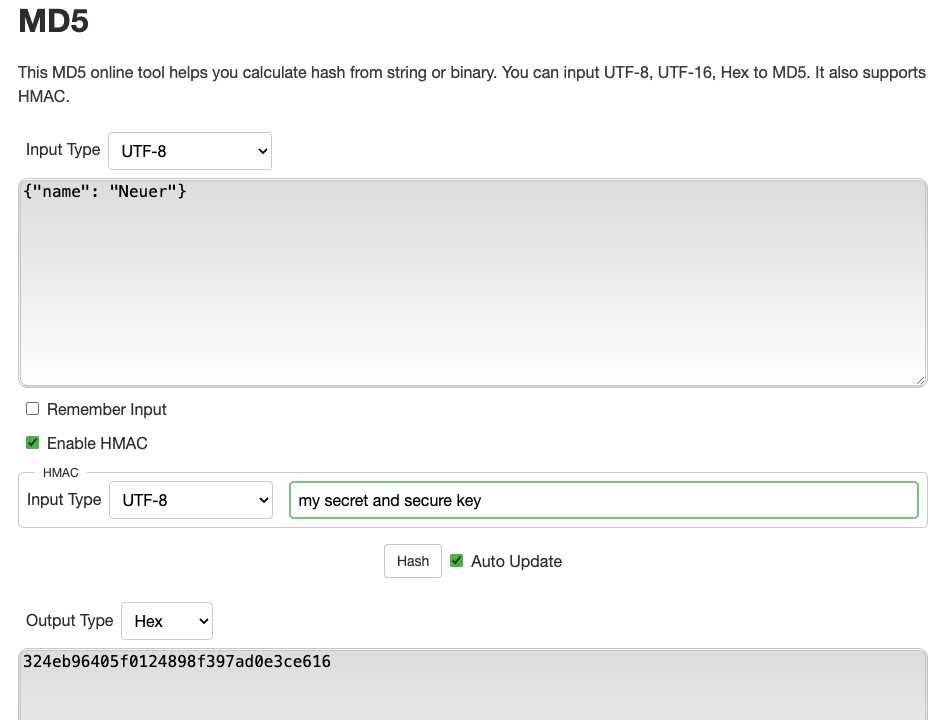
$ curl -d '{"name": "Neuer"}' \
 -H 'Content-Type: application/json' \
 -H 'Signature: 324eb96405f0124898f397ad0e3ce616' \
 -H 'hmacAlgorithm: MD-5' --user ad --user admin:admin http://localhost:8081/players

{"name":"Manuel Neuer","position":"Goalkeeper","age":"38","club":"Bayern Munich","hight":"193","foot":"right","caps":"119","goals":"0","marketValue":"4000000","country":"Germany"}
$ curl -d '{"name": "Neuer"}' \
-H 'Content-Type: application/json' \
-H 'Signature: 6666' \
-H 'hmacAlgorithm: MD-5' --user ad --user admin:admin http://localhost:8081/players
{"error":"HMAC validation failed, invalid signature hash"}Before moving on: Please press Control-C in the terminal, where make run was executing. This avoids port conflicts.
Step 3: Configure and test your custom policy
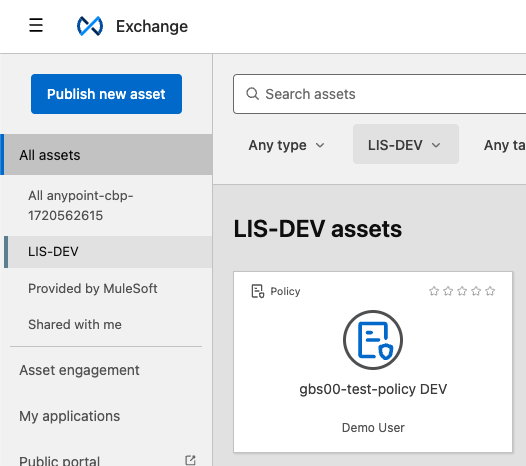
Publish your custom policy to Exchange
make publishIn Exchange you should be able to see:
Using the policy
Return back to the Flex Gateway created in Step 1.1 and Step 1.2. Now we would like to apply the custom policy to it.
Make sure the Flex Gateway ingress from Step 1.1 works by entering the below command:
curl -X POST http://<Your-INGRESS-EXTERNAL-IP-Address>:9001/players -H "Content-Type: application/json" -d '{"name":"Neuer"}' --user ad --user admin:adminNow go to API Manager and click on your “<Team ID> UEFA Euro 2024 Players” API we configured in Step 1
Click on “Policies”

Select your policy, based on the Team ID:

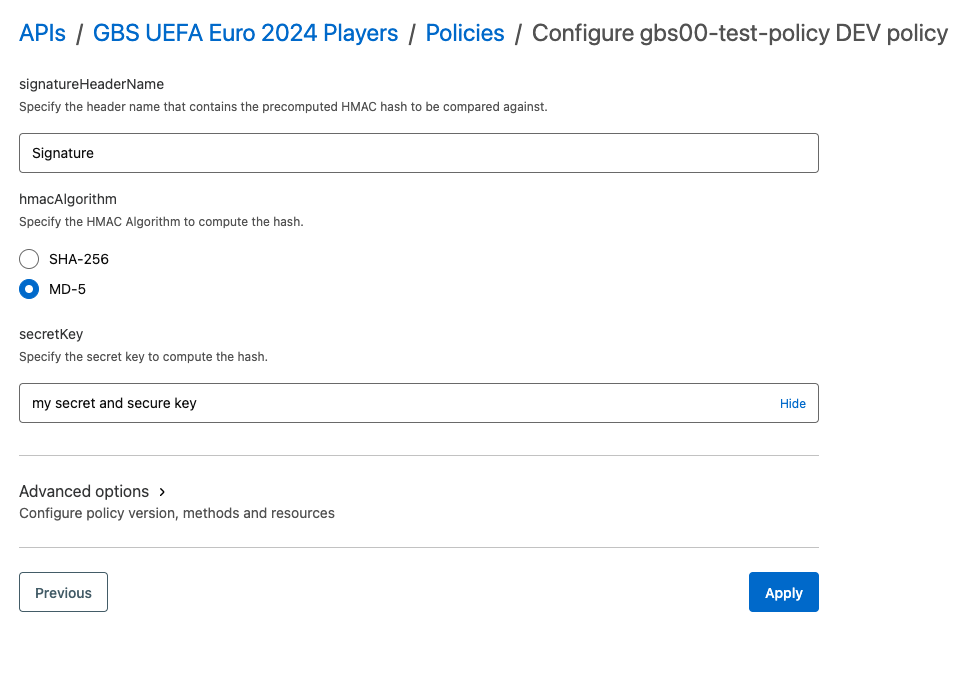
Configure the policy and click Apply:
-
Set the Secret Key to “my secret and secure key”
-
Select the hashing algorithm: MD-5
Now test the Flex Gateway and the policy:
curl -d '{"name": "Neuer"}' \
 -H 'Content-Type: application/json' \
 -H 'Signature: 324eb96405f0124898f397ad0e3ce616' \
 -H 'hmacAlgorithm: MD-5' --user ad --user admin:admin  http://<Your-INGRESS-EXTERNAL-IP-Address>:9001/players

{"name":"Manuel Neuer","position":"Goalkeeper","age":"38","club":"Bayern Munich","hight":"193","foot":"right","caps":"119","goals":"0","marketValue":"4000000","country":"Germany"}
$ curl -d '{"name": "Neuer"}' \
-H 'Content-Type: application/json' \
-H 'Signature: 6666' \
-H 'hmacAlgorithm: MD-5' --user ad --user admin:admin http://<Your-INGRESS-EXTERNAL-IP-Address>:9001/players
{"error":"MD-5 HMAC validation failed"}With a successful response, you have successfully completed this lab. You learned how to create a custom policy, publish it to Exchange, and use flex gateway in local mode.